Challenge shirt

It all started with an Instagram post from mainlymenswear of a vintage McCall’s pattern he found. This pattern had an interesting twist to the yokes, and it therefore intrigued me. So I made a remark that I should try to find it. To which Duane said; “you could probably draft this yourself!”

And with that, the challenge was created. I just could not go and buy it without at least trying to make the pattern first. With only the photos of the front and back of the pattern sleeve, I set out to recreate this as well as I could.

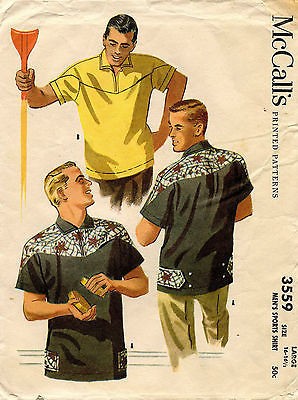
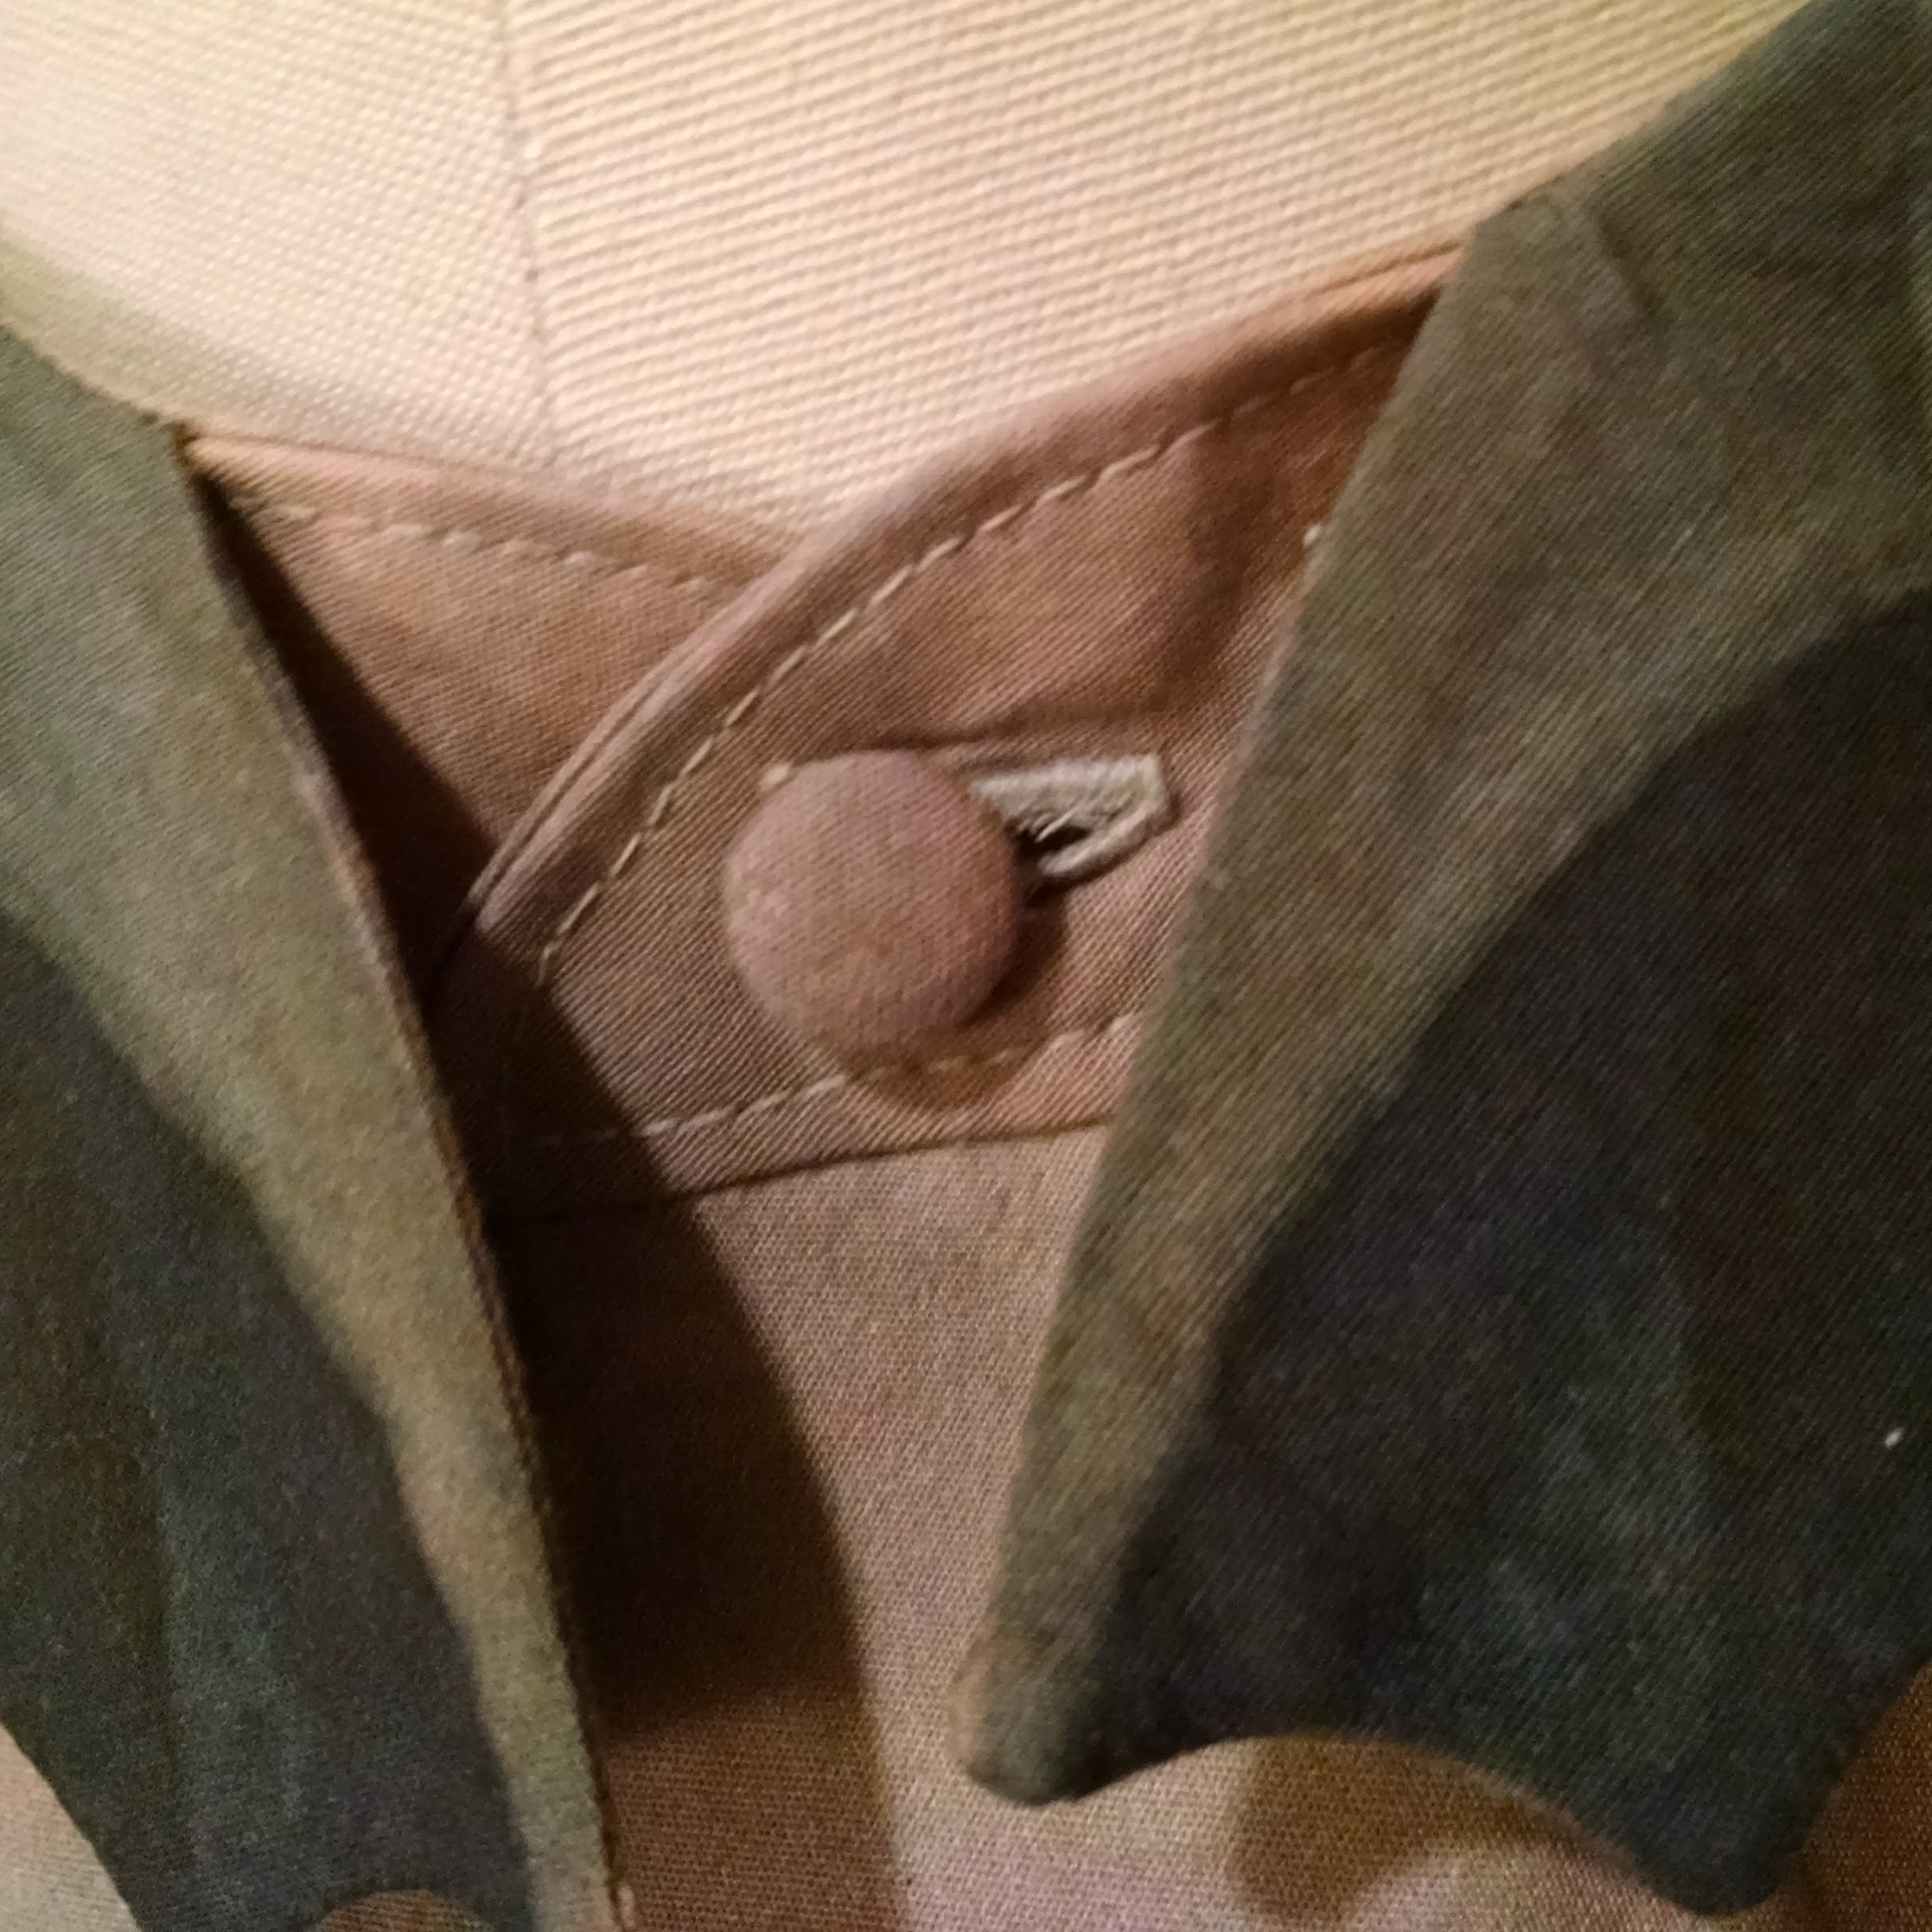
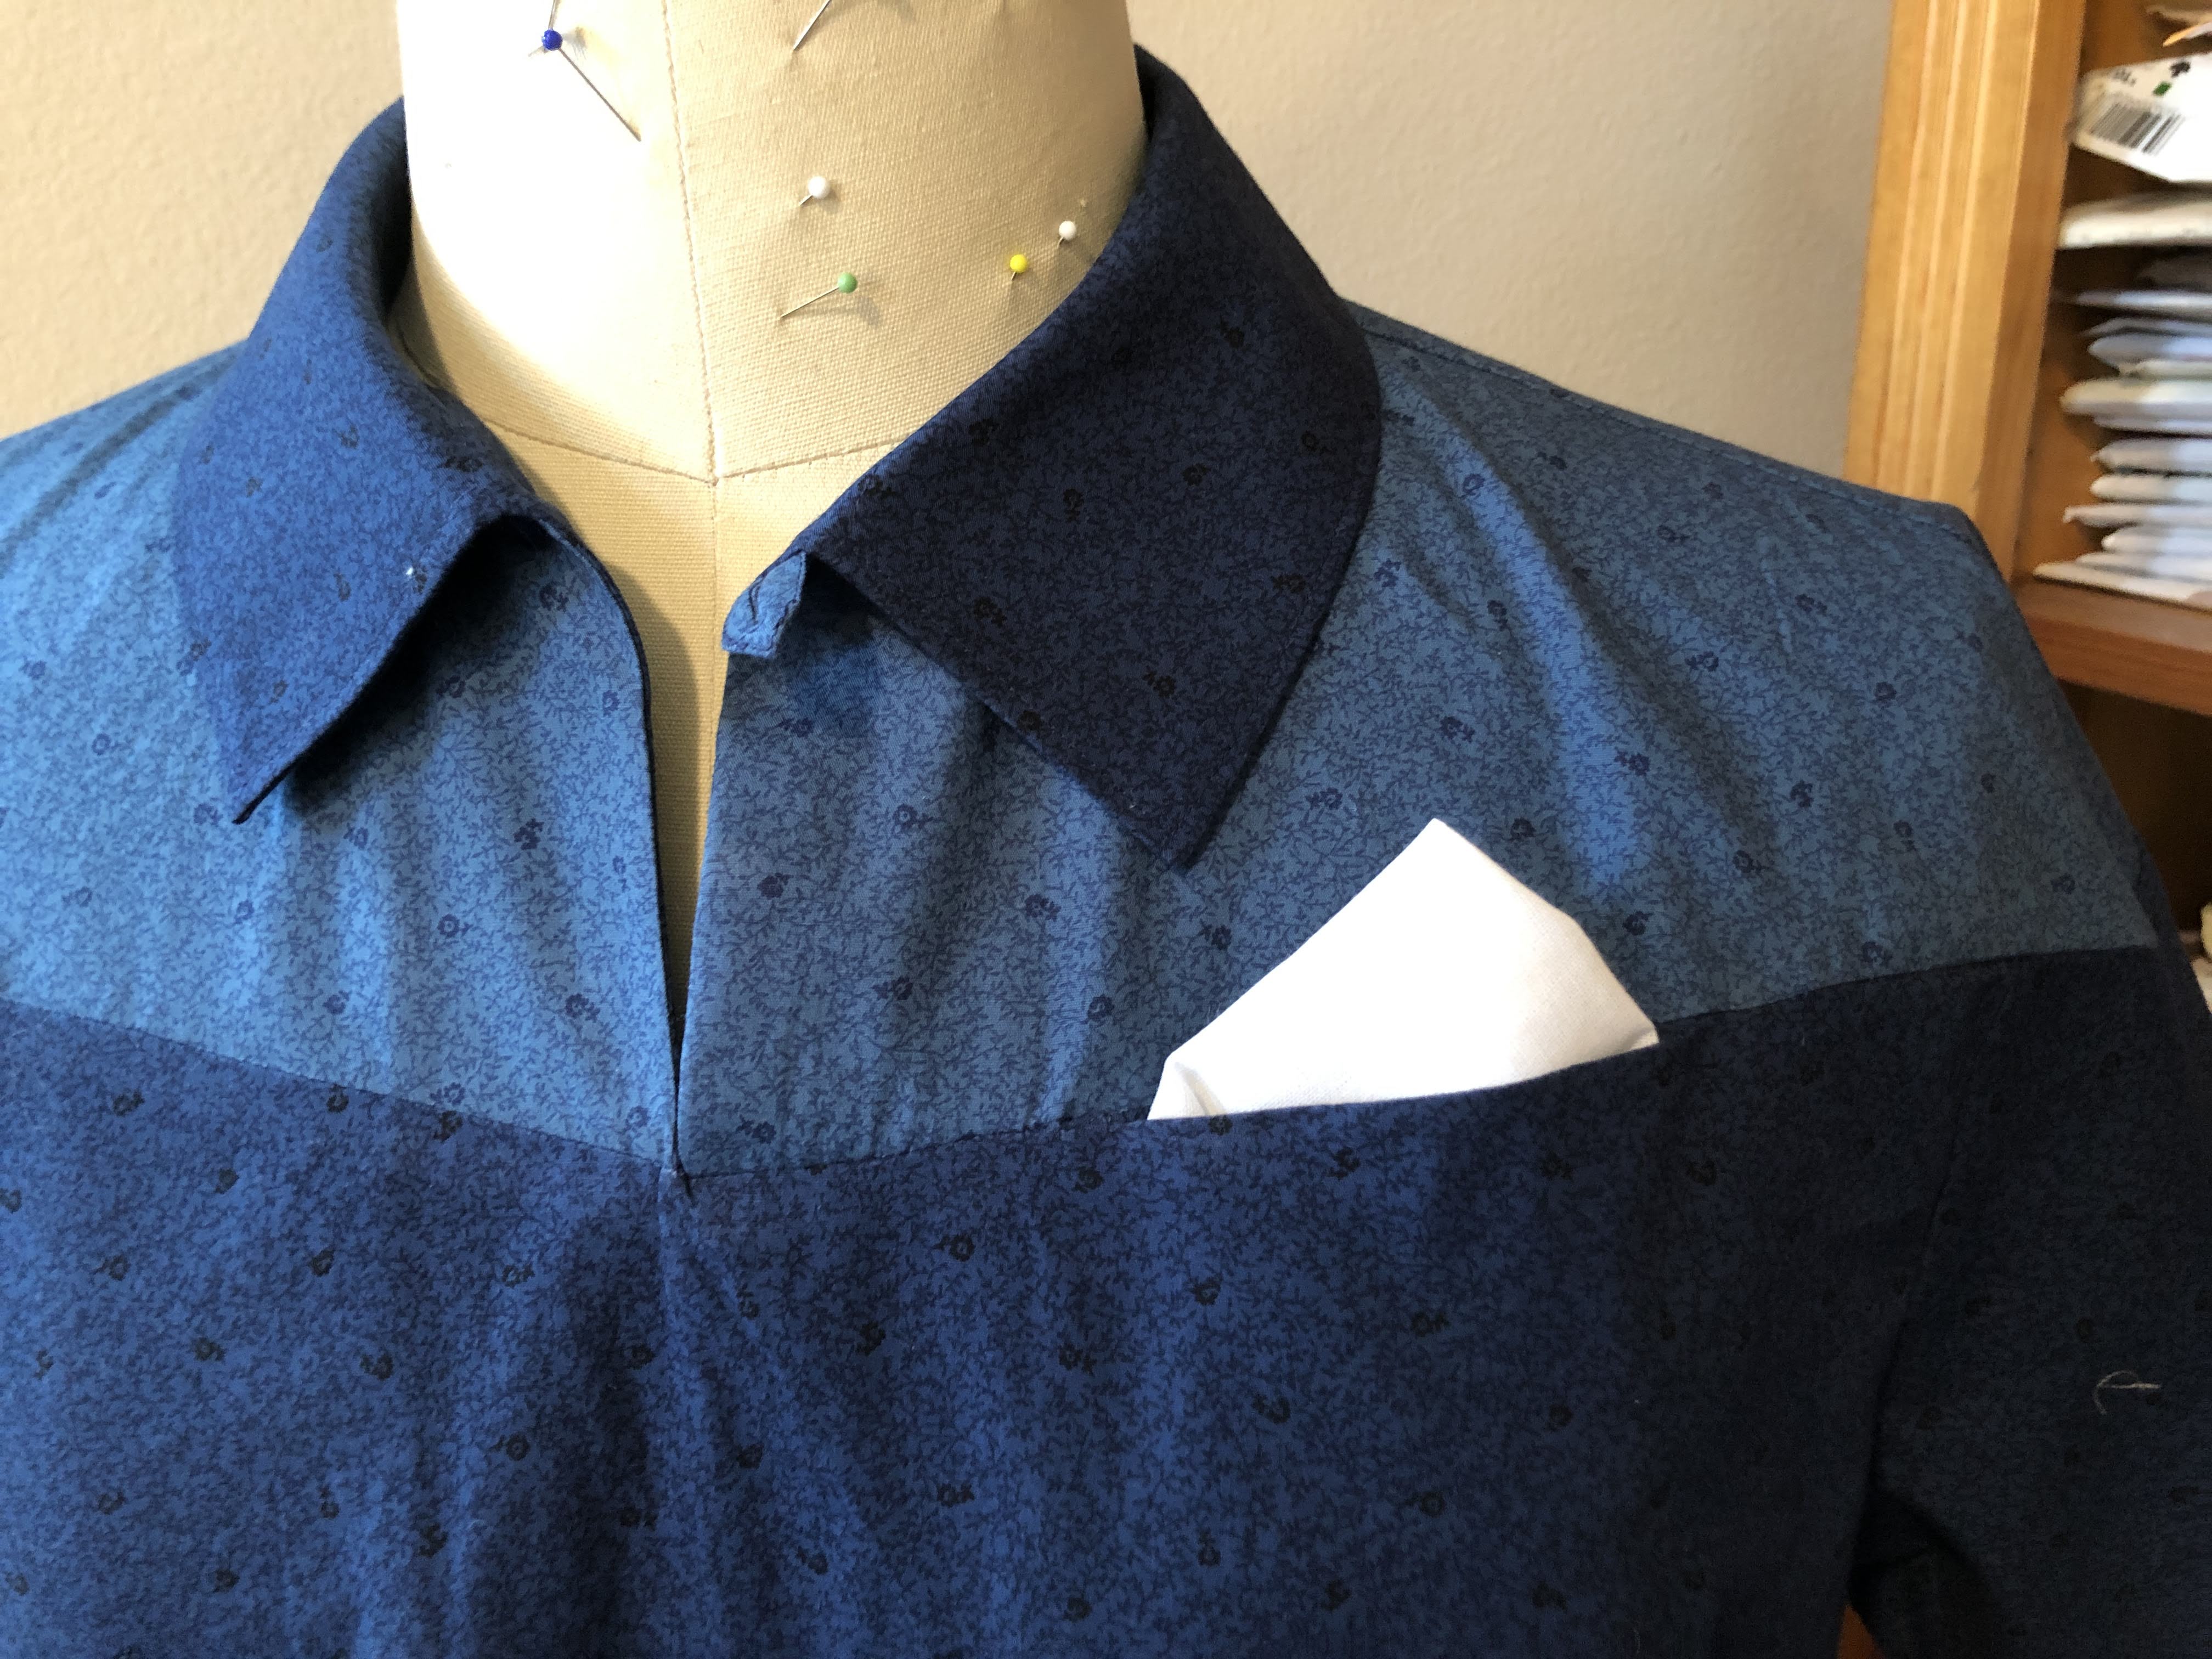
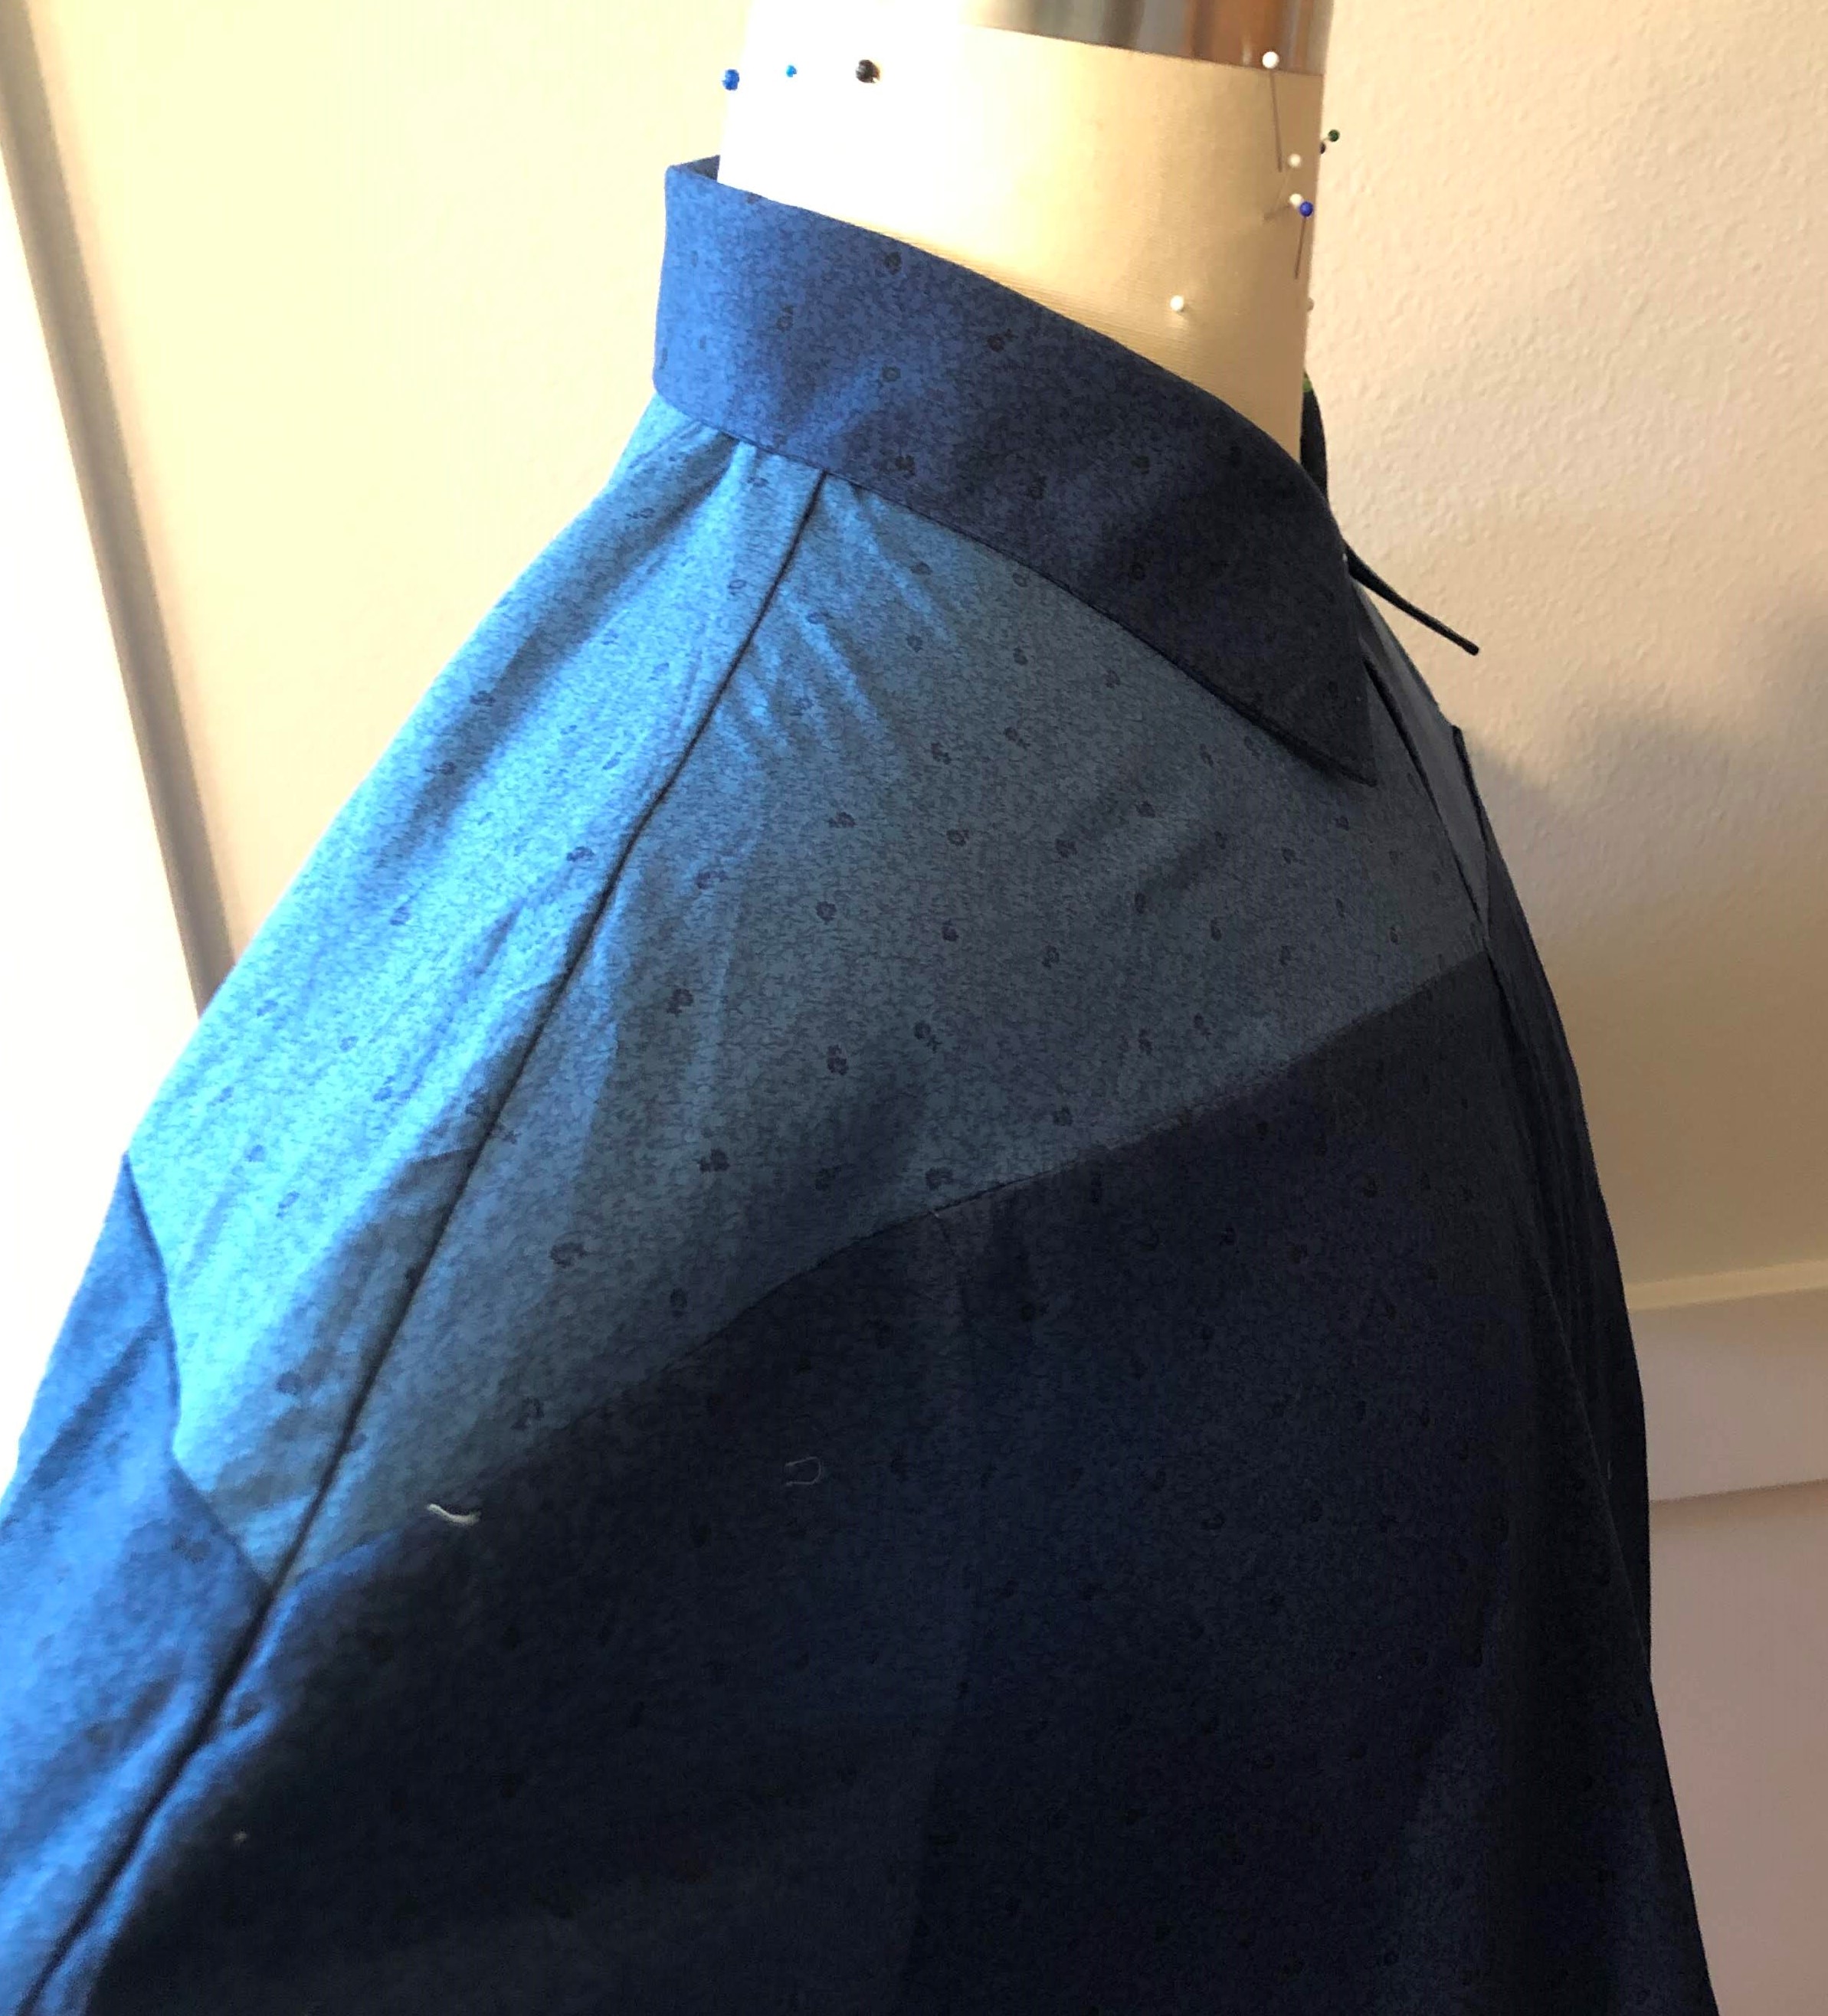
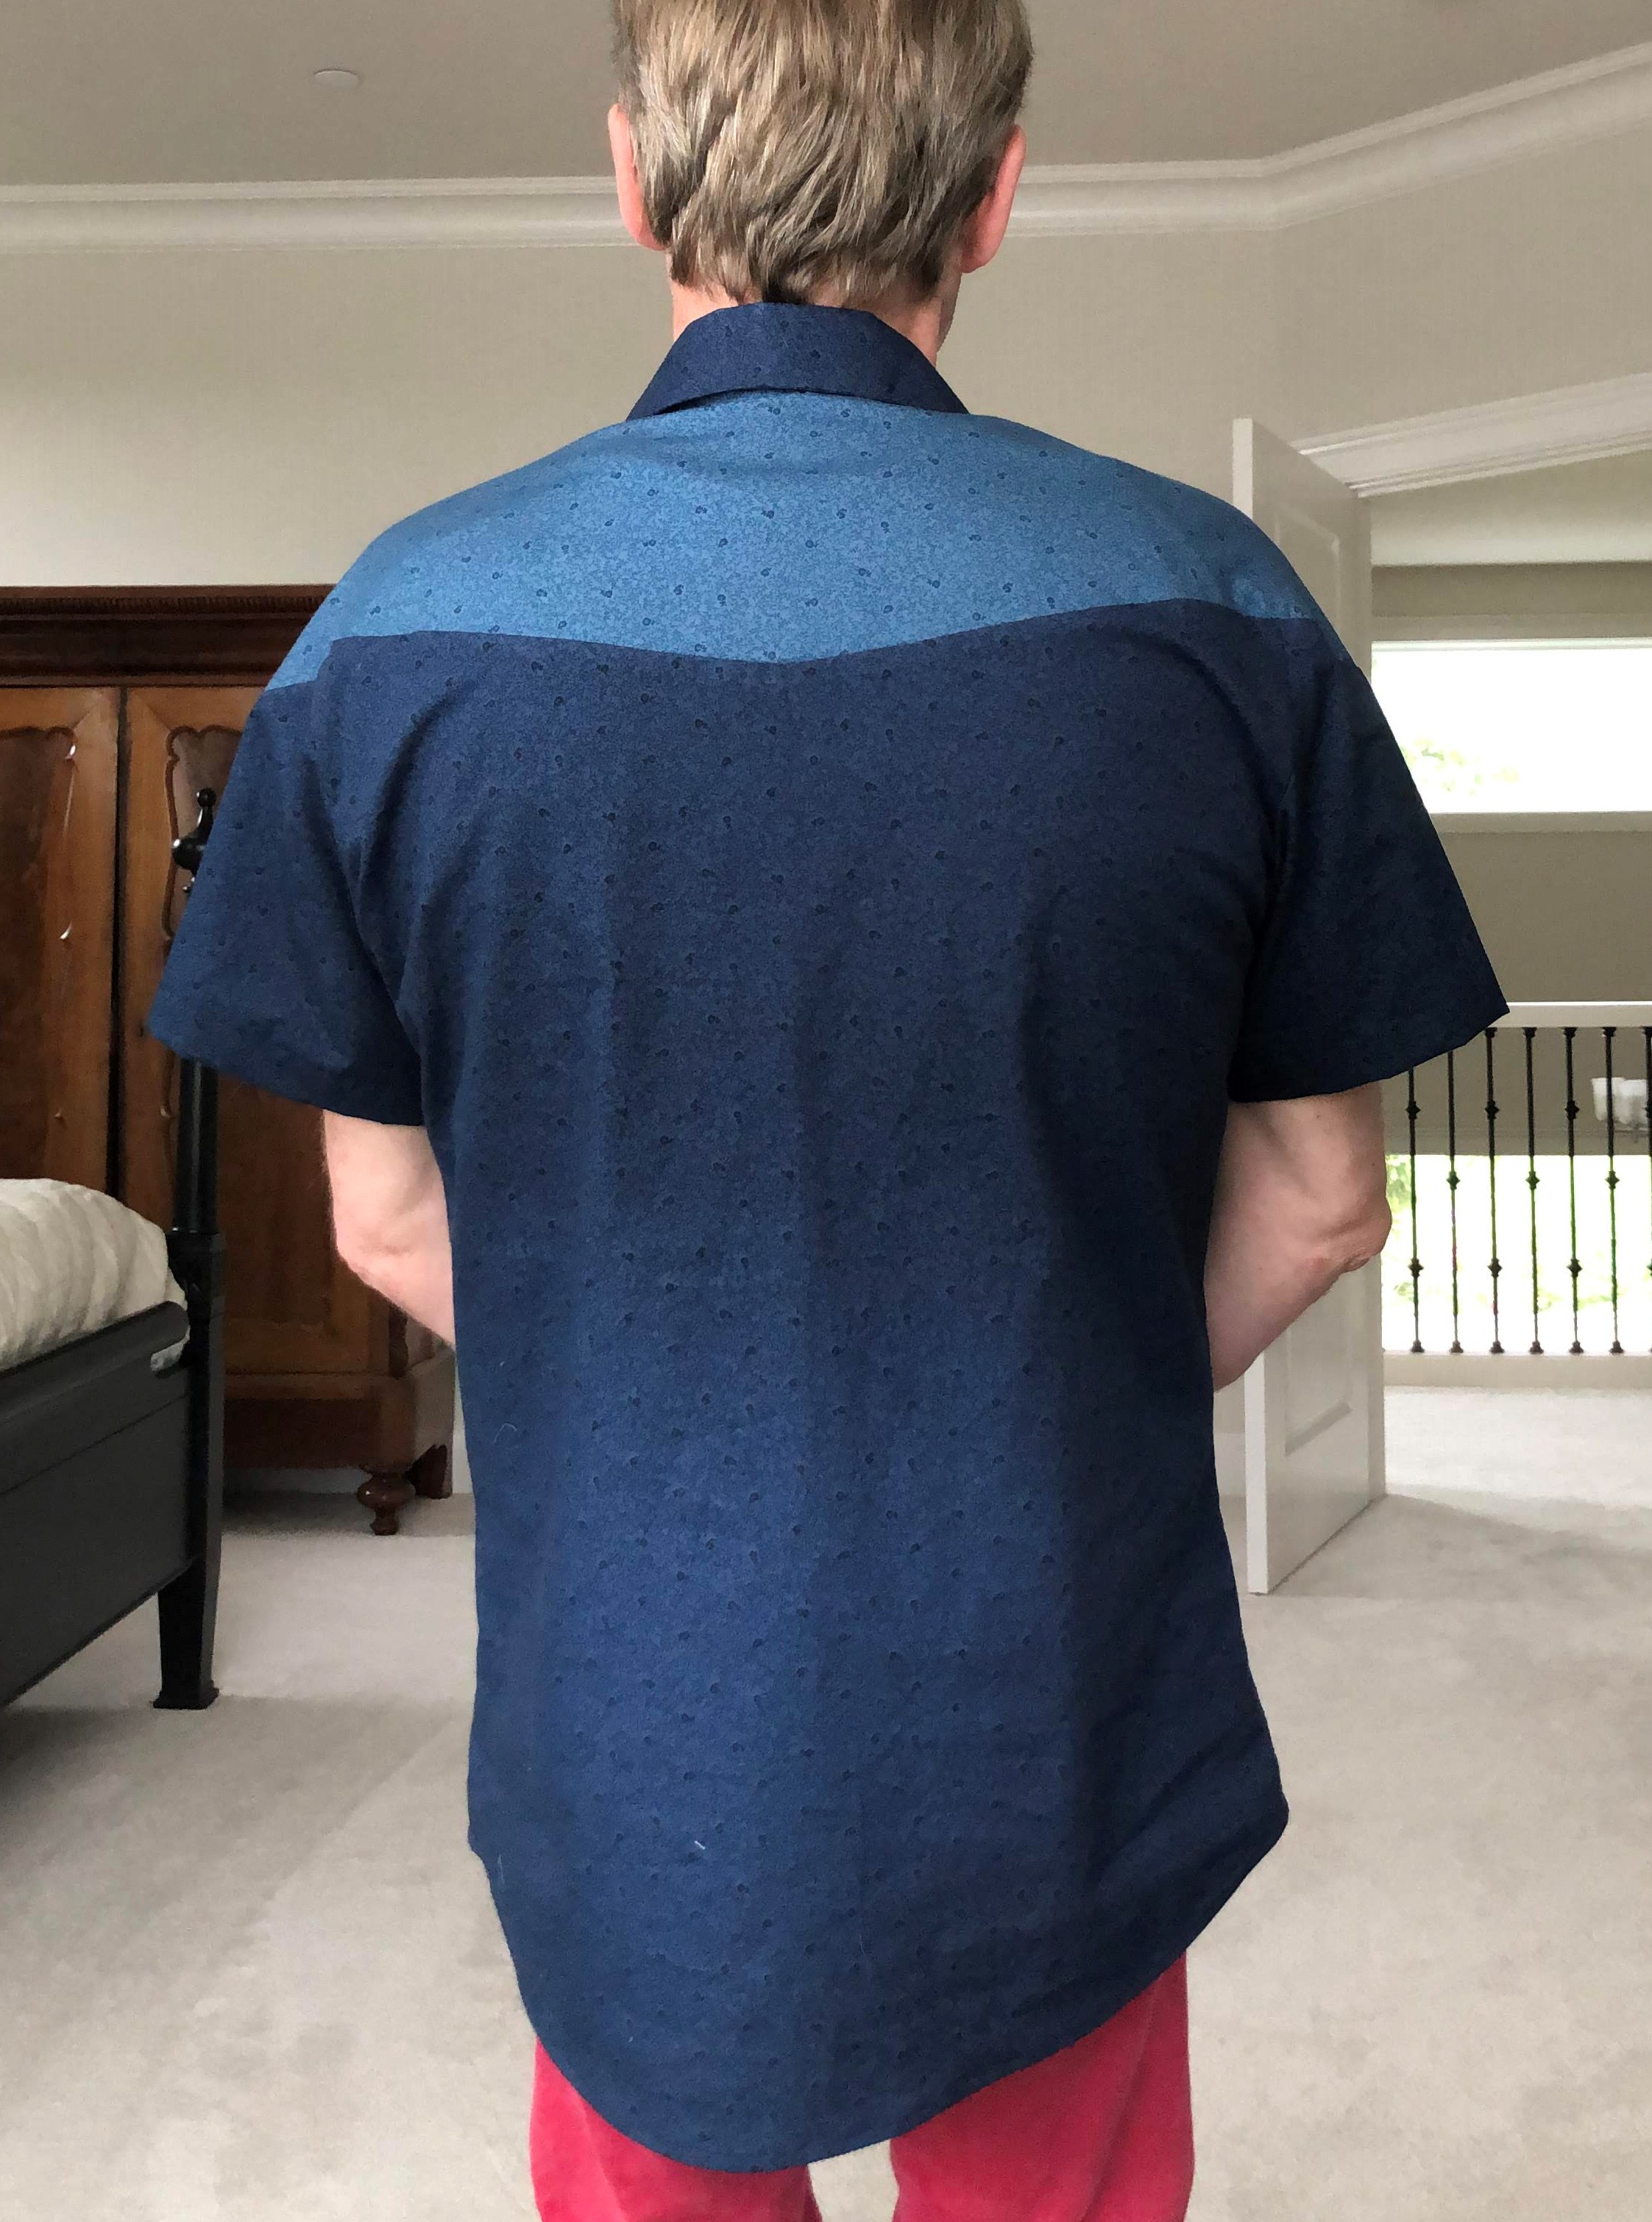
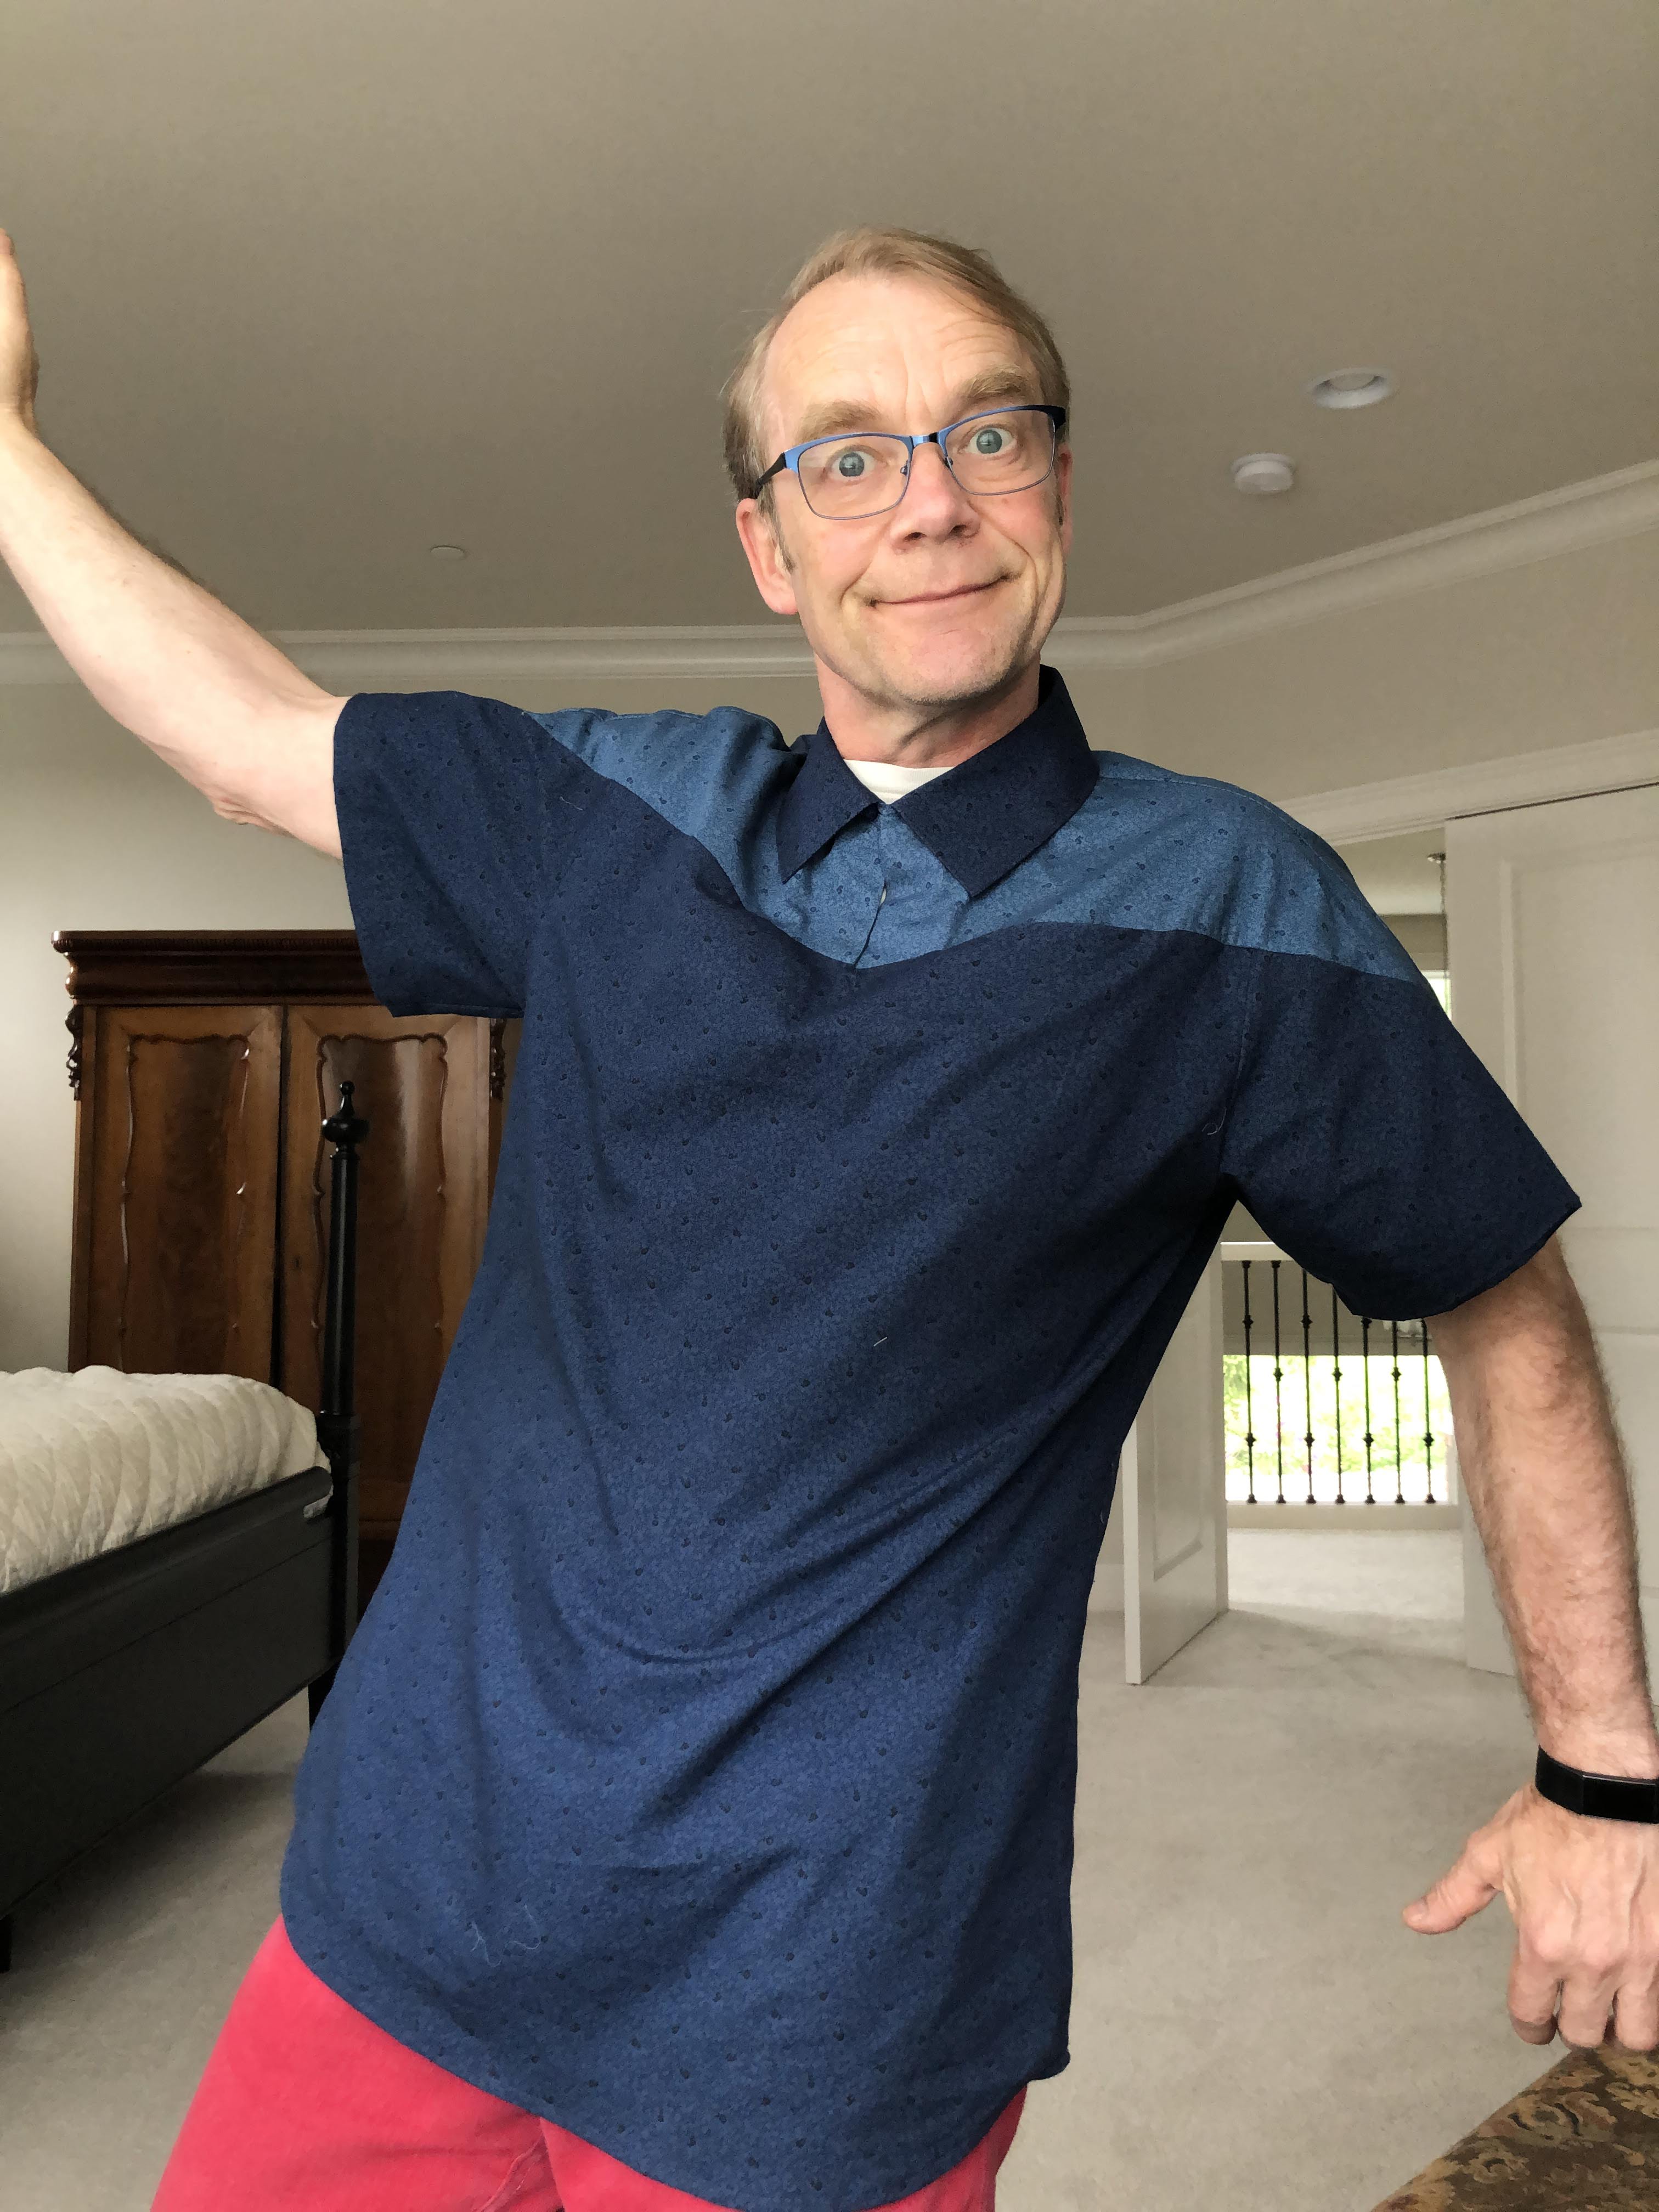
This pattern has a front and a back yoke that extend into the sleeves. Those sleeves themselves are made of two pattern pieces. The front below the yoke is cut on fold. It has a type of a camp collar, without a collar band. The two front yoke pieces come together without overlapping and don’t have any buttons, other than the usual camp collar loop and button at the very top. The yoke in both the front and the back angle down towards the middle. This gives the impression of a diamond shape if you look at it from the top. Specially if you use contrasting fabric, as one of the examples on the pattern sleeve does. And it has a front pocket whose opening is hidden in the seam of the front yoke.

Starting completely from scratch seemed silly, so I pulled out a pattern that had a similar collar. First approach was to just make a muslin and then start drawing on that. The combination of an old bed sheet, unfamiliarity with this pattern, and rushing made for a poor and unusable muslin. So I decided to go with my tried and true shirt pattern, new and good quality muslin fabric, and make a new one.

The first decision was to see how low I should make the yoke in the front come down. This would be dictated by the front opening. I figured that I should be able to wear it with the button undone. For that, the opening should not extend too low. I measured one of my shirts and decided on 4½ inches.
Looking at the pictures, it seemed that the yokes should extend beyond halfway down the sleeve, but not much more. That gave me two points to base all the changes to the pattern on. I used my dress form and some string to draw straight onto the muslin. Then transferred the measurements over to the original pattern pieces, and create new ones based on that.
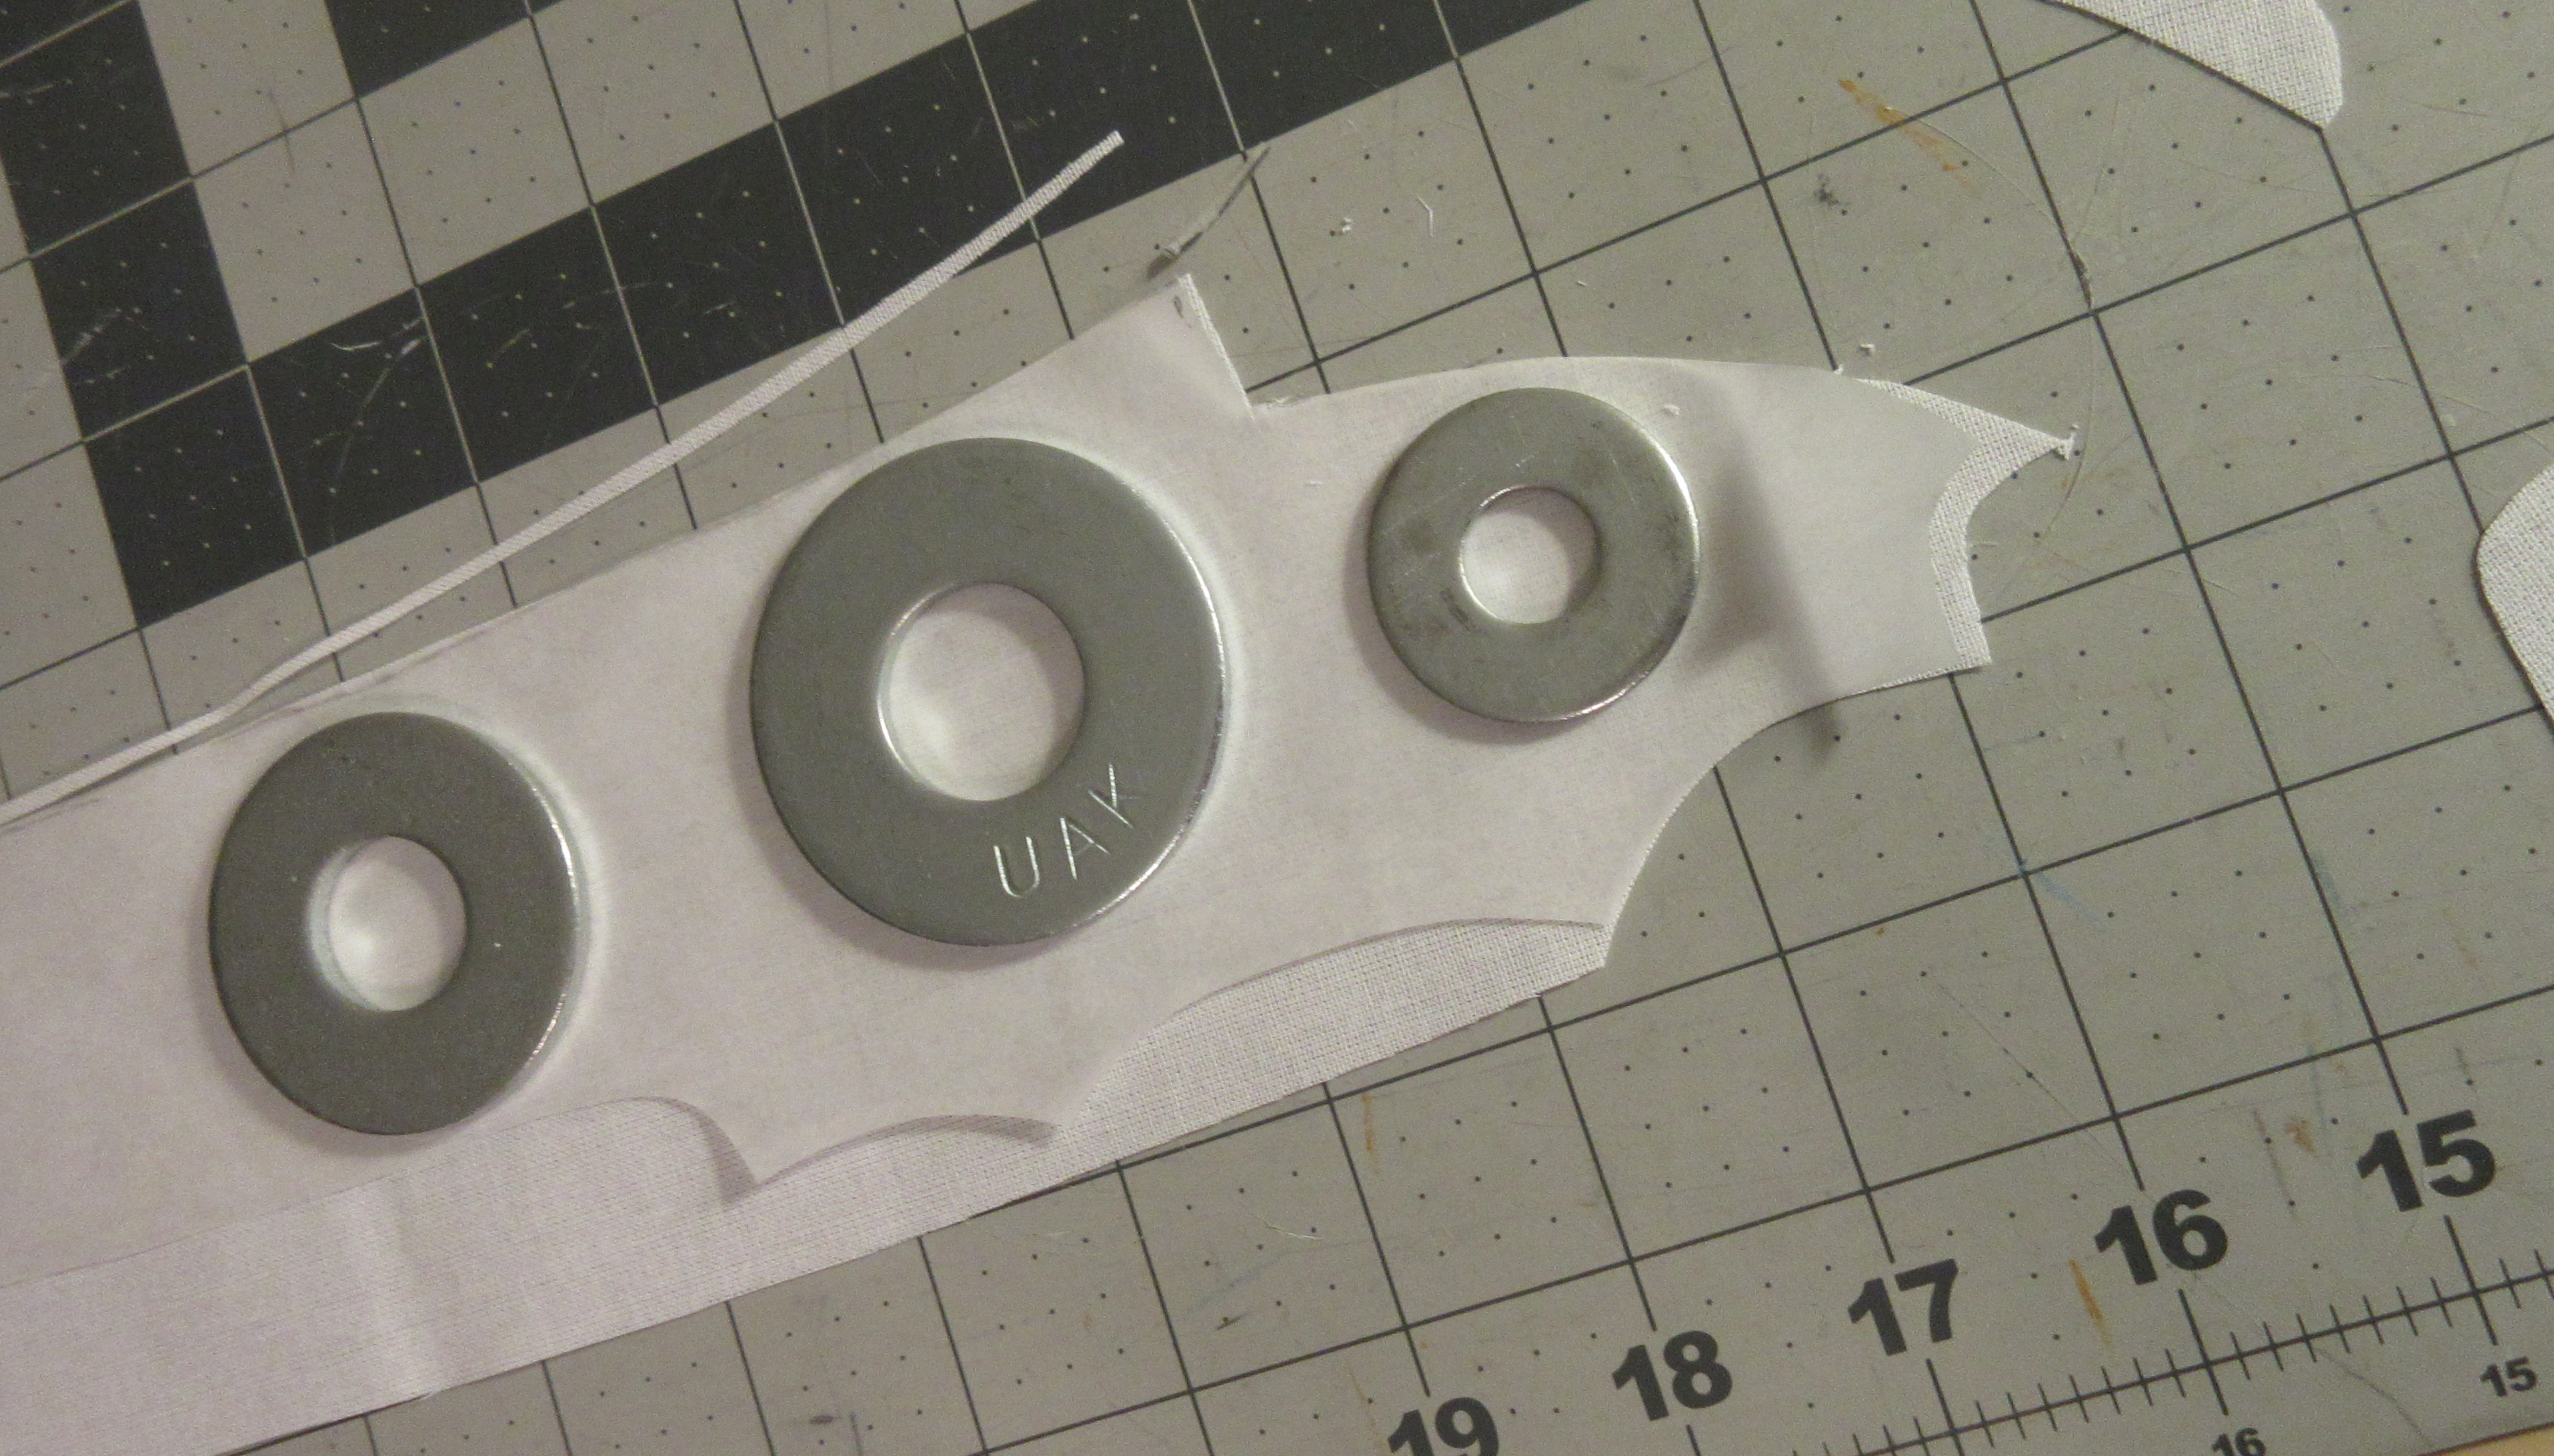
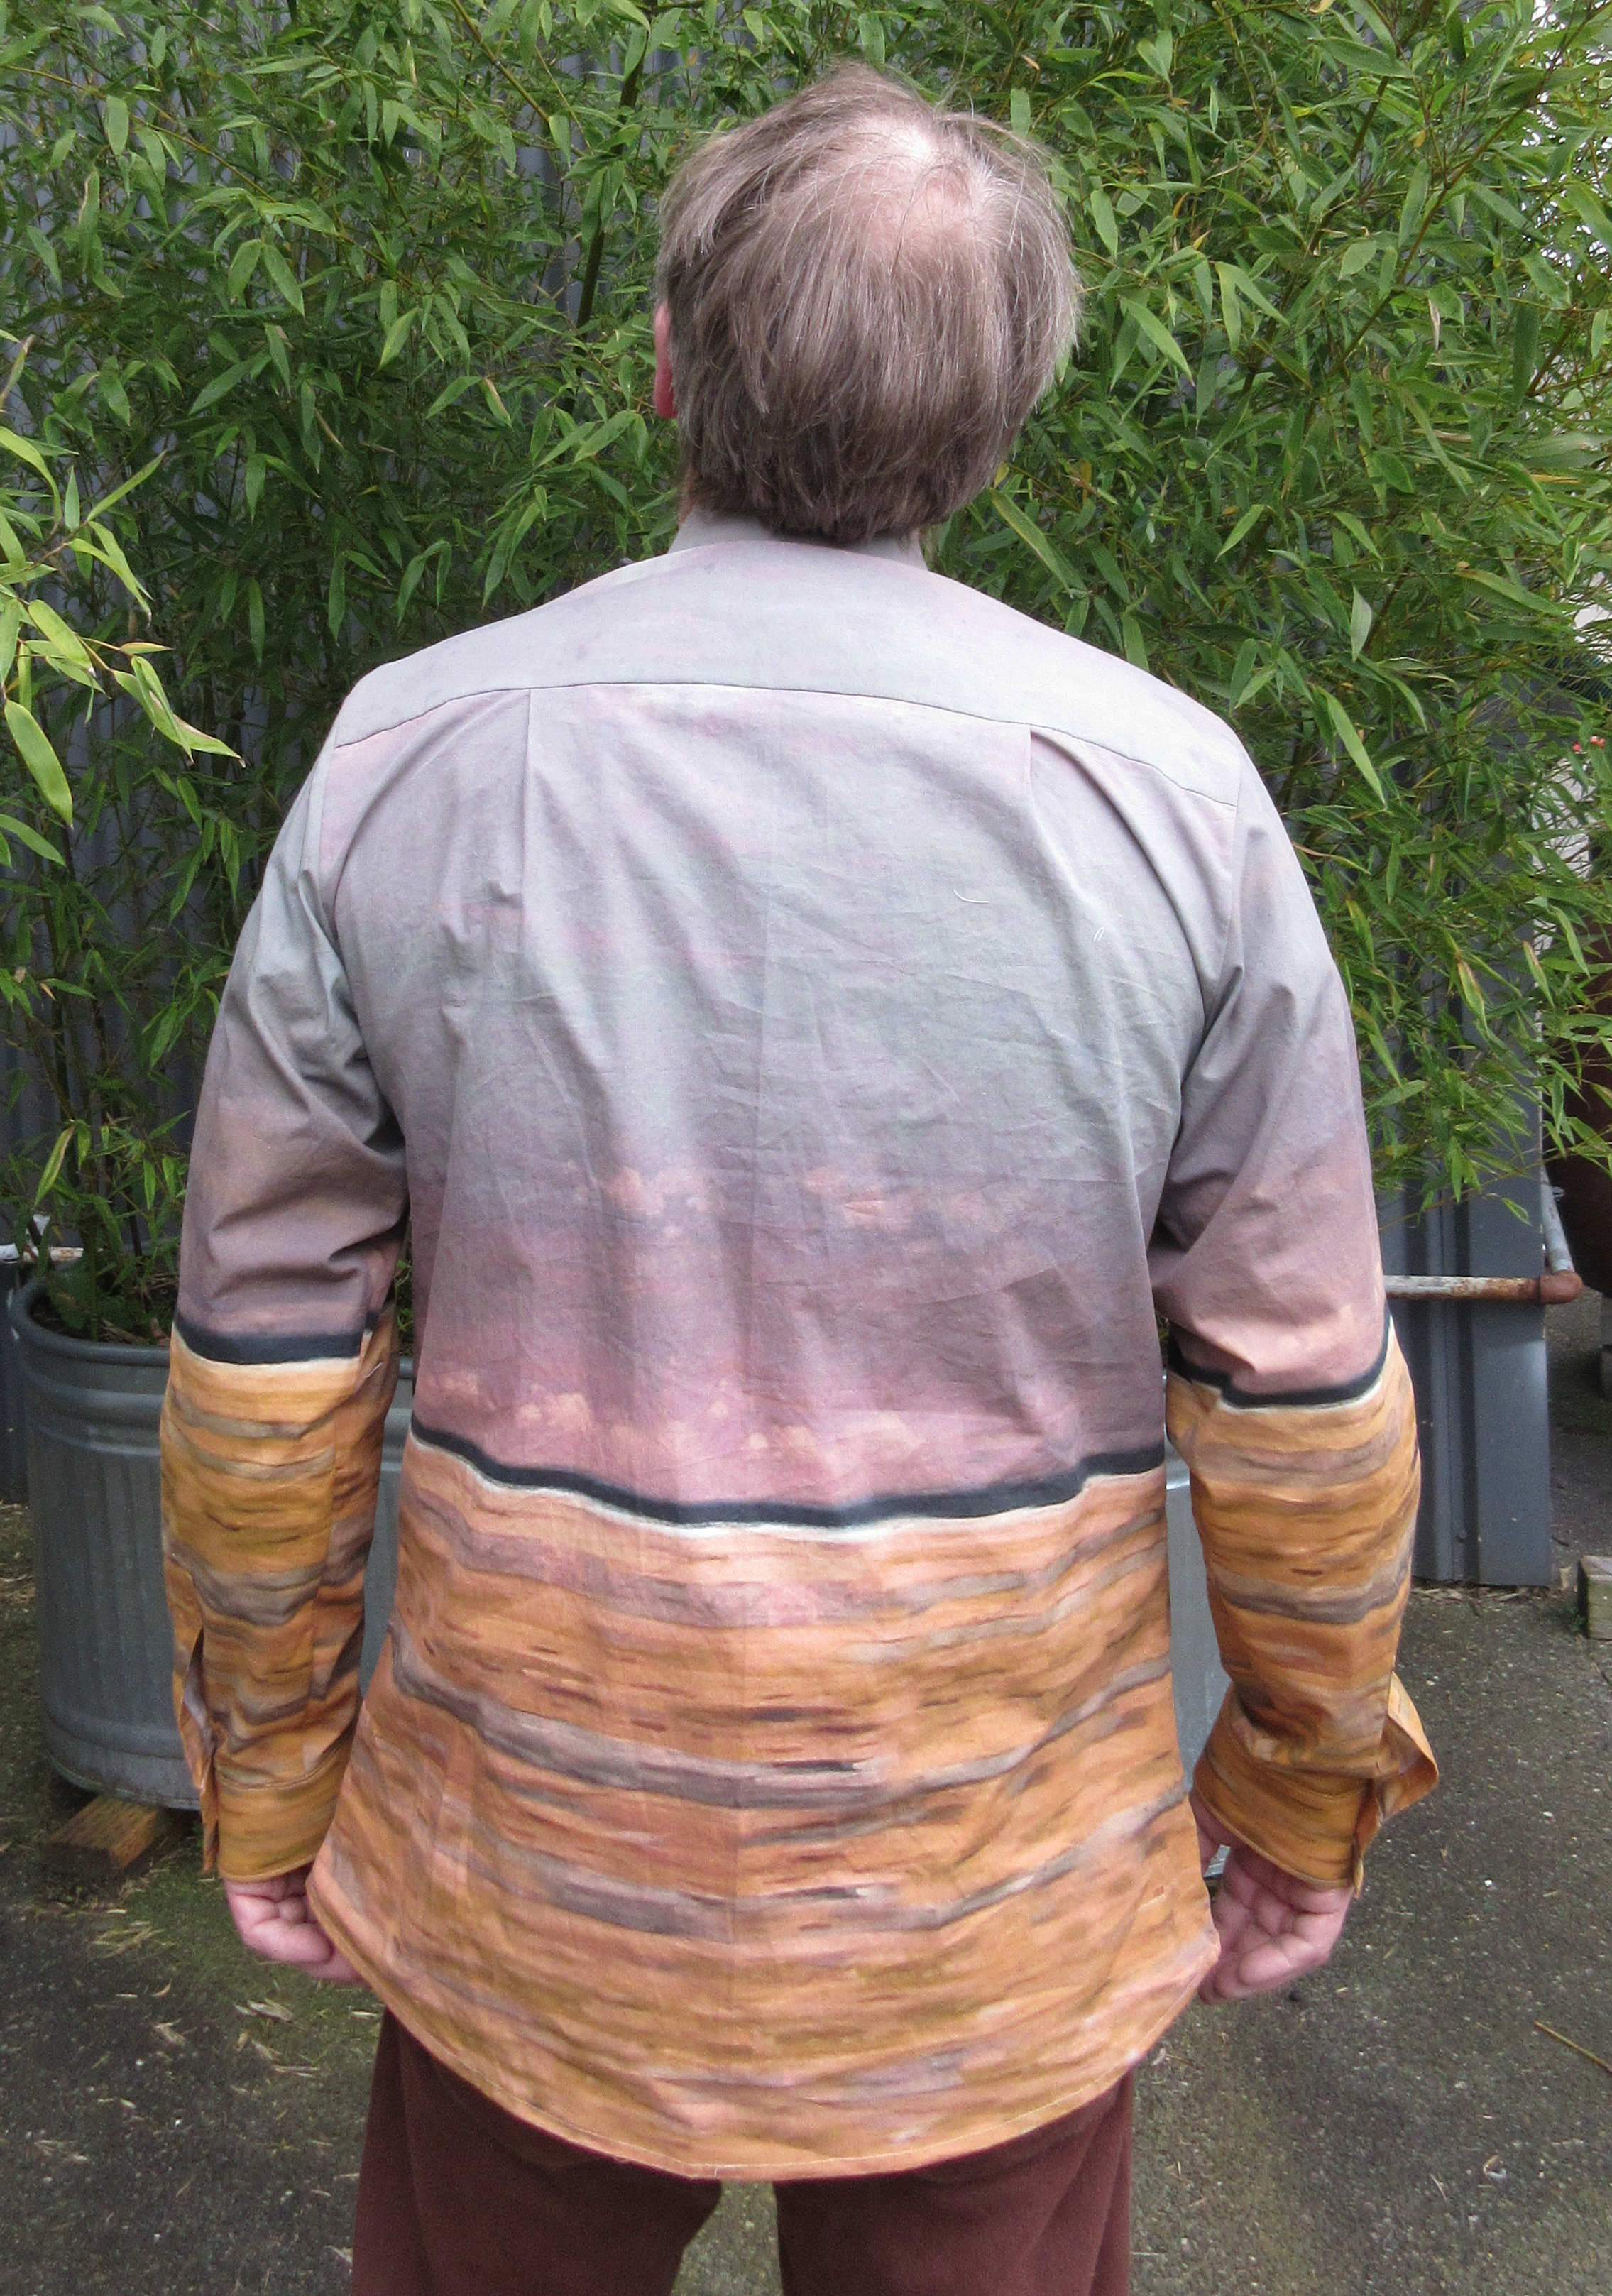
To create a straight seam across the front for the yoke, I found that a straight line was close enough. But on the back you actually need to make a curve to make the seam look straight.

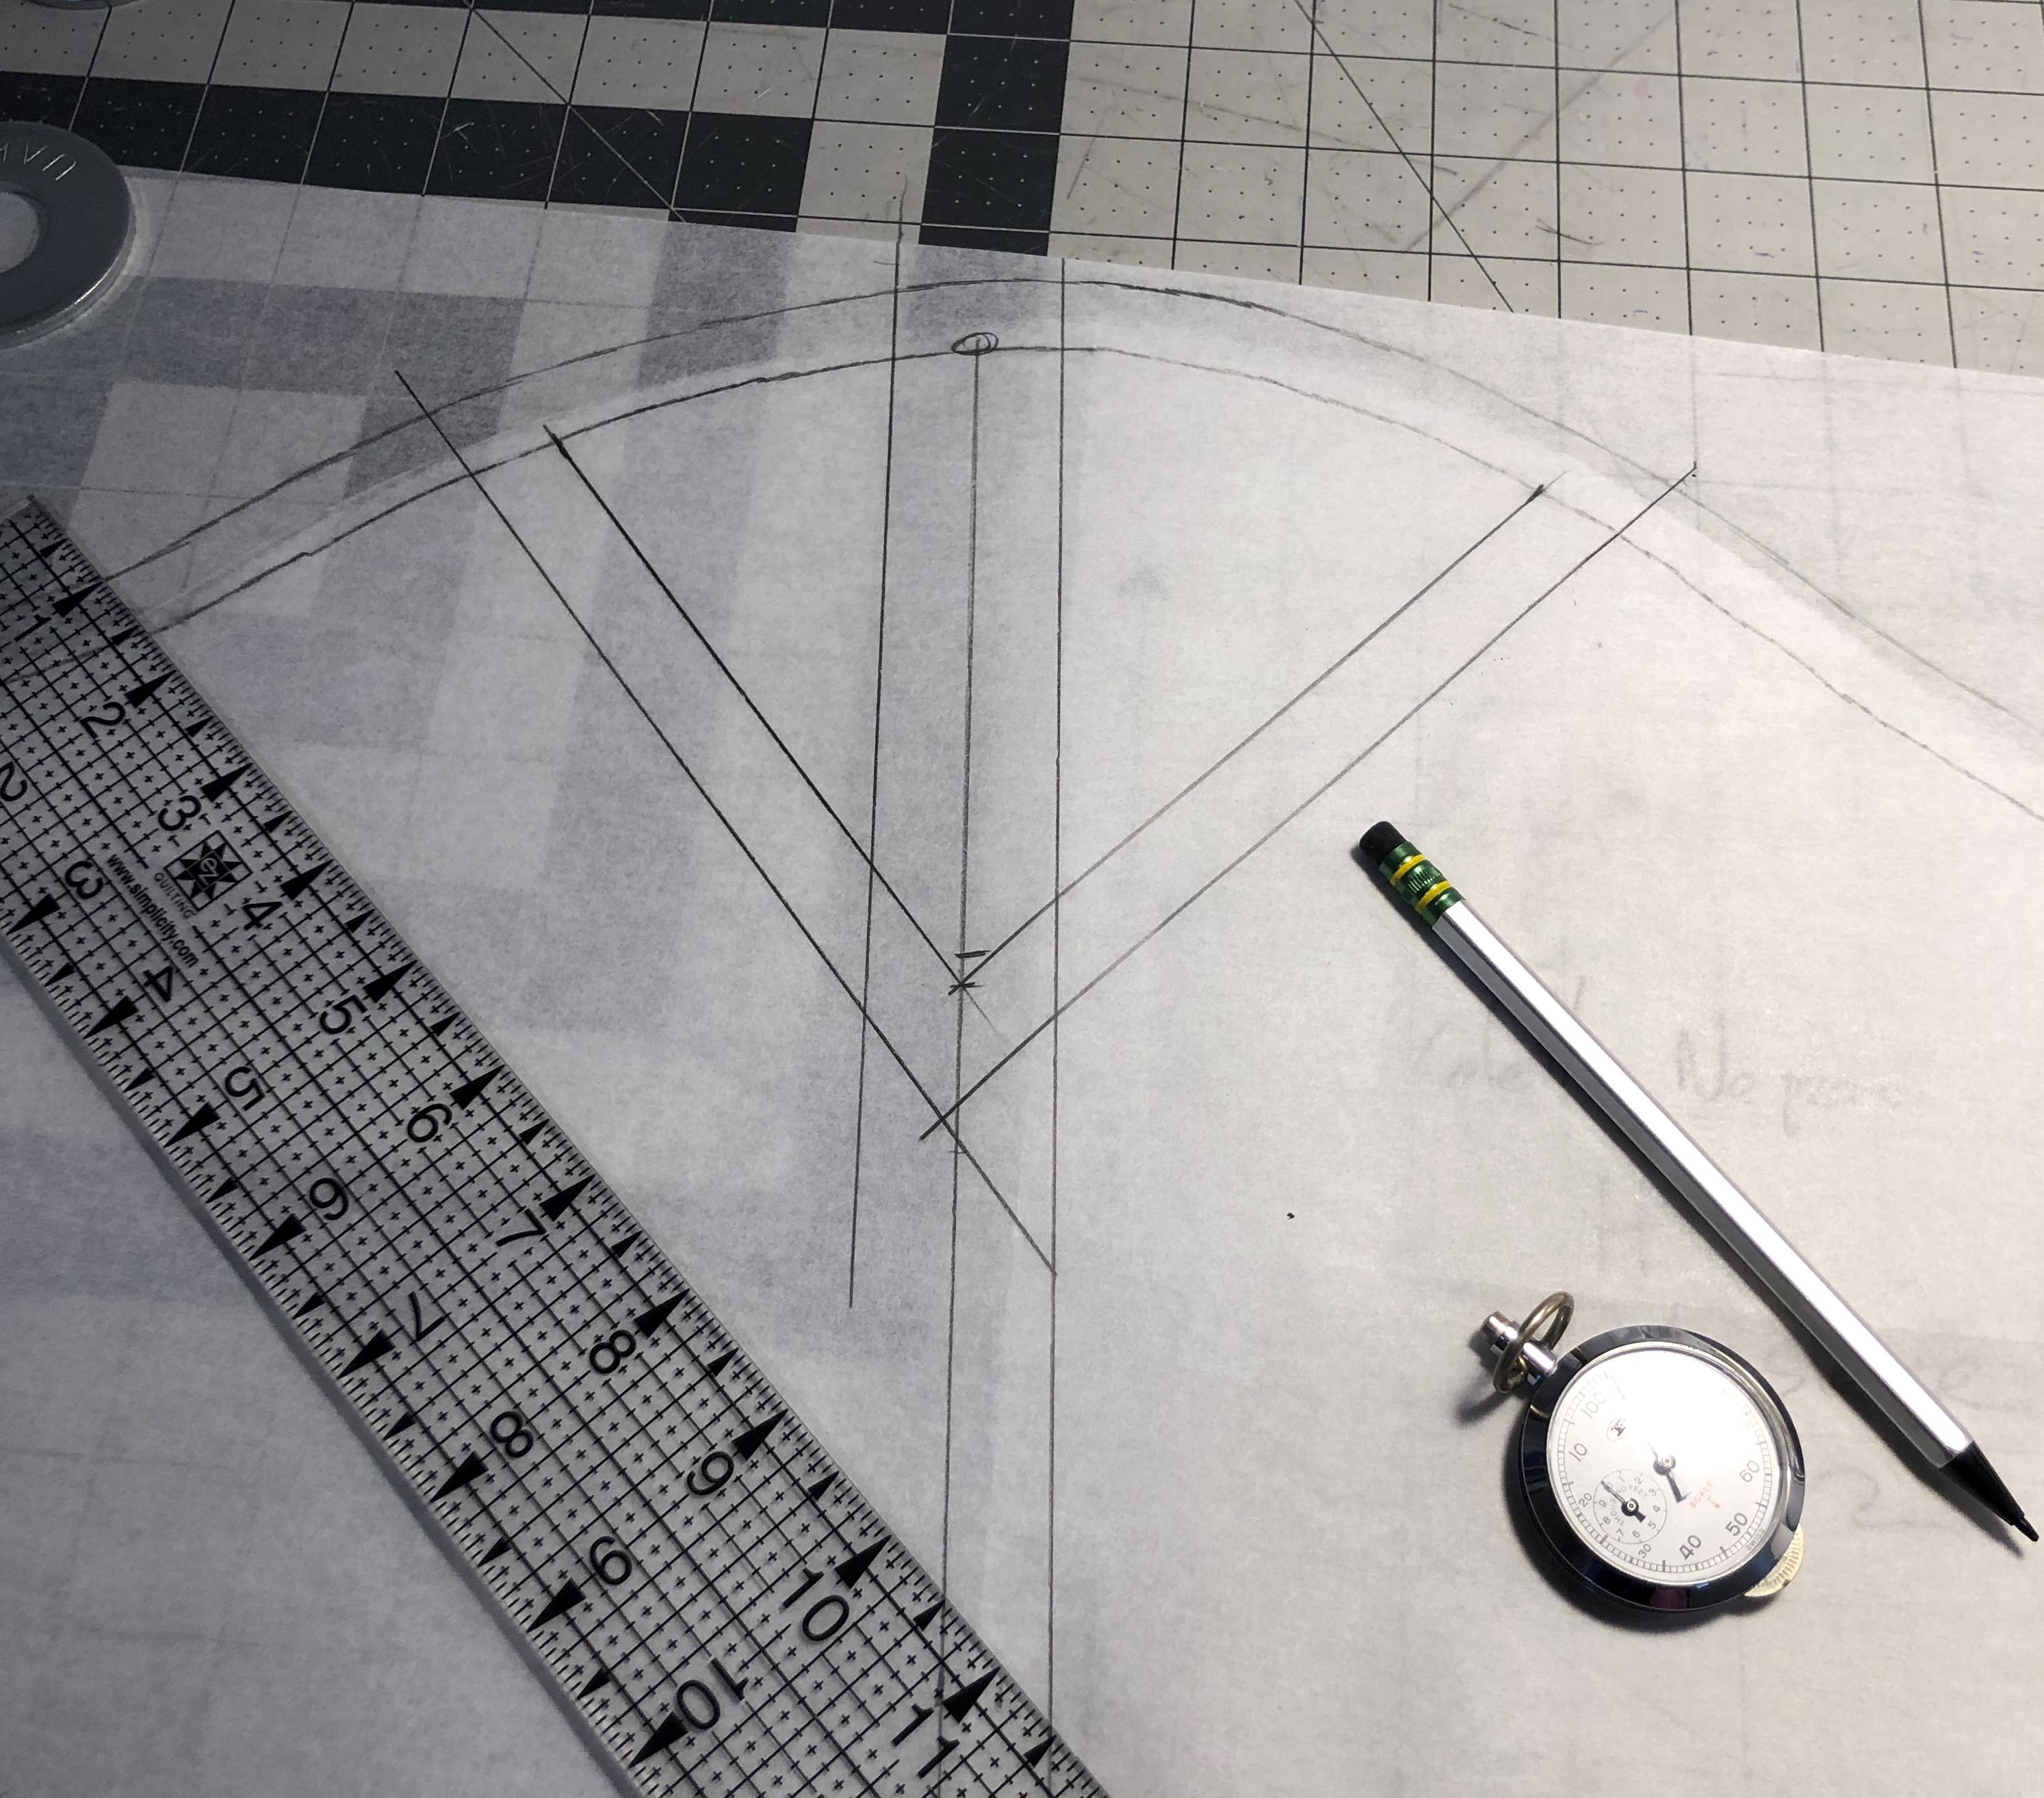
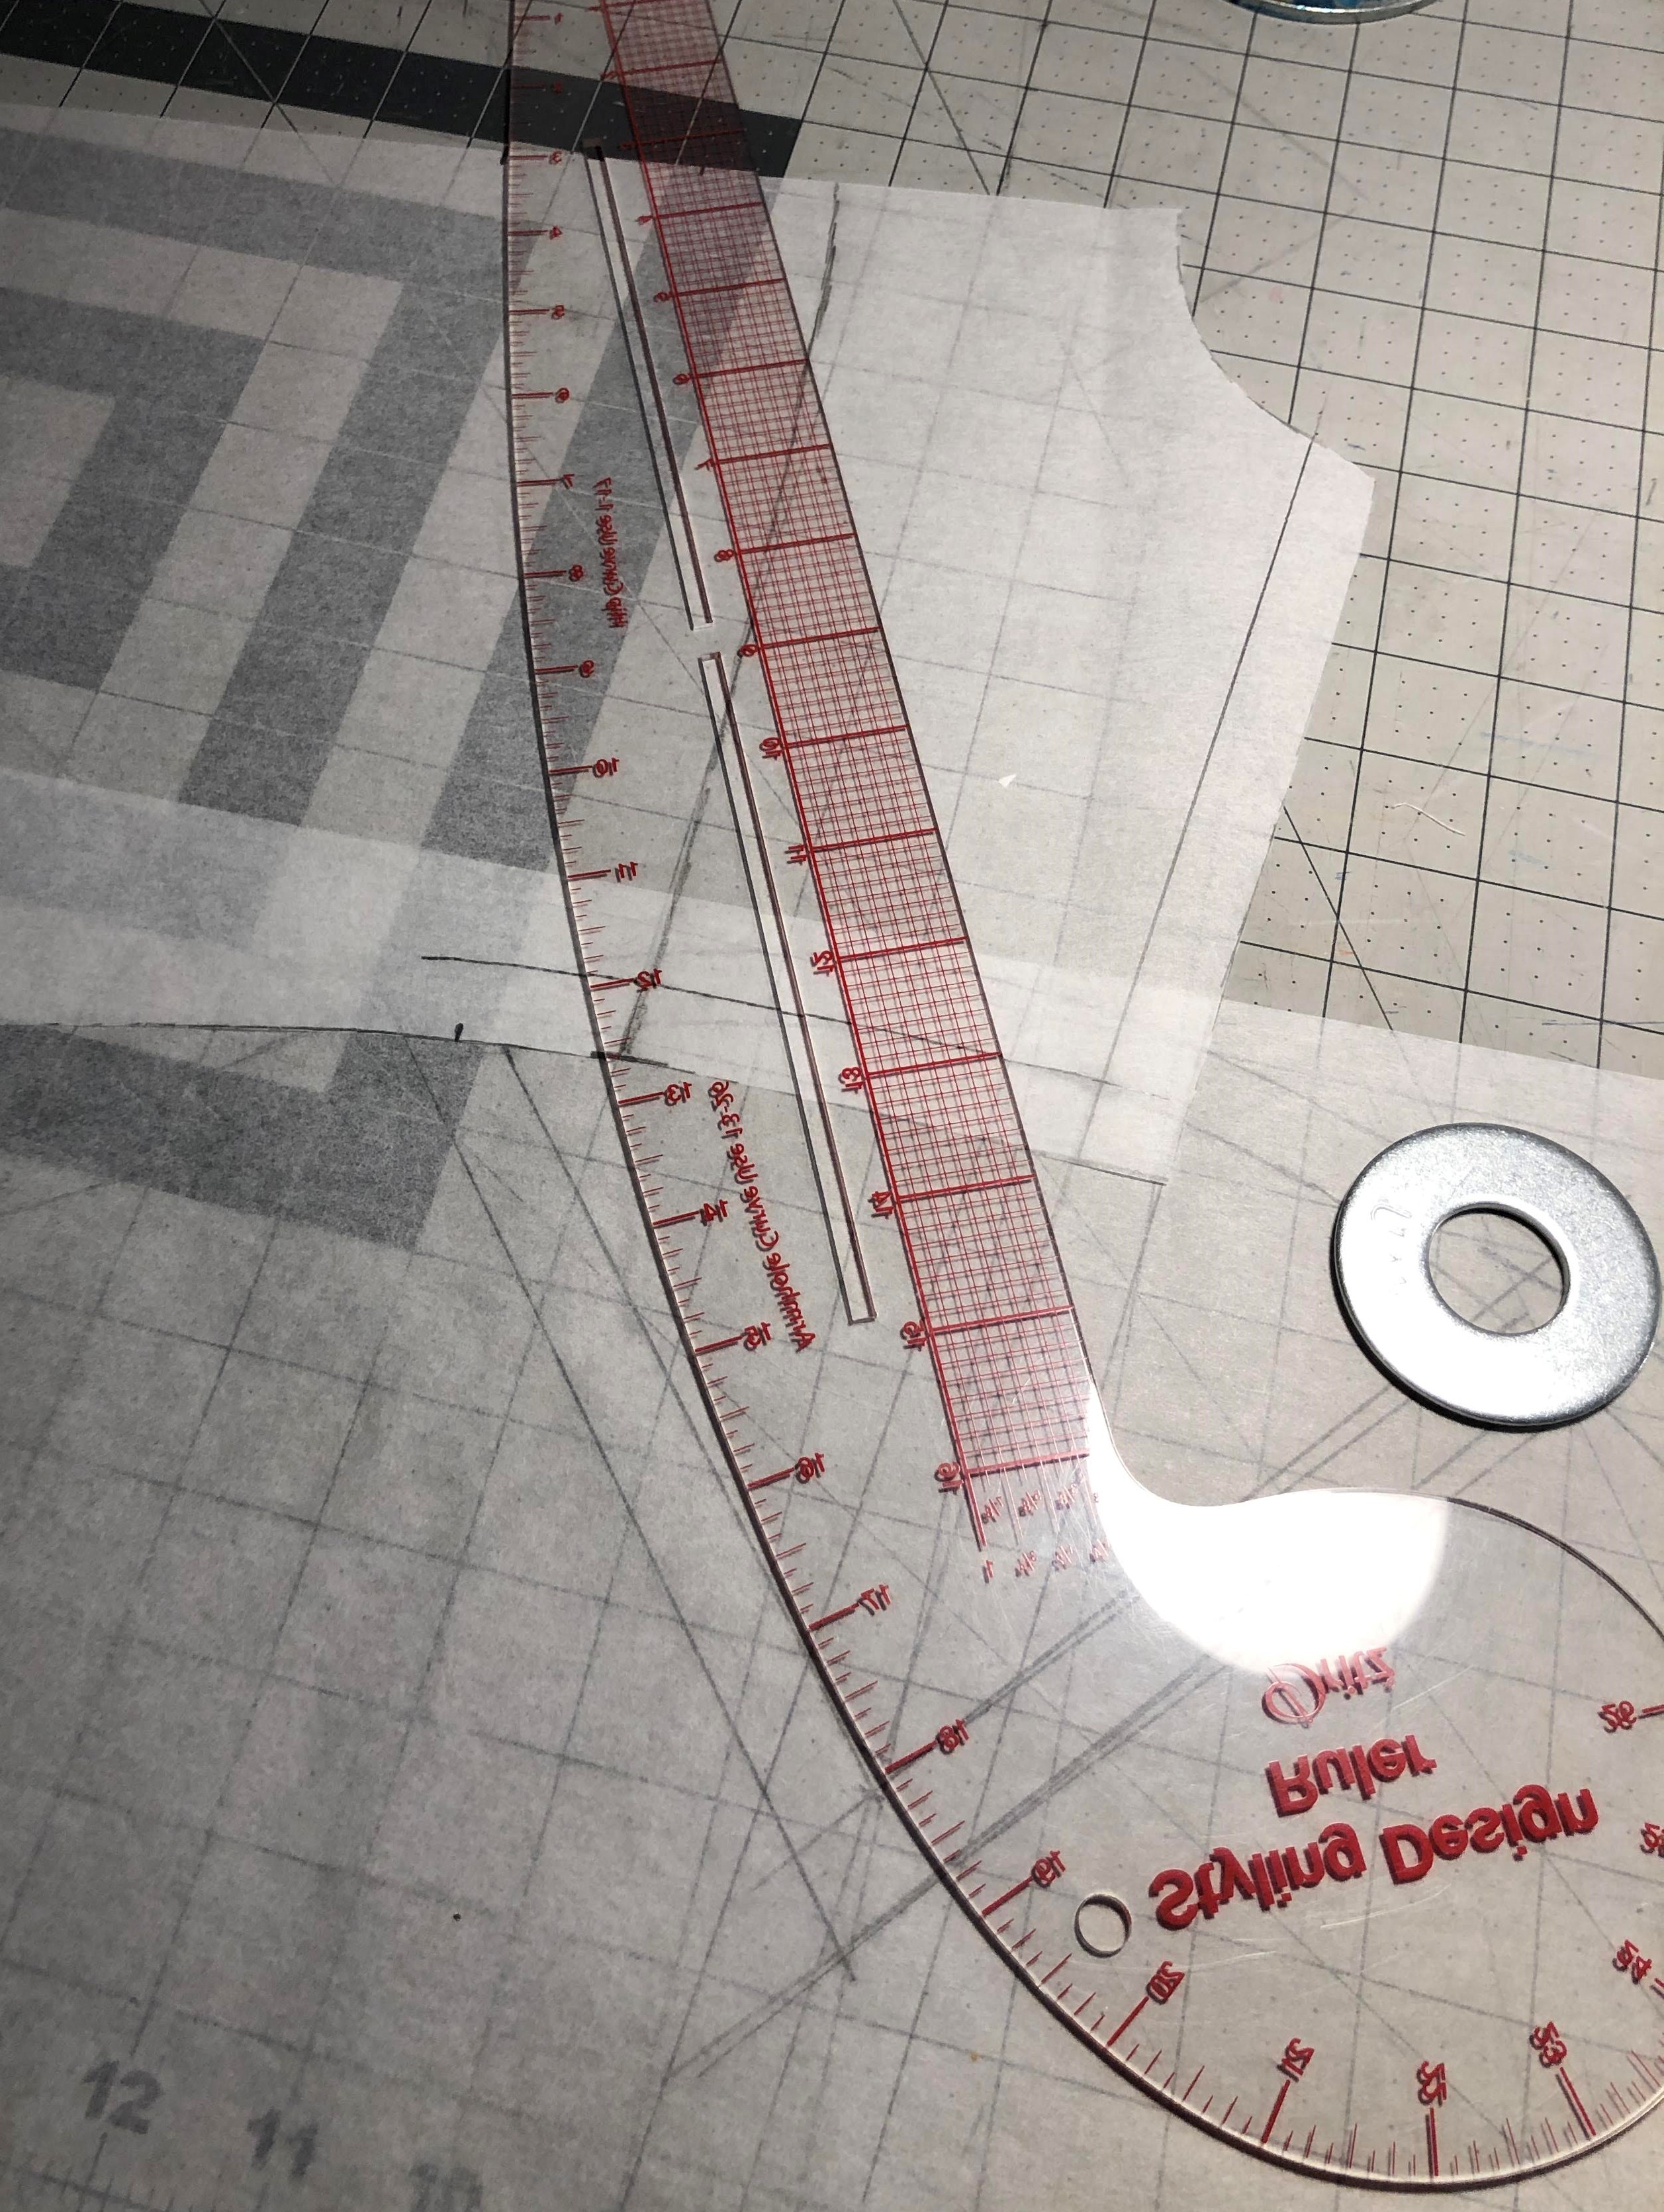
As you can see, there are a lot of opportunities to make mistakes. With the front piece, I forgot that the original pattern piece had seam allowances included when I transferred the measurements. So you see two sets of new seam lines there. Figuring out how to align the sleeve piece to that back piece so I could draw the new seam is still a mystery to me. I just winged it and it worked.
Now I could take the muslin apart and use it to create some of the new pieces. The body of this first try came together easily enough. Now it was time to address what I had dreaded; the collar.

I have drafted new collars and collar bands. Some of my art shirts have quite intricate collars. But I had never created a collar without a collar band. And I’m not as comfortable sewing shirts without collar bands either. Using another shirt as an example to work from wasn’t an option, since this shirt would not have a front button placket, and all my camp collar patterns do have that. I decided on the trail and error method. Just use paper to sculpt something that is close, tweak it a bit, make a new one, and repeat until you’re happy. Then transfer this to fabric, and see if you can figure out how to make the corresponding facing.

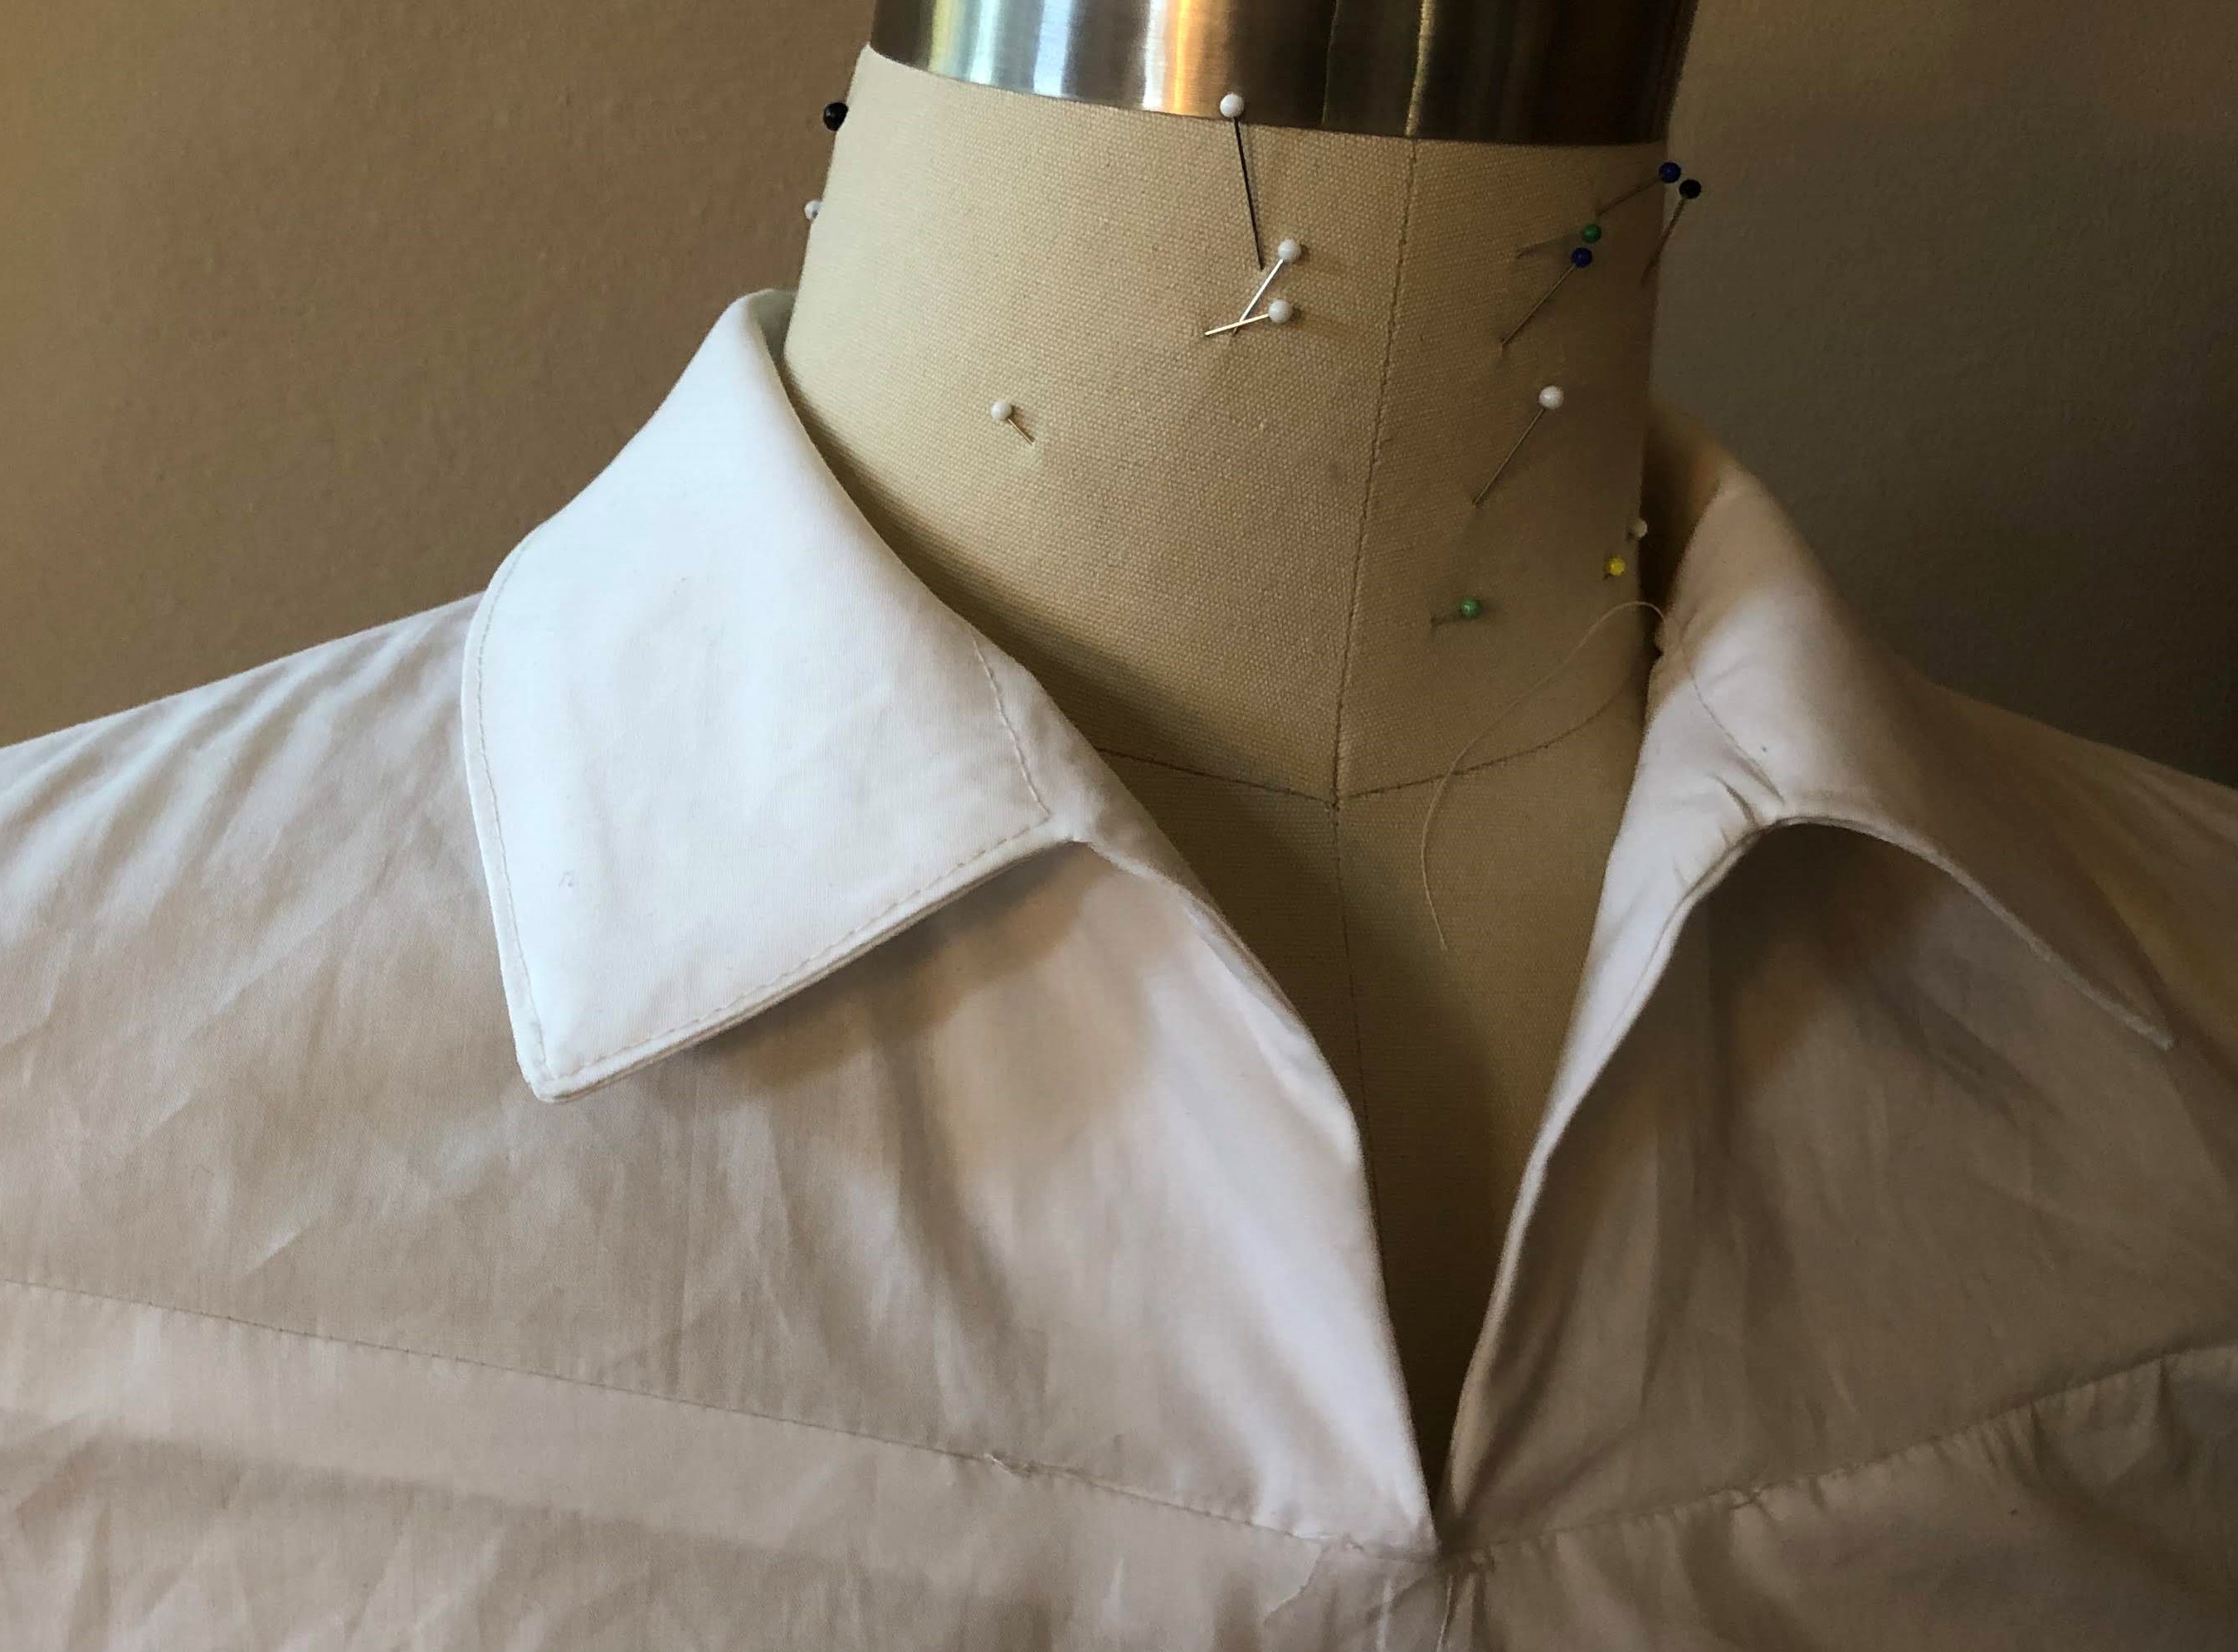
I’m not completely happy with the collar, I think the points are a bit too big, but I’m not going back to change them.

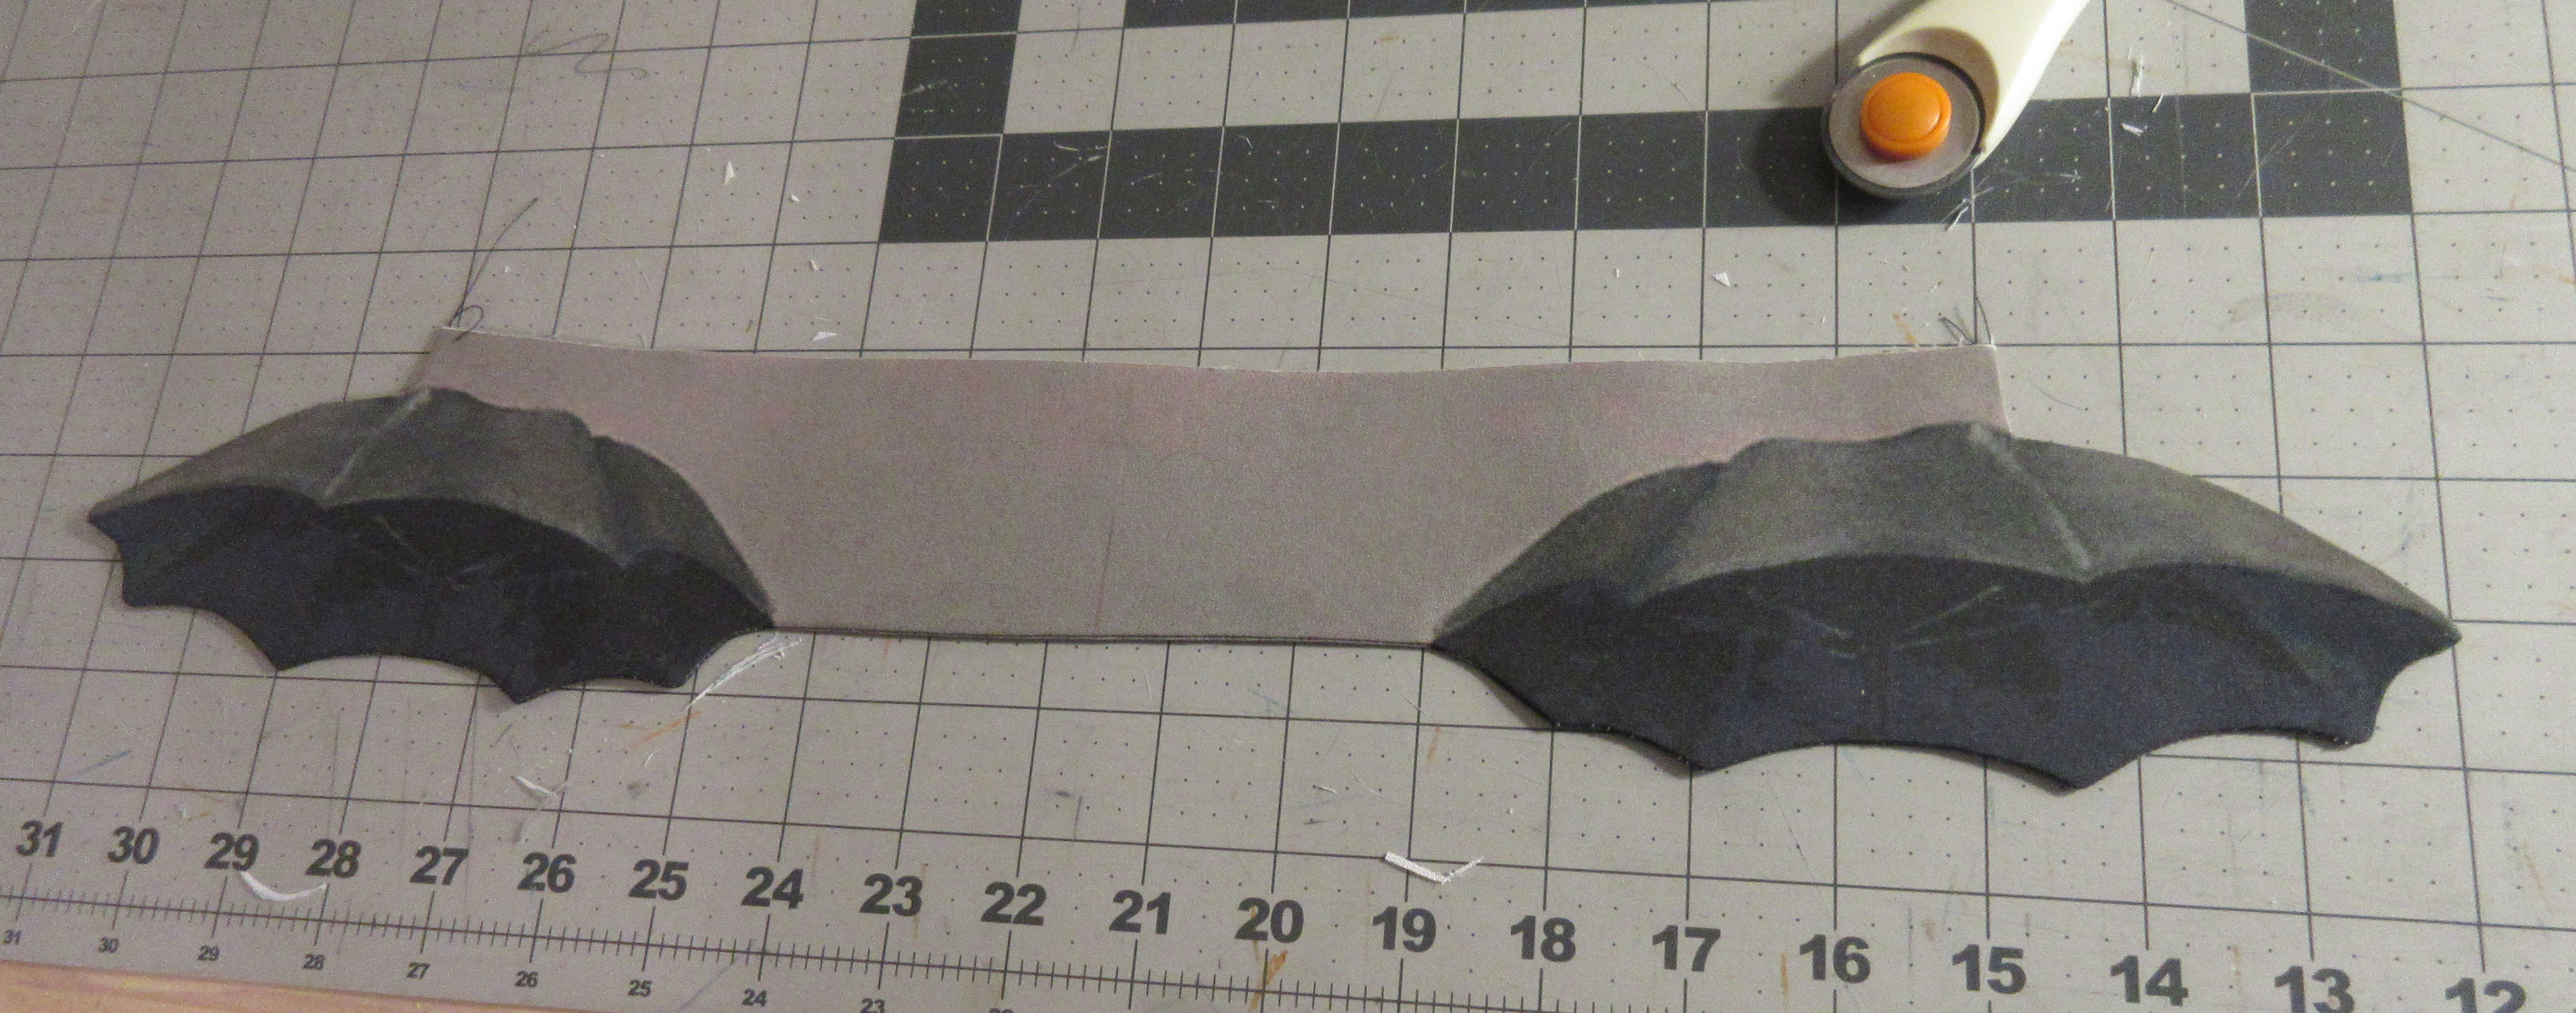
Here are all the pieces I ended up with (without the pocket piece, I still had to make that one):

While I was putting the final muslin together, it occurred to me that there’s a lot more to this than just making the pattern pieces. I have no construction instructions, and it is different enough to have the potential for lots of additional mistakes. I didn’t want top stitching, so (faux) French seams everywhere. The hardest part would be the sequence of sewing everything together.

To attach the front and back yokes, I would have to attach the sleeve pieces to the front and back first. I would not be able to sew the front yoke until I sewed the facings to the yoke because of how the facing must be caught in the French seam. But to sew the facings, I would need to have the collar in place. And for that the shoulder seam must be sewn. Since the shoulder seam extends all the way into the sleeves, the yokes must be attached to the front and back. A circular problem.

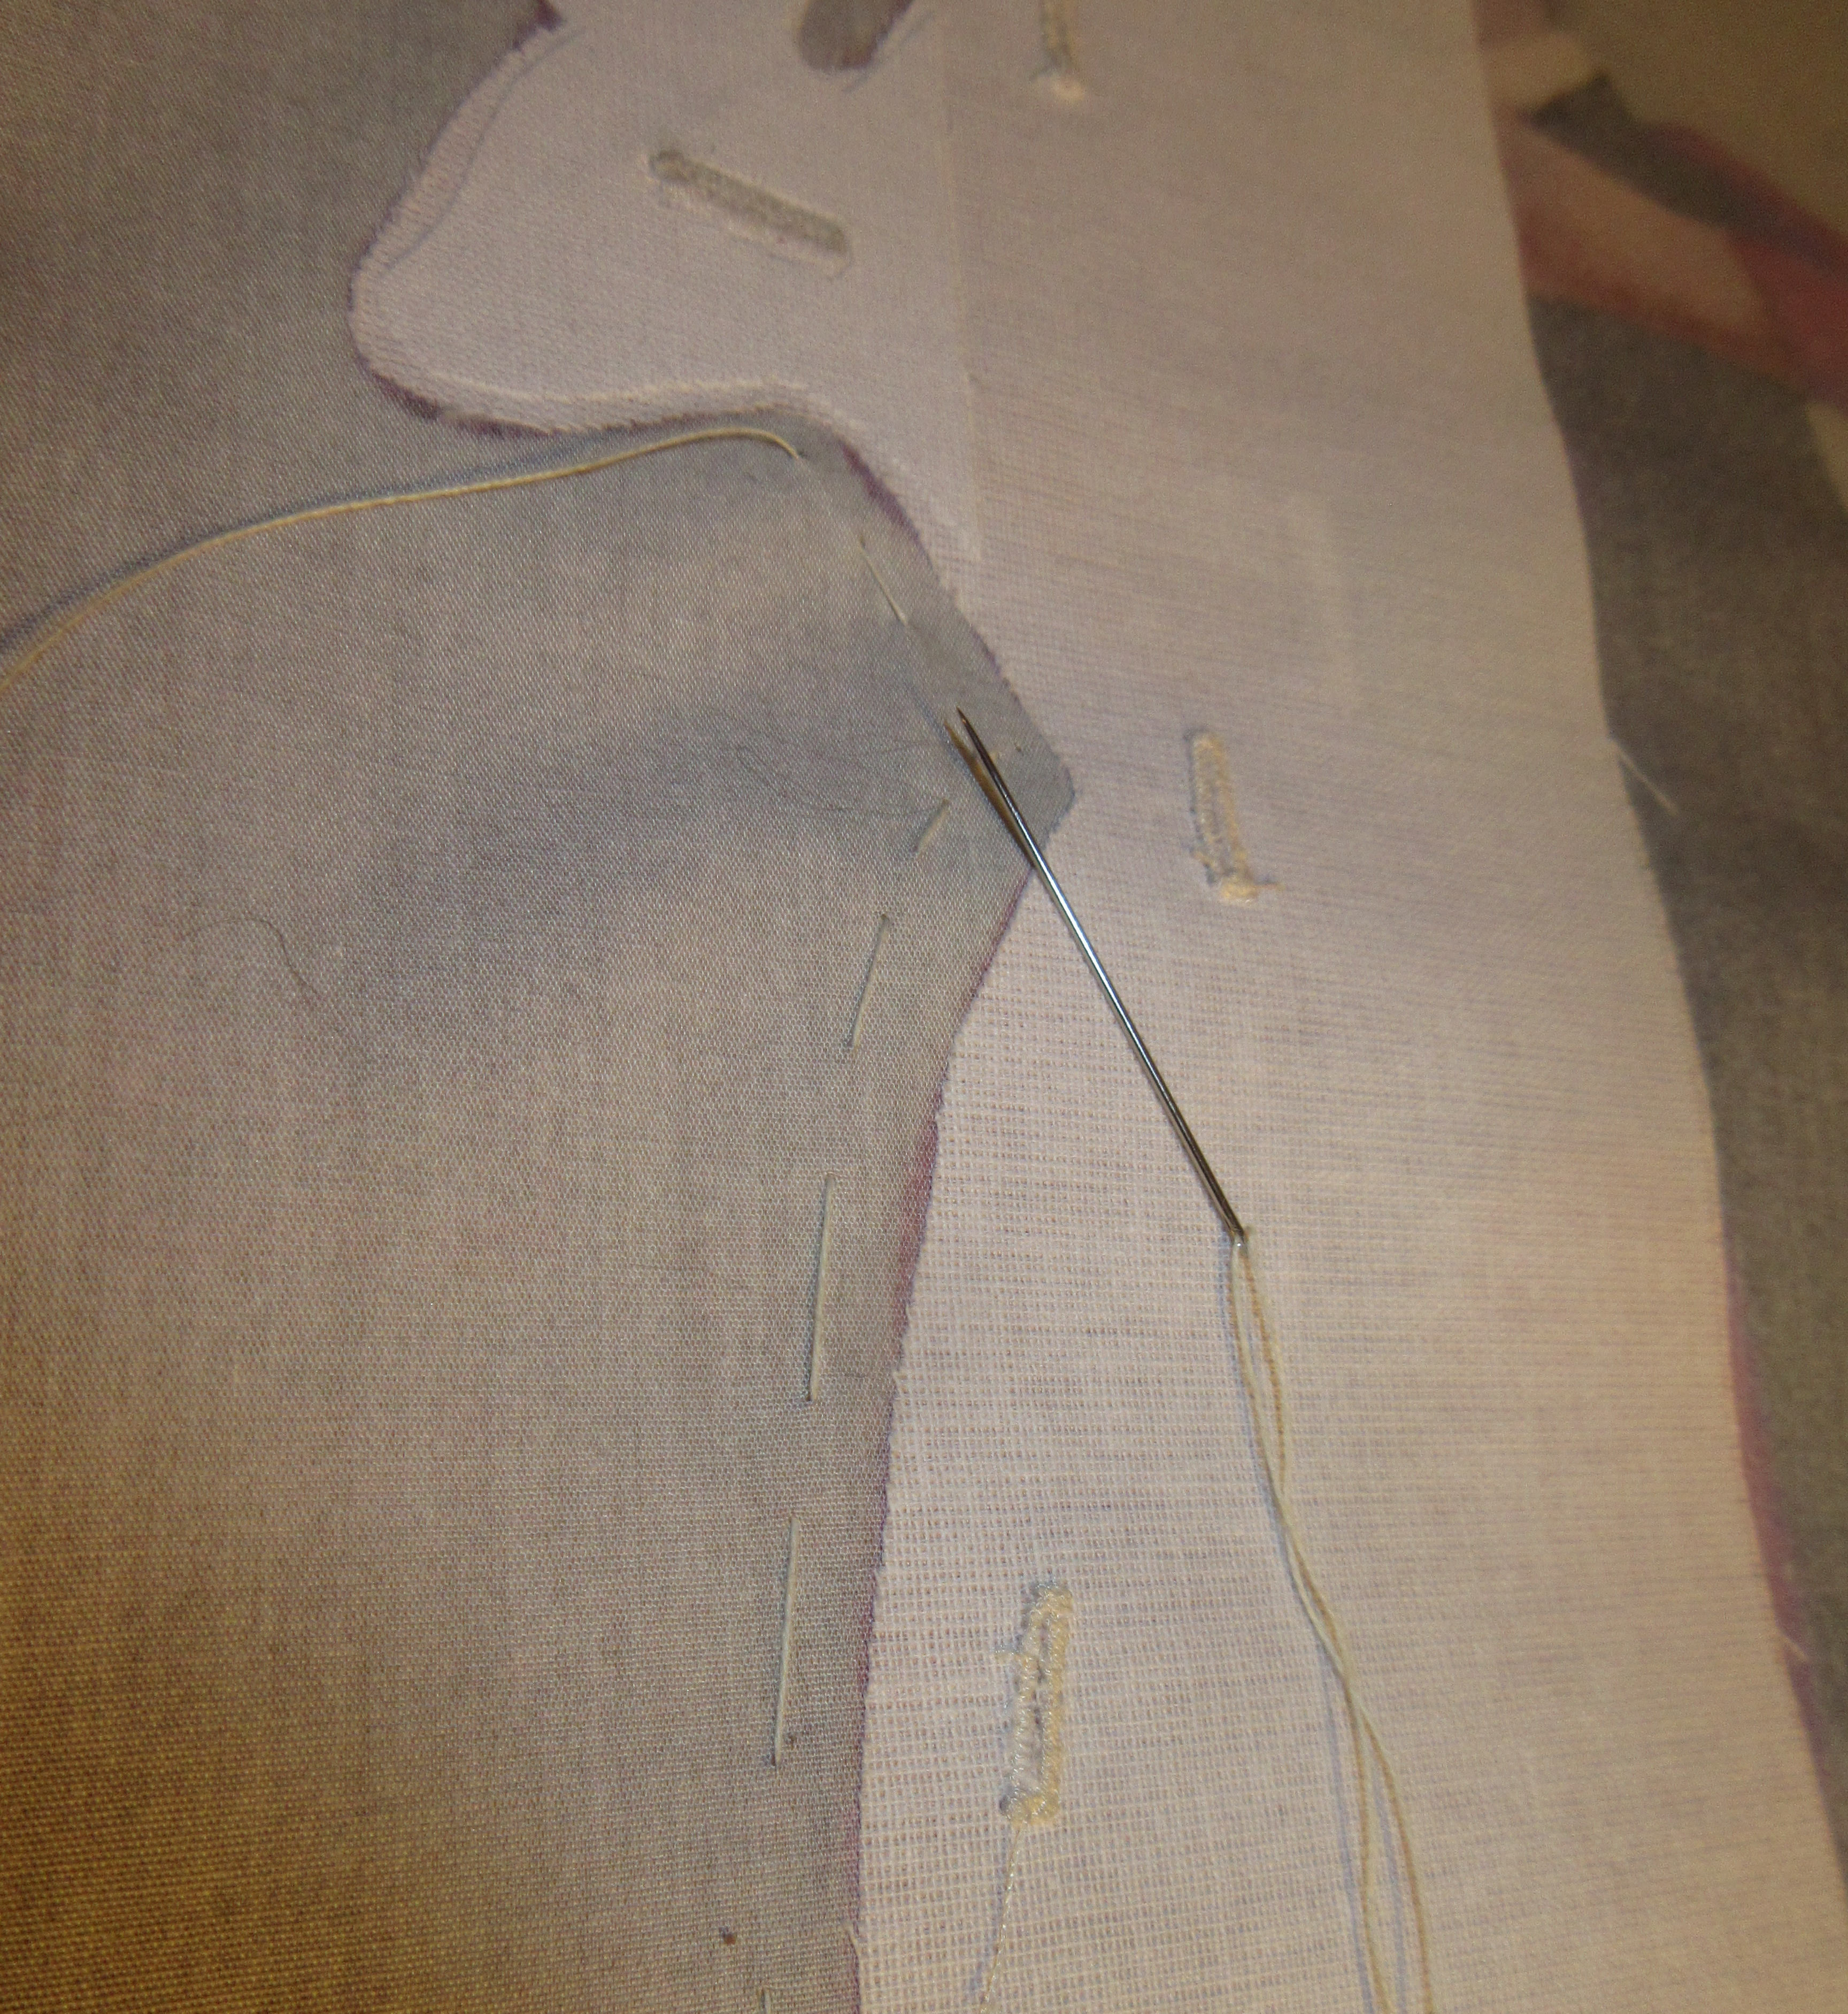
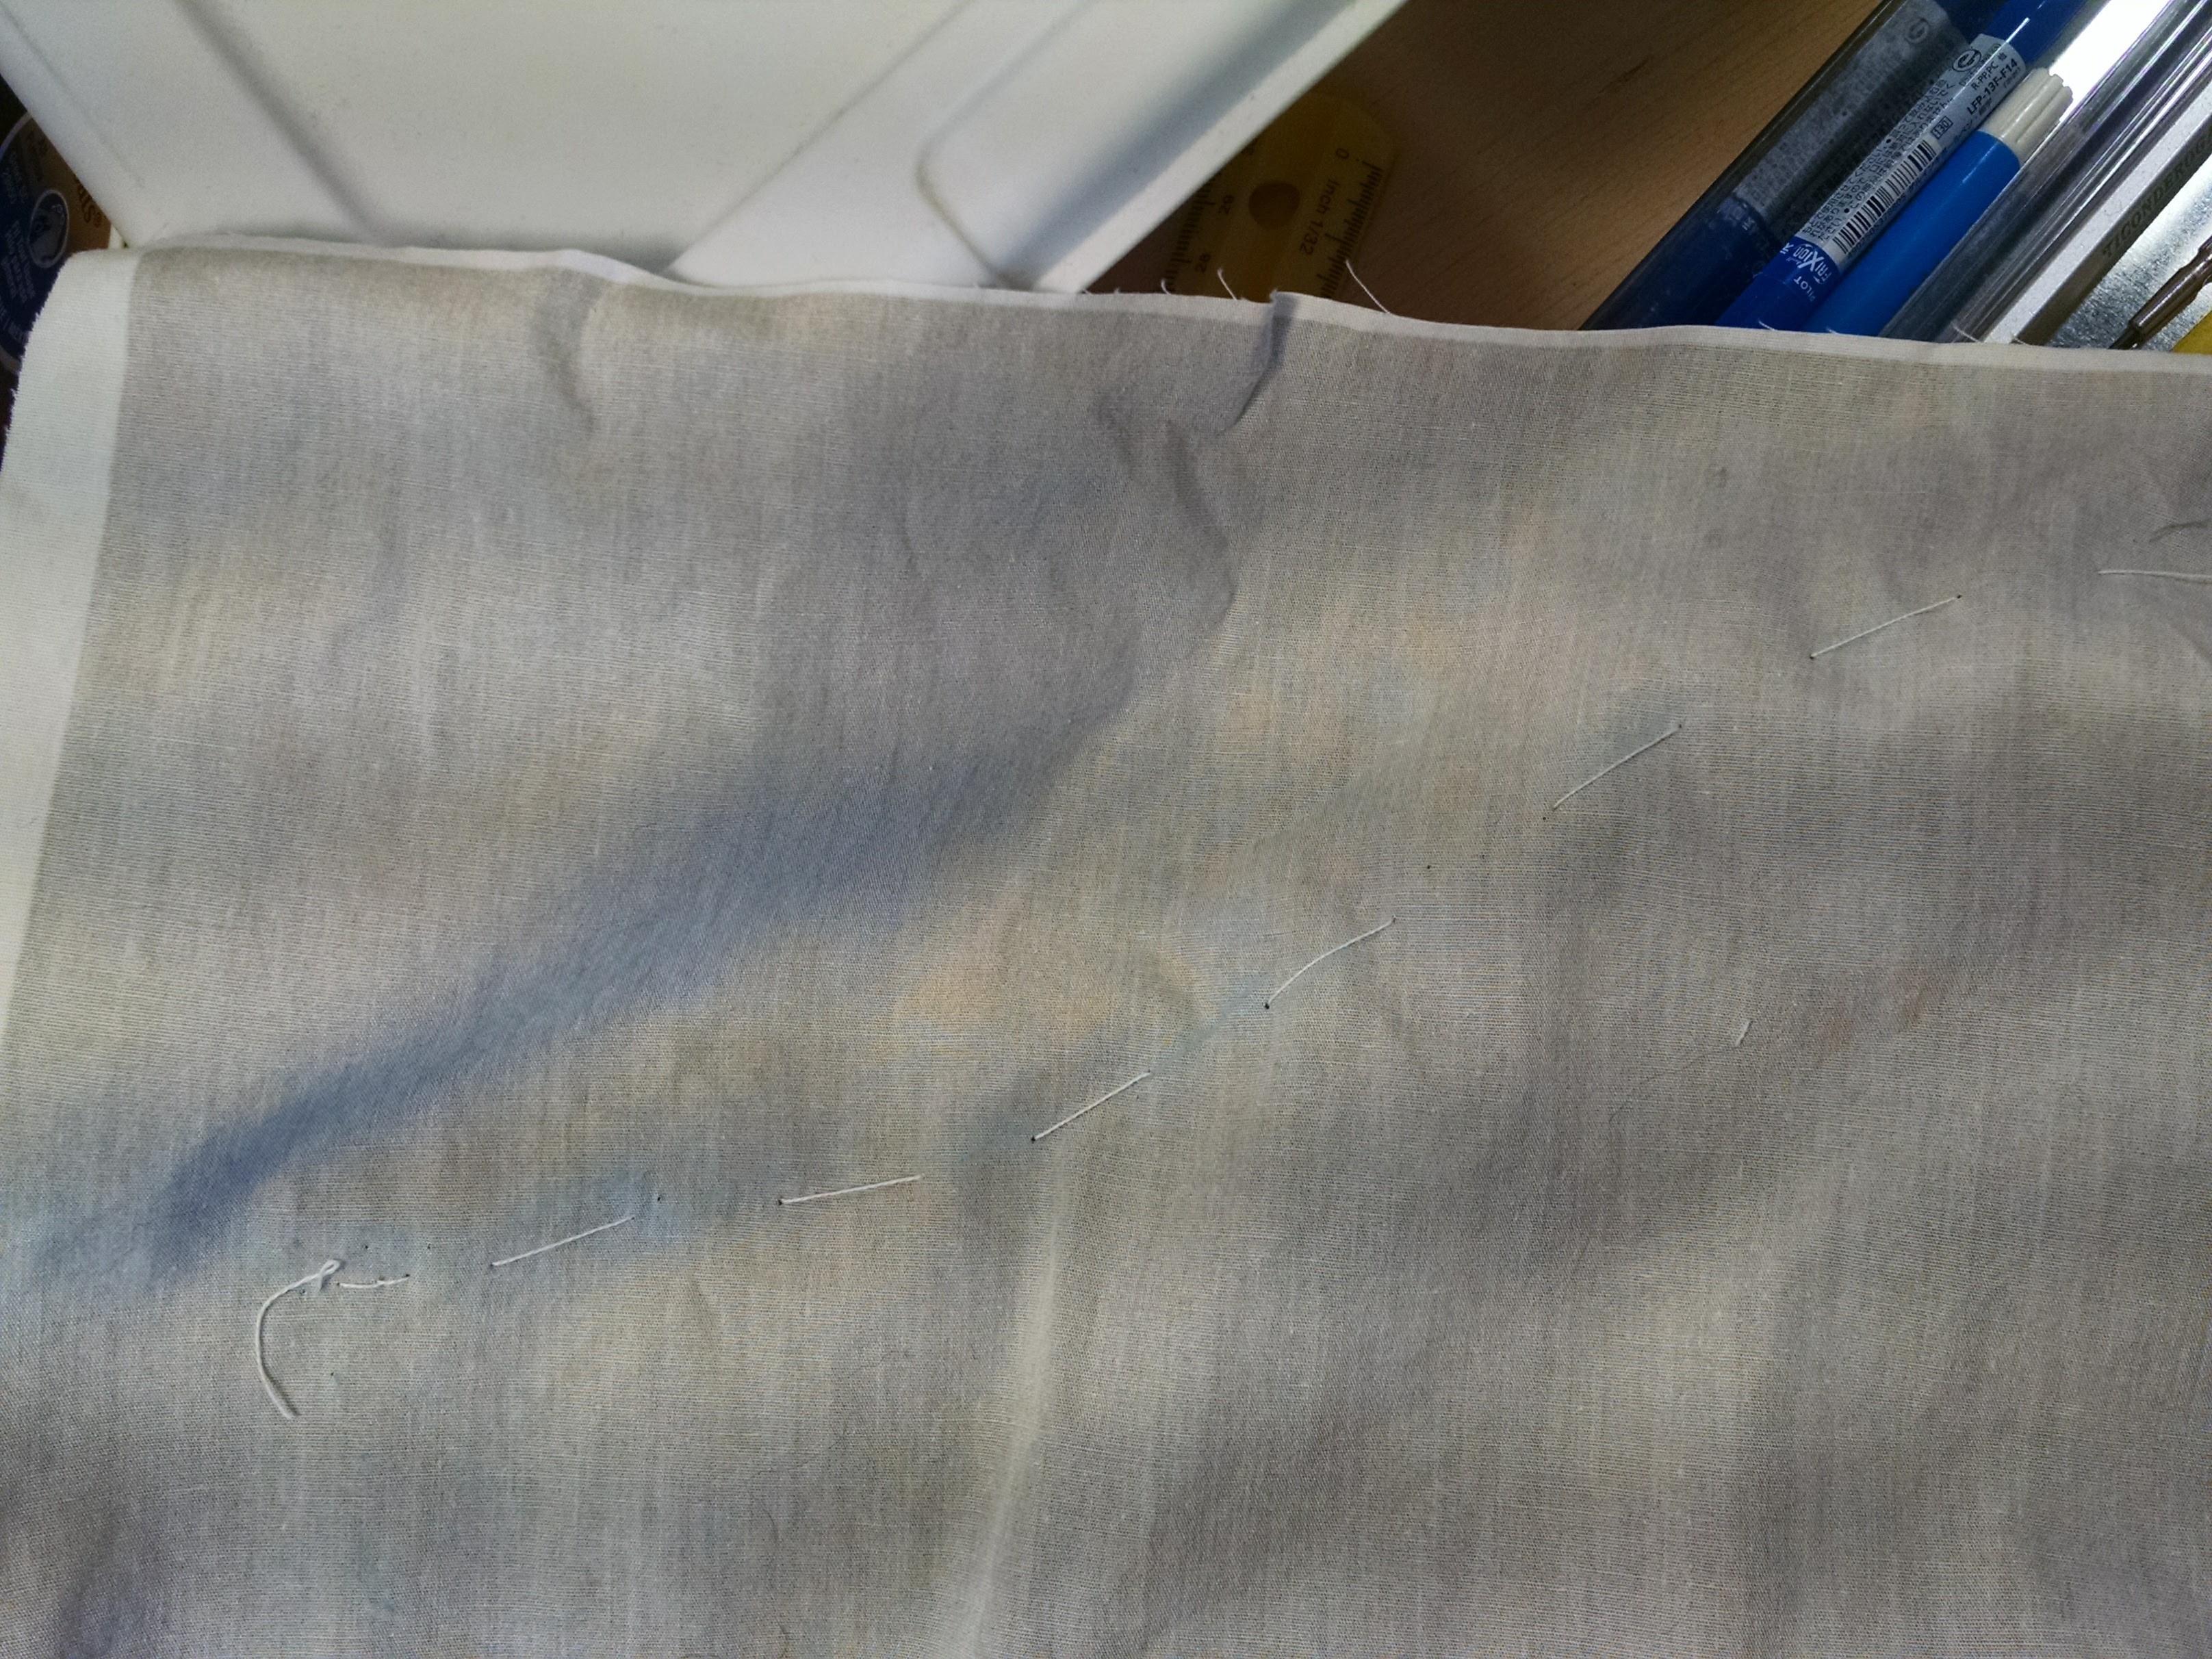
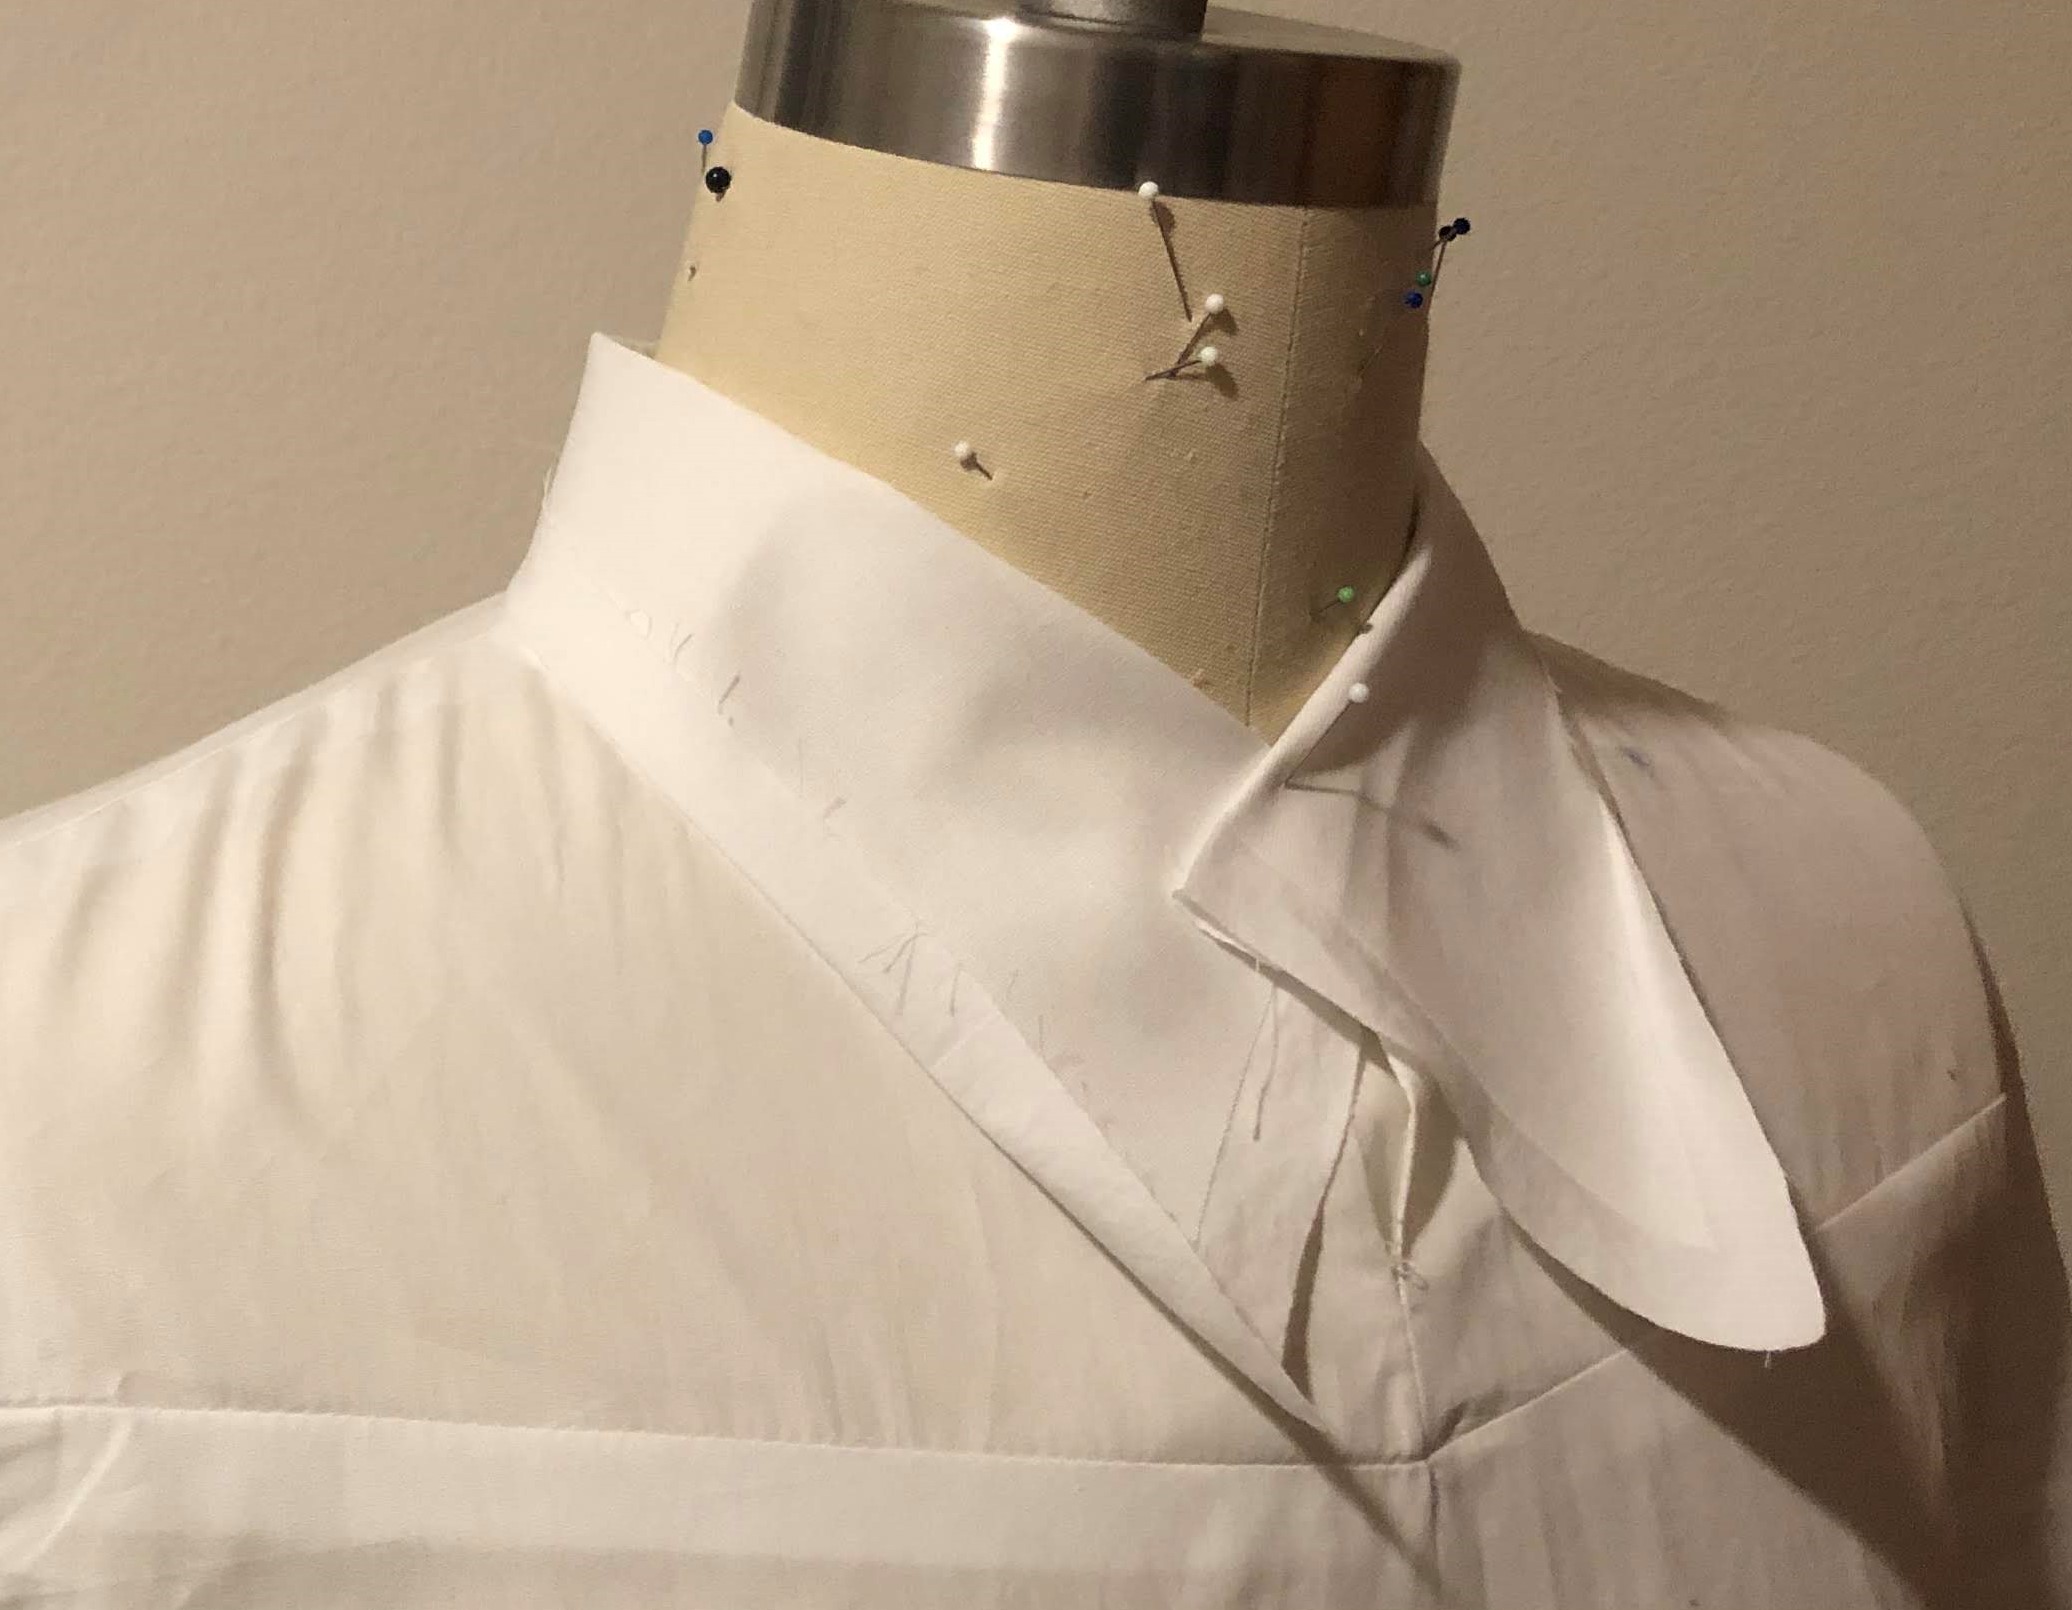
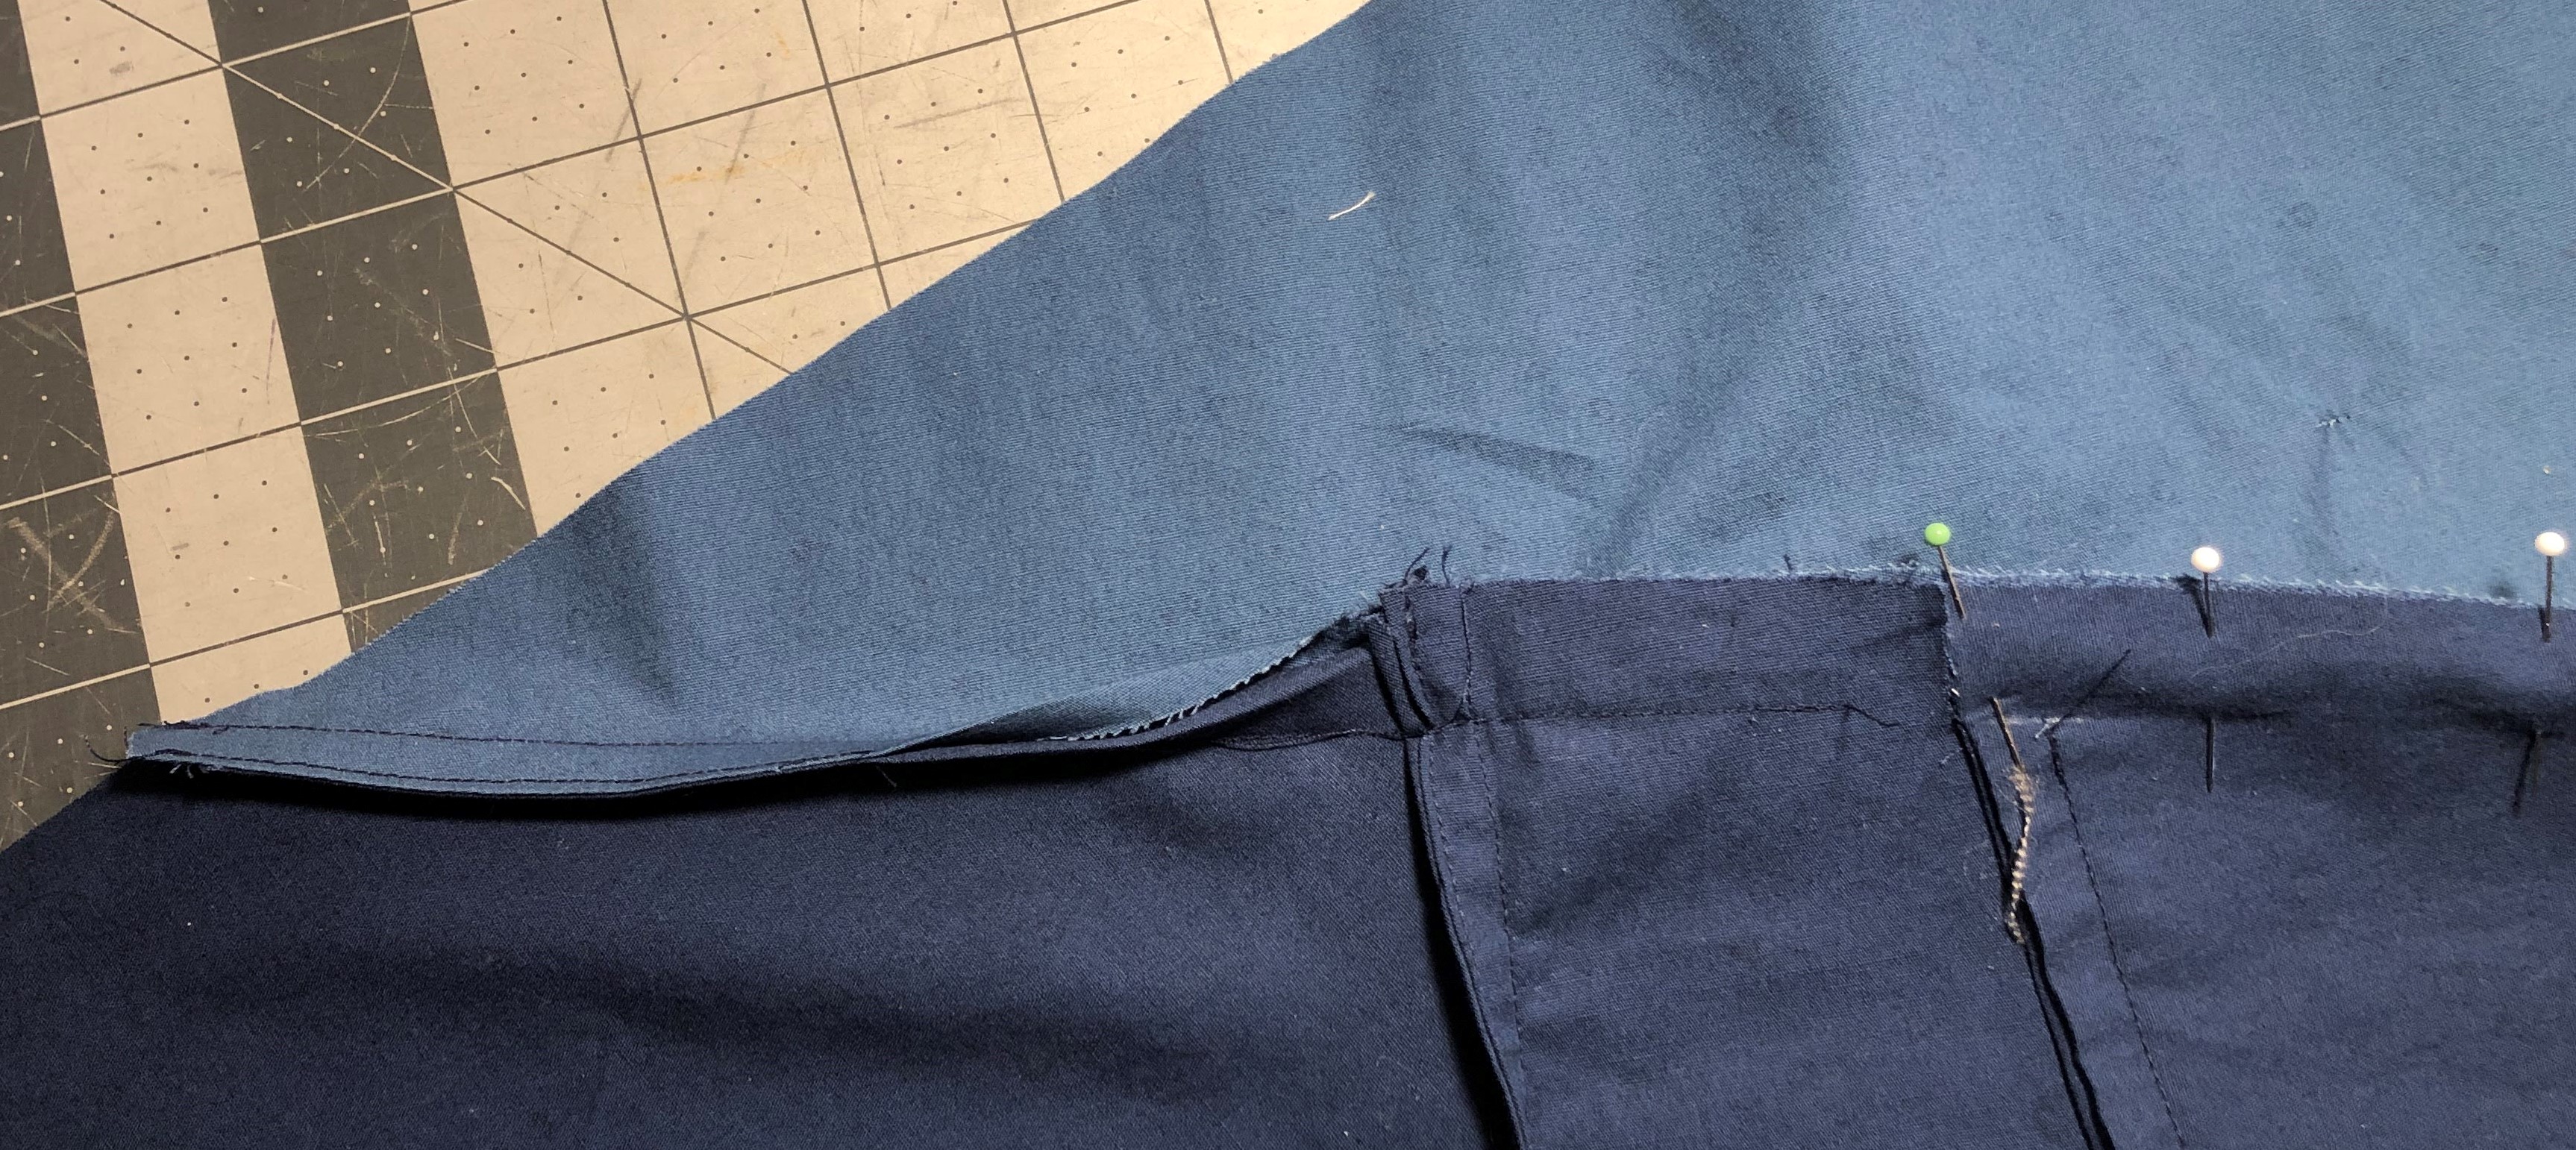
I was glad I was thinking of the construction while I was designing the pieces, so I could actually devise solutions before I needed them. In the end I decided to attach the front yoke half way, and make part of the (faux) French seam. This allowed me to sew the full shoulder seam and attach the collar. Once that was done, the facing could be attached and the final parts of the front yoke seam could be finished. Below you see part of the seam finished, while the rest is still pinned.

For all the headaches that the construction of the shirt itself caused, the one thing that went easily, yet that I thought would be a problem, was the hidden front pocket. Both the design and the construction was straightforward.

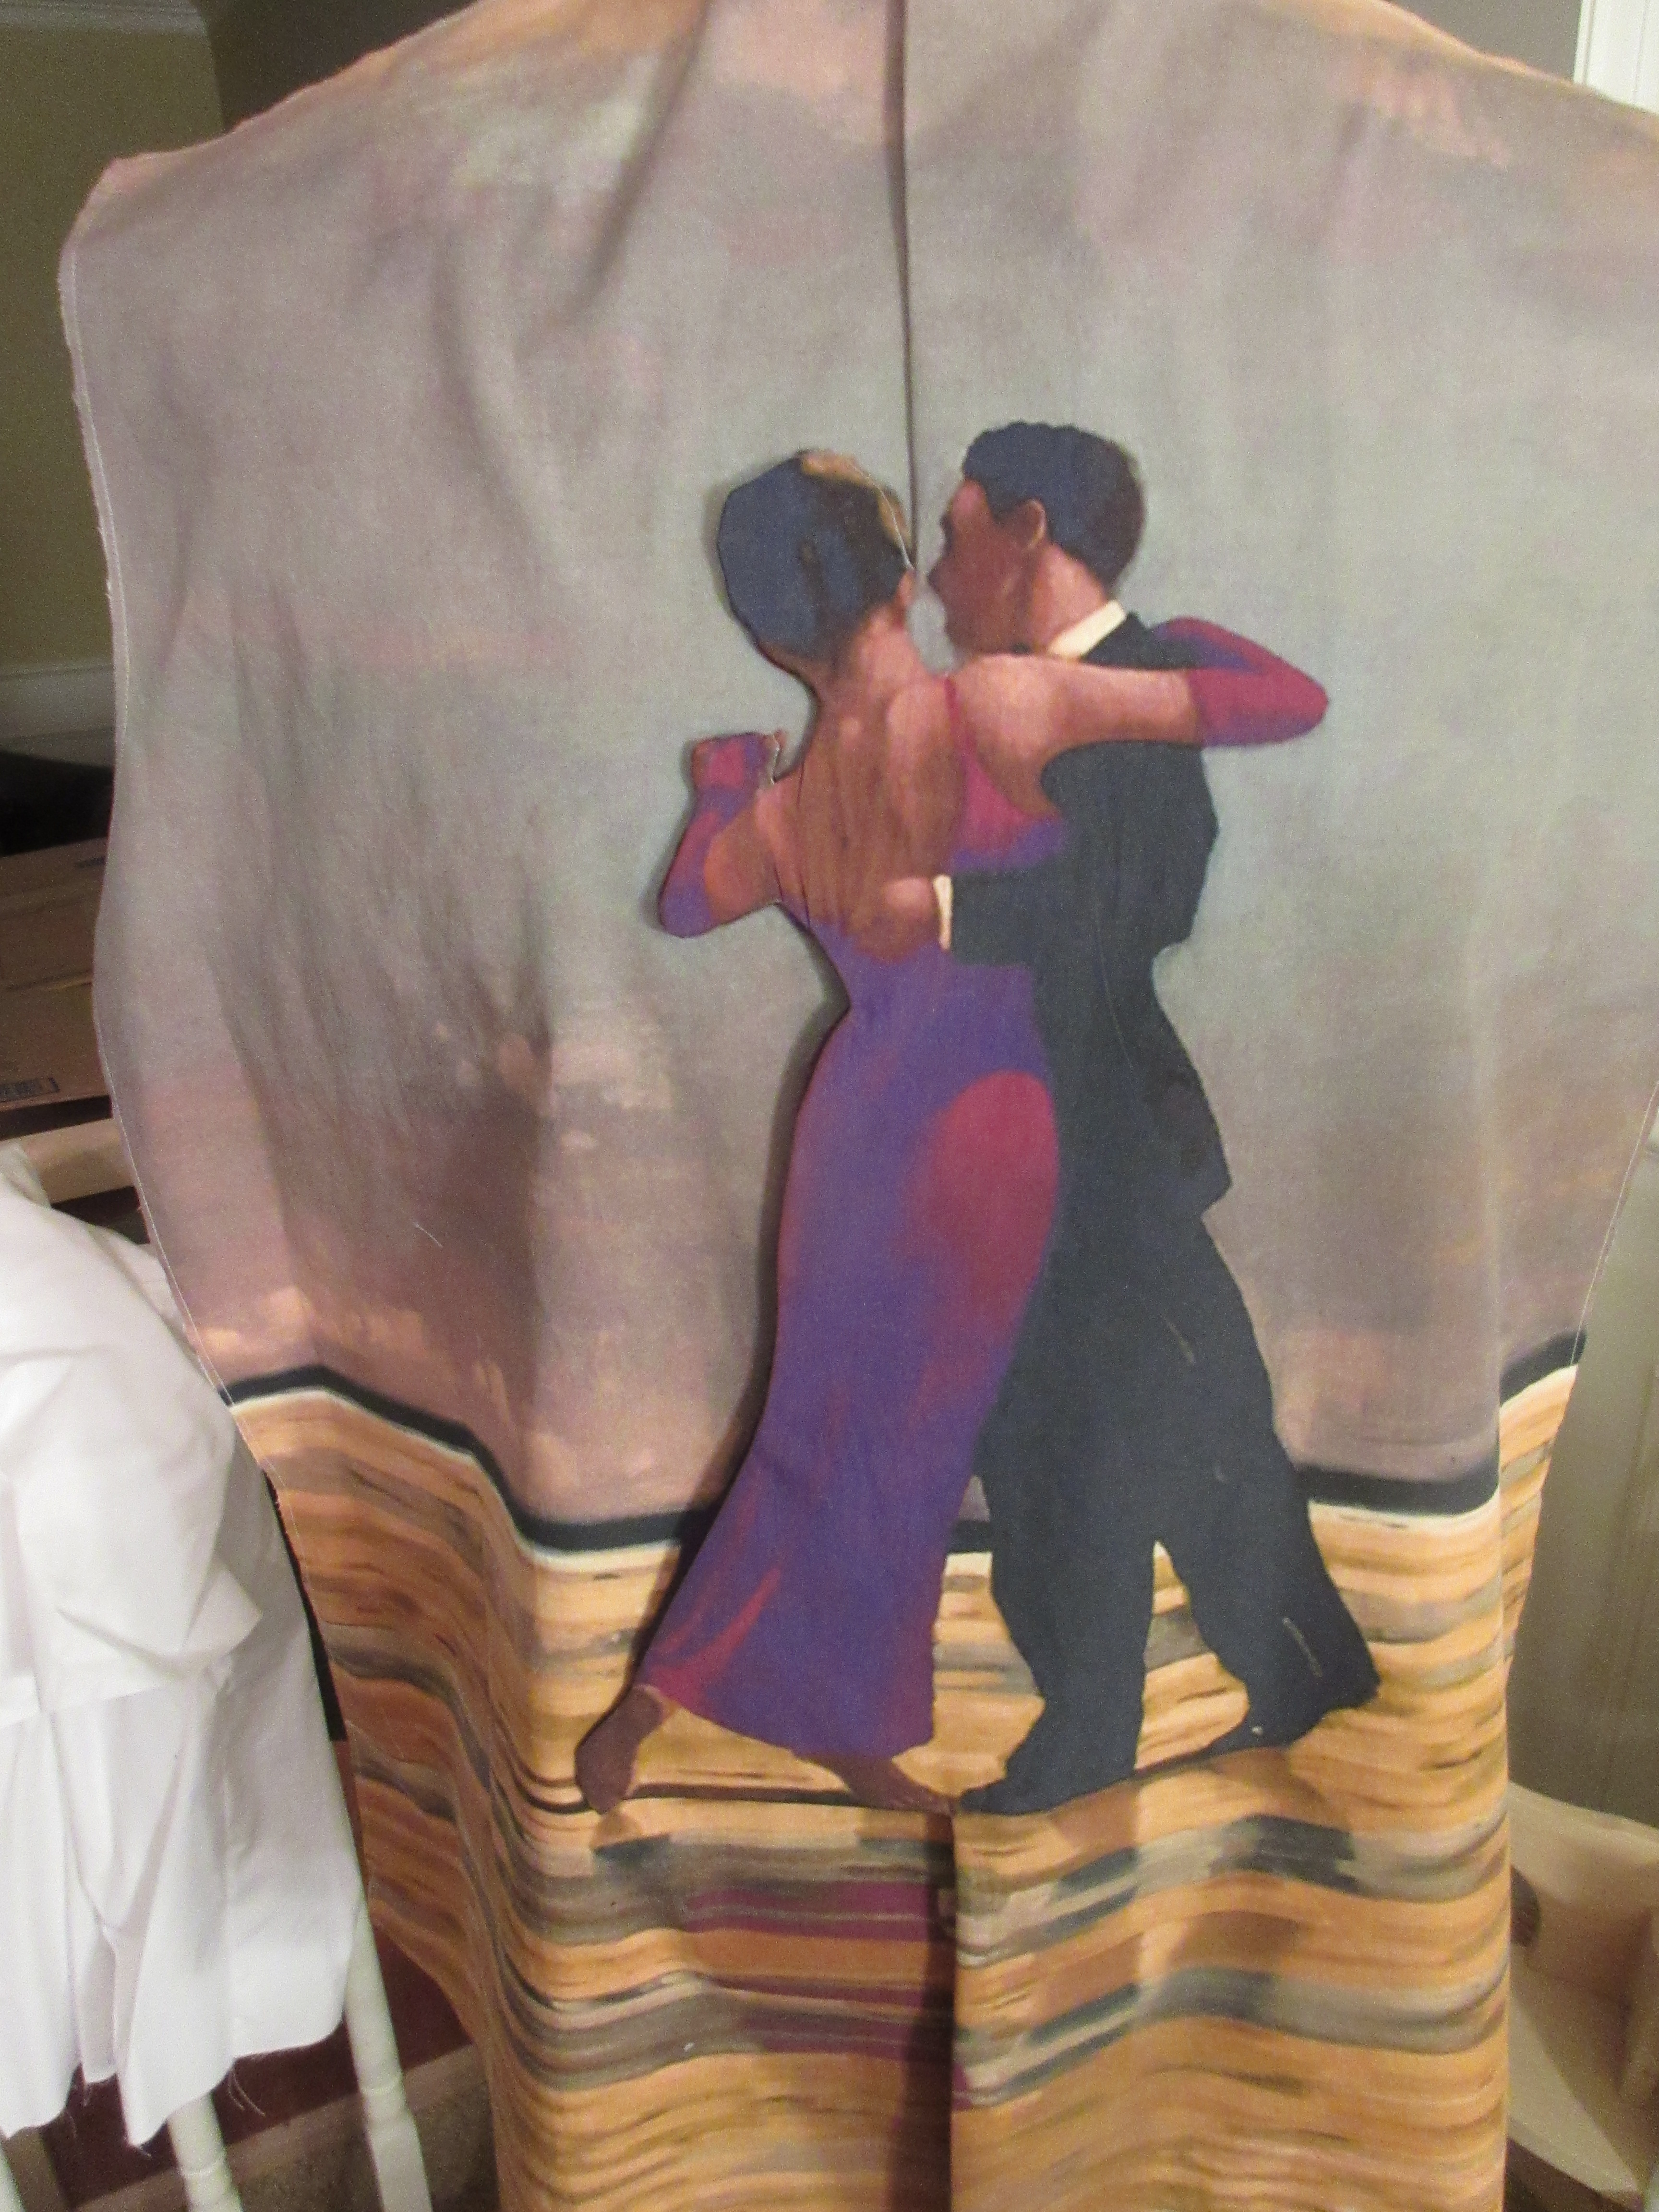
I’m rather pleased with the end result. Does it resemble the original McCall’s pattern? I don’t know. All I still have to go by are the two photos of the pattern sleeve. It doesn’t matter all that much though. I set out to make a shirt that looked like that one, and I think I succeeded in that. I (or Duane) challenged me and trying to meet that challenge felt great. And I ended up with another shirt, one I’m wearing now.

PS. Making a muslin is a very good idea. The 4½ inches of front opening was based totally on aesthetics. It also turns out to be just about the minimal opening size that I can still get my head through. Good thing I could test this before cutting into the real fabric. It would have been really funny if I would have made a shirt I could not actually put on.

Thanks for reading!

?

Another art shirt. This time without a special print. Just nice white shirting fabric.

It is one of those ideas that had been sitting and brewing in my mind for a long time. Thinking about it, throwing the concept around, and never daring to give it a go. For at least three years I didn’t think I had the skills to make it. Until one day I got enough courage to try.

When I just started making shirts I looked at all the parts that make up a shirt. And pondered why they all were the way they were. And how you could change them. Different collars, different closures, different sleeves. I started looking at where the collar meets the placket. And then it struck me that a collar looks very much like a placket. Could I make a collar that turns into a placket? Or a placket that turns into a collar?

Making this possible would require a lot of experimentation on the dress form. Start with a shirt and a lot of paper, and keep tweaking until you have something that looks like what is in your mind. That was the plan.

There were multiple things I could do with the placket; have it extend from the collar in a diagonal and let it disappear somewhere in the side seam, go straight down the front, or some thing else? Down the front would not work, for you would not be able to make the collar turn into a placket smoothly. Making it go into the side seam seemed to distract from the concept I was trying to create. So I decided on making it go in a slow curve that would go down the right side of the shirt, just 4 or 5 inches right of centre.

I started with the collar pattern piece of my standard shirt, took off the seam allowance, and pinned it in place. Then added some paper to make the right side point straight down along the centre front. Traced that onto a new piece of paper and added a large piece to the left side. Pinned that in place and started sketching where the natural sweep of the collar would end up. With that established, I could start sketching where the curve down the front would end up on a larger piece of paper.

The transition from collar to the front of the shirt presented some issues. It was rather difficult to get it to follow the contours of the form. To solve this I started from both ends, the collar on one side, and bringing the placket up from the other. Then join them where they would meet, at the junction of the shirt front and the collar band. This turned into an interesting pattern piece.

With the collar drawn, I could start transferring the parts onto my regular pattern pieces. Using the centre front of the shirt and the collar band as a reference, I just positioned them on top of each other and traced onto a new piece of paper. It is a tracing paper I buy from art supply stores that I use almost exclusively for my pattern drawing and tracing. It is not flimsy, easy to see through, and available in long rolls of different widths.

What I could not figure out well was the shape the collar band should get. The collar is supposed to flow from collar to placket, but the collar band cannot flow into the front piece. The collar band would have to remain separate. I decided to just leave extra fabric on it on the left side and sculpt it while it was on the form. Even using the muslin to figure this out didn’t give me consistent results.

I had some beautiful dobby shirting in my stash that seemed perfect for this project. Making these weird pieces was an interesting experience. Only the back, the yoke, and the sleeves were normal. All the rest made me feel like I was learning how to make garments all over again. Because of the weird shapes, it also took a lot more fabric than a shirt normally would. Specially the collar and the back of the right-side placket.

The construction of the collar band went a lot easier than I expected. I just kept tweaking the end of the fabric until it sat right. Then I marked the crease and sewed along the marked line. After that I could attach the collar / placket and I could continue with the shirt construction as normal.

This design of the placket created a hidden button feature that went well with the overall look I was going for. Figuring our where the buttons should be took a little experimenting. I didn’t want to have a button every half an inch, and their position alters how well the front sections follow the contours of the body. There is still a slight ripple from my right shoulder to the collar / placket that shows sometimes. I couldn’t get rid of that without adding more buttons, or introducing other imperfections elsewhere.

This was a very fun project to do. Having thought about it for so long before I actually began its construction made a lot of the details easily fall into place. It turned out pretty much exactly as I had envisioned.

Why the question mark? Throughout the project I kept thinking that the main feature of the shirt looked like one.

Thanks for reading.

IMG_1427

The Rainbow Shirt

Or the Skittles Shirt, as my daughters like to call it

Some four years ago, Peter Lappin of Male Pattern Boldness revealed Micheal’s Crossword Puzzle Shirt. And I just knew that I have to have one too. Peter documented the name and manufacturer of the fabric well, so obtaining that was not an issue. I wanted this to be a fitted shirt, and my only fitted shirt pattern was McCall’s 8889. This has a hidden button placket, instead of a sewn-on placket in Peter’s version. Wanting to copy the master’s vision, I figured I’d set out to adapt my pattern to include a different placket.

This meant I would have to make a muslin to test the changes I made. Specially since this was in the infancy of my sewing days and I didn’t quite know what I was doing with pattern changes. The changes turned out fine and the crossword shirt was made.

I ended up with a great shirt, and a very fine muslin. A really well done muslin. Seemed like it would be silly to let it go to waste. Some short sleeves were added and it almost looked like a real shirt. But it was white. Very white. Boringly white. And I was not in the business of making boring garments. Something had to be done.

Since the whole shirt was already constructed, there wasn’t much I could do with pleats, bibs, etc. The only thing that I hadn’t finished were the buttons. And with that a plan was beginning to take shape; what if I use different coloured buttons?

This created a quest to find identical, but differently coloured buttons. That shouldn’t be too much of a hassle. Wrong. None of the fabric and quilting stores around here had more than 4 colours of the same shirt buttons. I even had my daughters go through pots of old buttons in one of the stores, trying to find matching ones. Nothing.

il_570xN.611246581_nvvo

All the way from Thailand!

I decided to continue the quest online and came across these at an Etsy store. Only being $6 for 100 buttons, I felt that I could not go wrong. Patience was required, as they had to come all the way from Thailand!

When they finally came, there were many more colours than I had expected. I was hoping for some 7 or so that would complement each other well. Here I was with over 20 different colours and all were fun. How to decide which colours I should use?

Many different combinations were created by each member of the family. One thing we figured out quickly was that we all had our own favourite ones. Then it came to me. Why limit myself to the usual 7 buttons down the front? If I have so many colours, why not use them all? And with that, The Rainbow Shirt was born!

Measuring the placket on the front and looking at how many buttons I could use, I came to the conclusion that 1 inch spacing would be good. This in contrast to the normal 3 to 3½ inch spacing you see on shirts. That would be a lot of buttons and button holes. And after 23 button holes and 23 buttons, the shirt was done.

rainbow
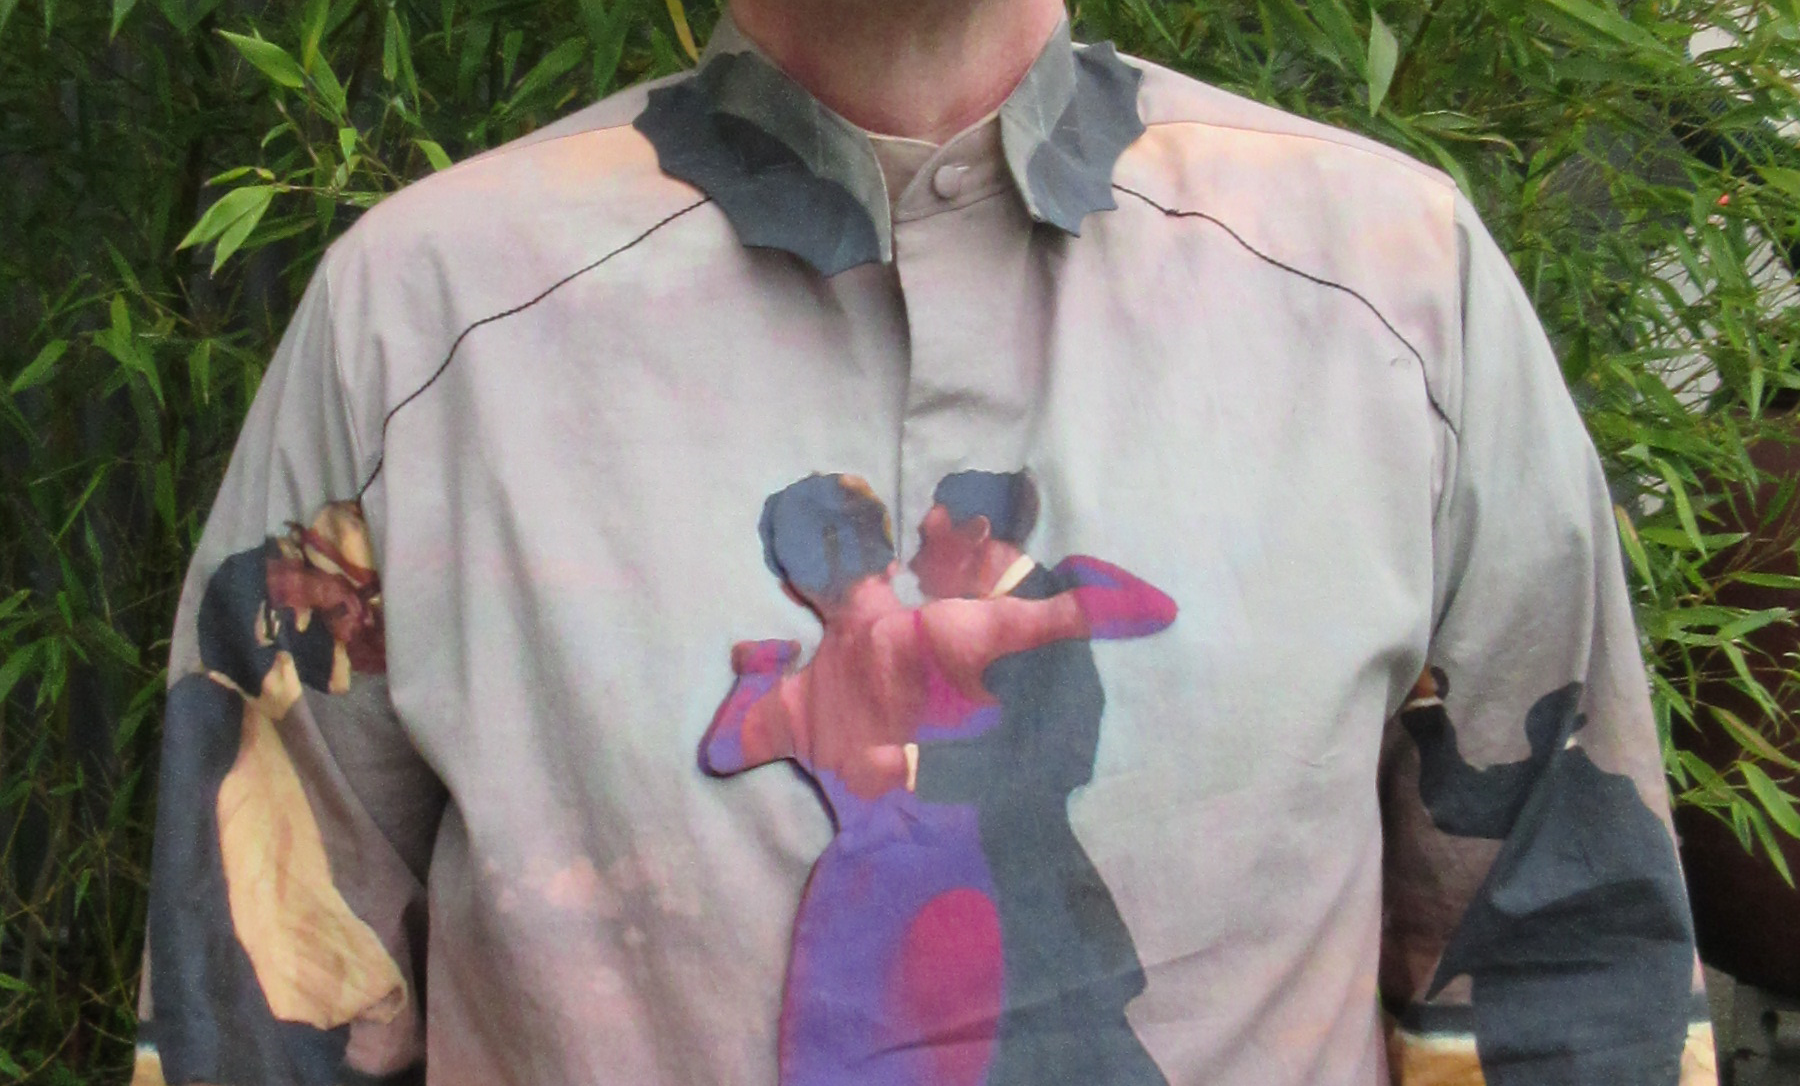
I wore it to that year’s Christmas dinner of my partner’s company with some boring slacks and a sports jacket. Lots of remarks, and all very positive. Great evening, good company, nice food, and a lot of dancing.

The next day I threw it in the laundry, so it would be ready for the next time. And when that next time arrived I noticed something alarming. This was a fitted shirt. And the pattern fits me nicely. And I made the shirt precisely to the pattern. Using nice muslin fabric. That I hadn’t washed before using it! The shirt had shrunk quite a bit during the laundry. So much so that I couldn’t close the collar anymore, and there was absolutely no ease across the chest. I really could not wear the shirt anymore. After all this time spend on it (do you know how long it takes to sew on 23 buttons?) the shirt was relegated to the back of the closet.

That was three and a half years ago. Ever since the day I put it away it bothered me. It was a good shirt. It deserved a version 2.0! So a couple of months ago I finally bought some nice white shirting fabric and I set out to make the exact same shirt. This was a new experience for me. I had remade a RTW shirt, and remade design failures. But I hadn’t made a shirt I had already made exactly like the original. And I had to, I didn’t feel like there was anything about the shirt I should change.

The construction was a breeze. The only things I did differently from my normal shirt construction is that I added the button holes and buttons before attaching the front panels to the other parts of the shirt. With 23 button holes to make, it’s a lot easier to have a small piece of fabric to manoeuvre than the whole shirt. It just takes some precision to know where to start the first button and hole.

The only issue was that when I marked the top of the sleeve to align it with the shoulder seam, I grabbed a ballpoint that was not a frixion. How that pen ended up in my sewing accoutrements, I will never know. But my heart almost stopped when I saw that while ironing, the mark didn’t disappear. After some testing I found that Shout! and generous amounts of bleach will take care of it. The pen has been relegated to the waste bin.

I’m really happy with how this turned out the second time around.

And here are they both together:IMG_0908

Thanks for visiting!

The Singing Butler

After my first Art Shirt worked out so well, I needed to make another one. I knew this even before I finished making the first. This is in stark contrast with the first shirt. I don’t really recall when I decided to try to make that one. It started probably with seeing the Great Wave painting and then slowly figuring out that I could make a shirt with that.

Since I already knew I wanted to make another Art Shirt, I had to find a subject. This turned out a lot harder than the the process of starting with a painting and moving towards a shirt. Obvious classics like Starry Night and The Scream didn’t appeal to me. Those have been used for too many things by too many people.

Then one night while browsing through classic paintings I came across The Singing Butler by Jack Vettriano, and I knew I had a good one. Nice composition with the subjects in the middle, and enough flexibility for me to do things with.

the-singing-butler

Just like with The Wave, there were items I could use for the collar; the umbrellas in this case. But where I could use a mirror image of The Wave for the back of the shirt, I didn’t think that would work well here. I didn’t want to have two couples on a beach. That meant that I would have to create an empty beach. This would add significantly to the required Photoshop work.

back
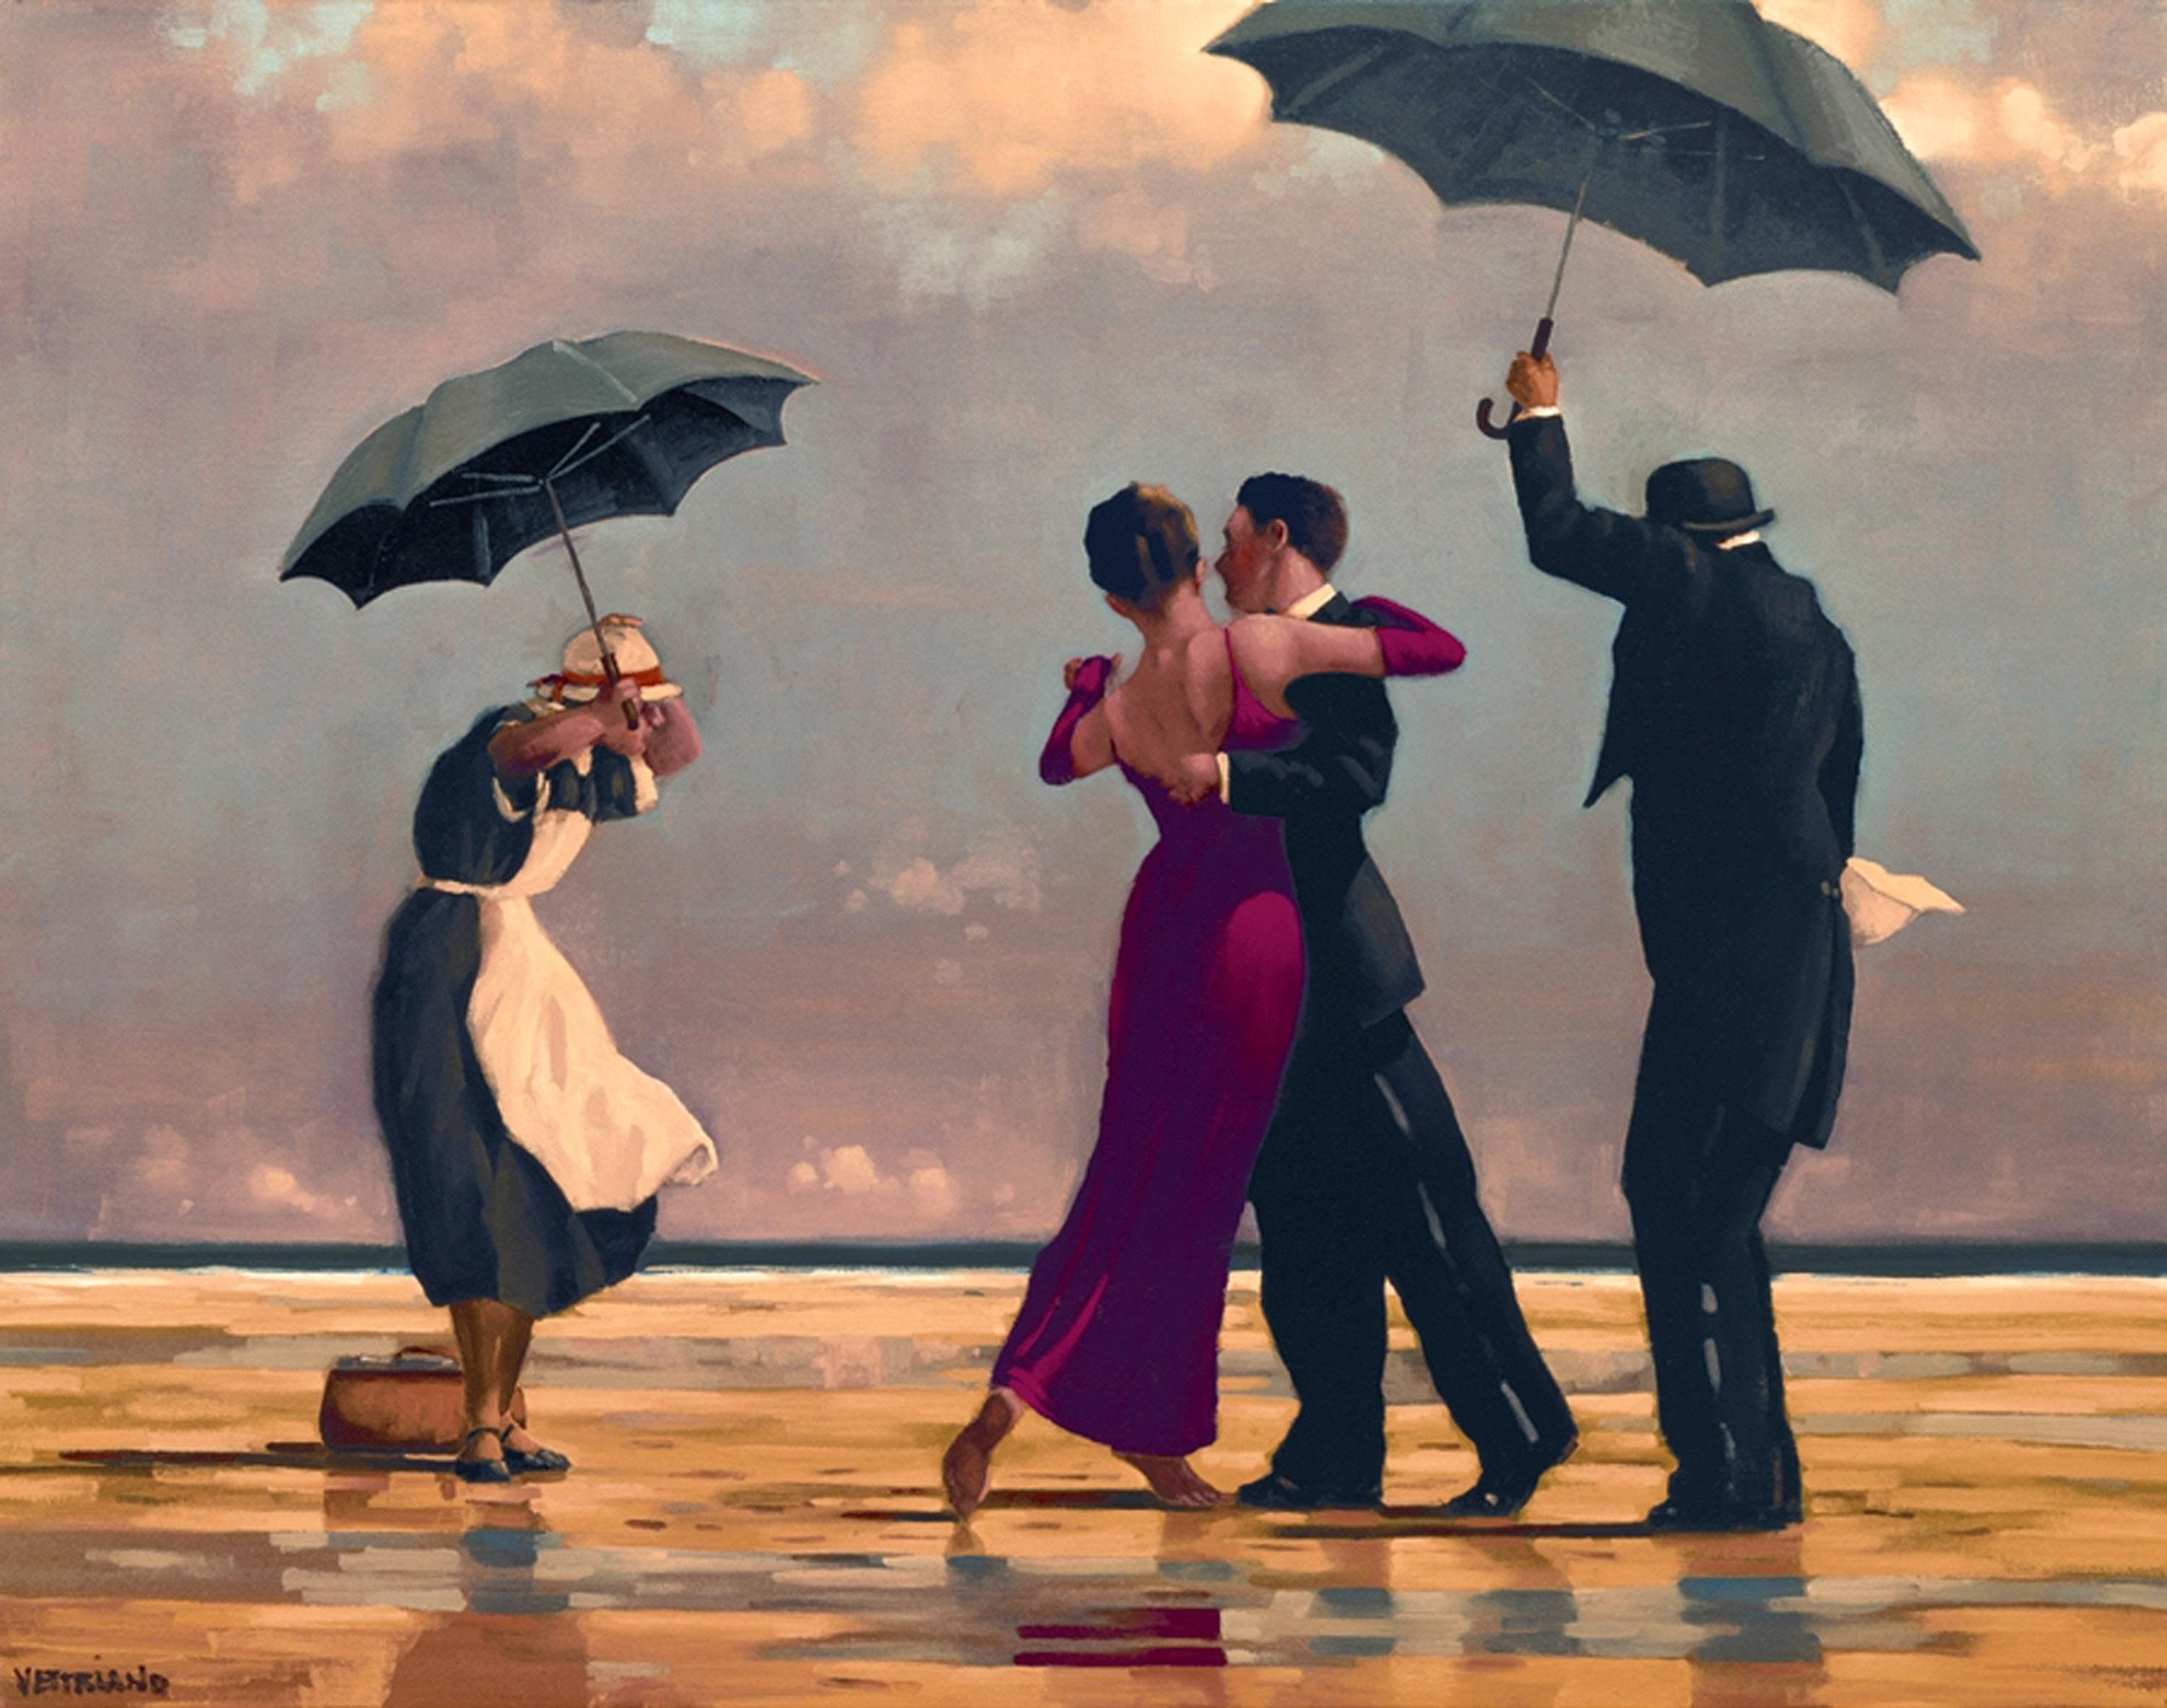
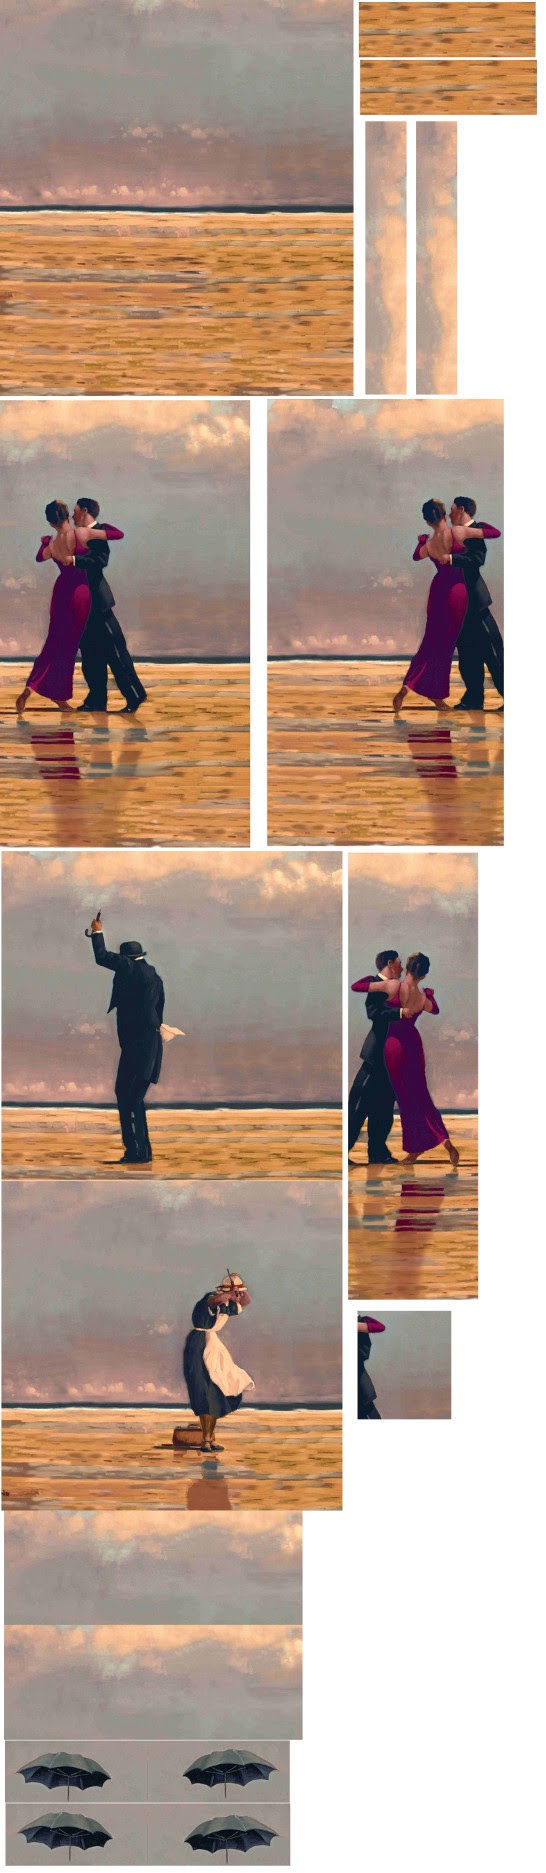
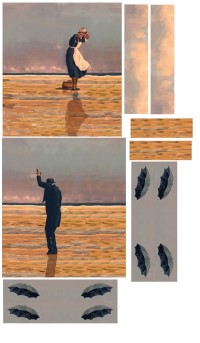
After measuring I realized that if I would tuck the shirt in my pants, I would cut off the couples’ legs. More Photoshop work to add more beach at the bottom of the painting, including new shadows and reflections for everyone. The maid and the butler would be moved to the sleeves, and the umbrellas to the collar.

the-singing-butler-Total (2)

Full 3 yards of fabric design

With those general decisions made, I could start with the design of the fabric. This phase went pretty well, and the way it is painted made tweaking it not all that hard.

Then I had to make a decision on what to do with the front closure. I considered having the two sides split between the dancers, with the lady on the right and the gentleman on the left. The way their arms were held made that too difficult. I figured I would put both the dancers on the left front of the shirt and have the closure follow the outline of the lady. Then how to close then shirt? Showing buttons on the front would ruin the image. Using something like velcro would never sit right. Hidden buttons it would have to be. But I also didn’t want to have any top stitching show.

After researching this and even asking for ideas on The Cutter and Tailor forum, I decided on making a double-layered front with buttonholes in the hidden layer. I tested this first with a muslin and it worked pretty well. Making the whole front a double layer keeps the buttons from pulling the fabric into strange twists.

Now I would have to wait a good three weeks for the fabric to be printed and arrive at my doorstep.

Since the button placket is basically the whole dancing figures, I interfaced that, and the band above and below it.

IMG_0343

Applying the interfacing to the right front. The additional inner layer is on the left.

IMG_0344

Joining both layers of the right front so I can treat them as one.

IMG_0345

Stitches within the seam allowance. This will be cut off once the shirt has been constructed.

For the left front I first had to make the inner layer, complete with the button holes in strategic places. This inner layer is partly made of a mirror image of the front. Once this was done, I could join both along the couple’s left side. Basting the layers together by hand first while checking the position of the layers, and going ever so slow on the machine made for a good result.

basting

Basting the layers together. Button holes are already made

IMG_0350

Small stitches and lots of patience.

IMG_0351

Draped the fronts on the dressform

Next task was the collar. Although this one was more elaborate than your average collar, it was still a lot easier than making the one for The Big Wave. One umbrella on each side and hopefully I had designed the distance between them correctly. This brings up an interesting tidbit; when you design the fabric for something like this, you have to keep in mind that the fabric will shrink before you get to sew with it. Knowing that your collar needs to be 19″ long, tip-to-tip means that you have to create the design to be 19″ times shrink-factor. Turning the collar was relatively easy.

Collarinterfacing

Cutting the interfacing

collar

Collar ready. Just over 19″, good enough.

And this is where the smooth sailing hit the cliffs. After attaching the collar to the stand and then to the shirt, I didn’t like the small, minimalistic collar stand I had envisioned. And the angle of the umbrellas didn’t look quite the way I wanted them. I was so upset with the result, the seamripper came out immediately and I took it off before taking a photo. Here is the offending item:

collarandband

Wrong, wrong, wrong.

the-singing-butler-Extra

Two more yards of fabric

After putting that aside, I focused my attention to the sleeves. And found another set of cliffs. I had swapped the width and height measurements for the sleeve parts and designed the fabric wrong! The parts were wider than high, while the opposite is required. Now I knew I had to redesign the fabric and order some more. Things like this is why these projects always turn out to be rather expensive. I did make sure to include two new versions of the collar, some extra cuffs and collar stands.

Of course, this gave me some weeks to focus on other things before I could continue with the project.

When the new fabric arrived, was washed three times and ready for use, I had to decide how to mount the sleeves. Since I had to order two yards of fabric, I had designed the patterns for the sleeves with a lot of extra space around them. This way I could change where the maid and the butler would end up on the sleeve. To figure out the final placement, I basted the sleeves to the body without cutting the fabric out first. It seemed an easy idea at first, and turned into more work than I anticipated. Sewing without seam allowances to line up is harder than I thought.

IMG_20170407_131618921

Following a hardly visible chalk line.

It took a couple of tries to get them lined up the way I wanted them. The rest of the sleeve construction went without a flaw. As you may have noticed, I forgot to include plackets in the fabric design. Luckily I could use the incorrectly designed sleeves to cut the plackets from.

Now that I had the sleeves in place, I had to decide on how to make the umbrella shafts. While going through the creation of the fabric, I had deliberately photoshopped them out of it. This so I could later add them when the placement of the sleeves and collar were finalized. While researching this, I came across a technique called ‘couching‘. One site I found said you could replace the bottom thread with the decorative thread, adjust some tensions, and sew it upside down. Never too shy to experiment, I tried this. First tries were not so great, but after playing with the settings some, I really liked the effect.

Since the decorative thread is on the bobbin, you cannot see the right side of the fabric while you’re sewing. I had to draw the line I wanted to follow on the inside of the shirt by poking pins in at regular intervals and connecting these. Then put it under the machine and hope for the best.

With the shirt construction completed, all that was left was adding the buttons in the right place. This is where my pattern matching obsession really helped out. I just had to look where in the pattern the button hole was and then just add the button in the corresponding spot on the other front.

IMG_0464IMG_20170413_215728_222

Closing the buttons is something to get used to. The buttonhole only goes through the first layer of the front, not through the second one. So you cannot manipulate the button once it is partly through the hole. Not extremely practical, but it looks the way I wanted it.

Here are some photos of the completed shirt.

frontsiderightBackshirt

me

Happy shirt maker

Thanks for reading. Reactions are appreciated.