Shirt and Tie

It seems like this has been a year of making facemasks and jeans. The former because we had to, and the latter because I didn’t seem to have that many. It just doesn’t feel right to dress the same as I would in the office, when I now just walk downstairs and sit in my sewing-room/home-office. So I really did need more jeans. And eventually I got tired of sewing masks and jeans, and needed to do something else.

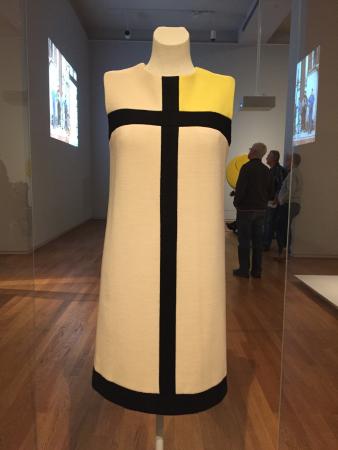
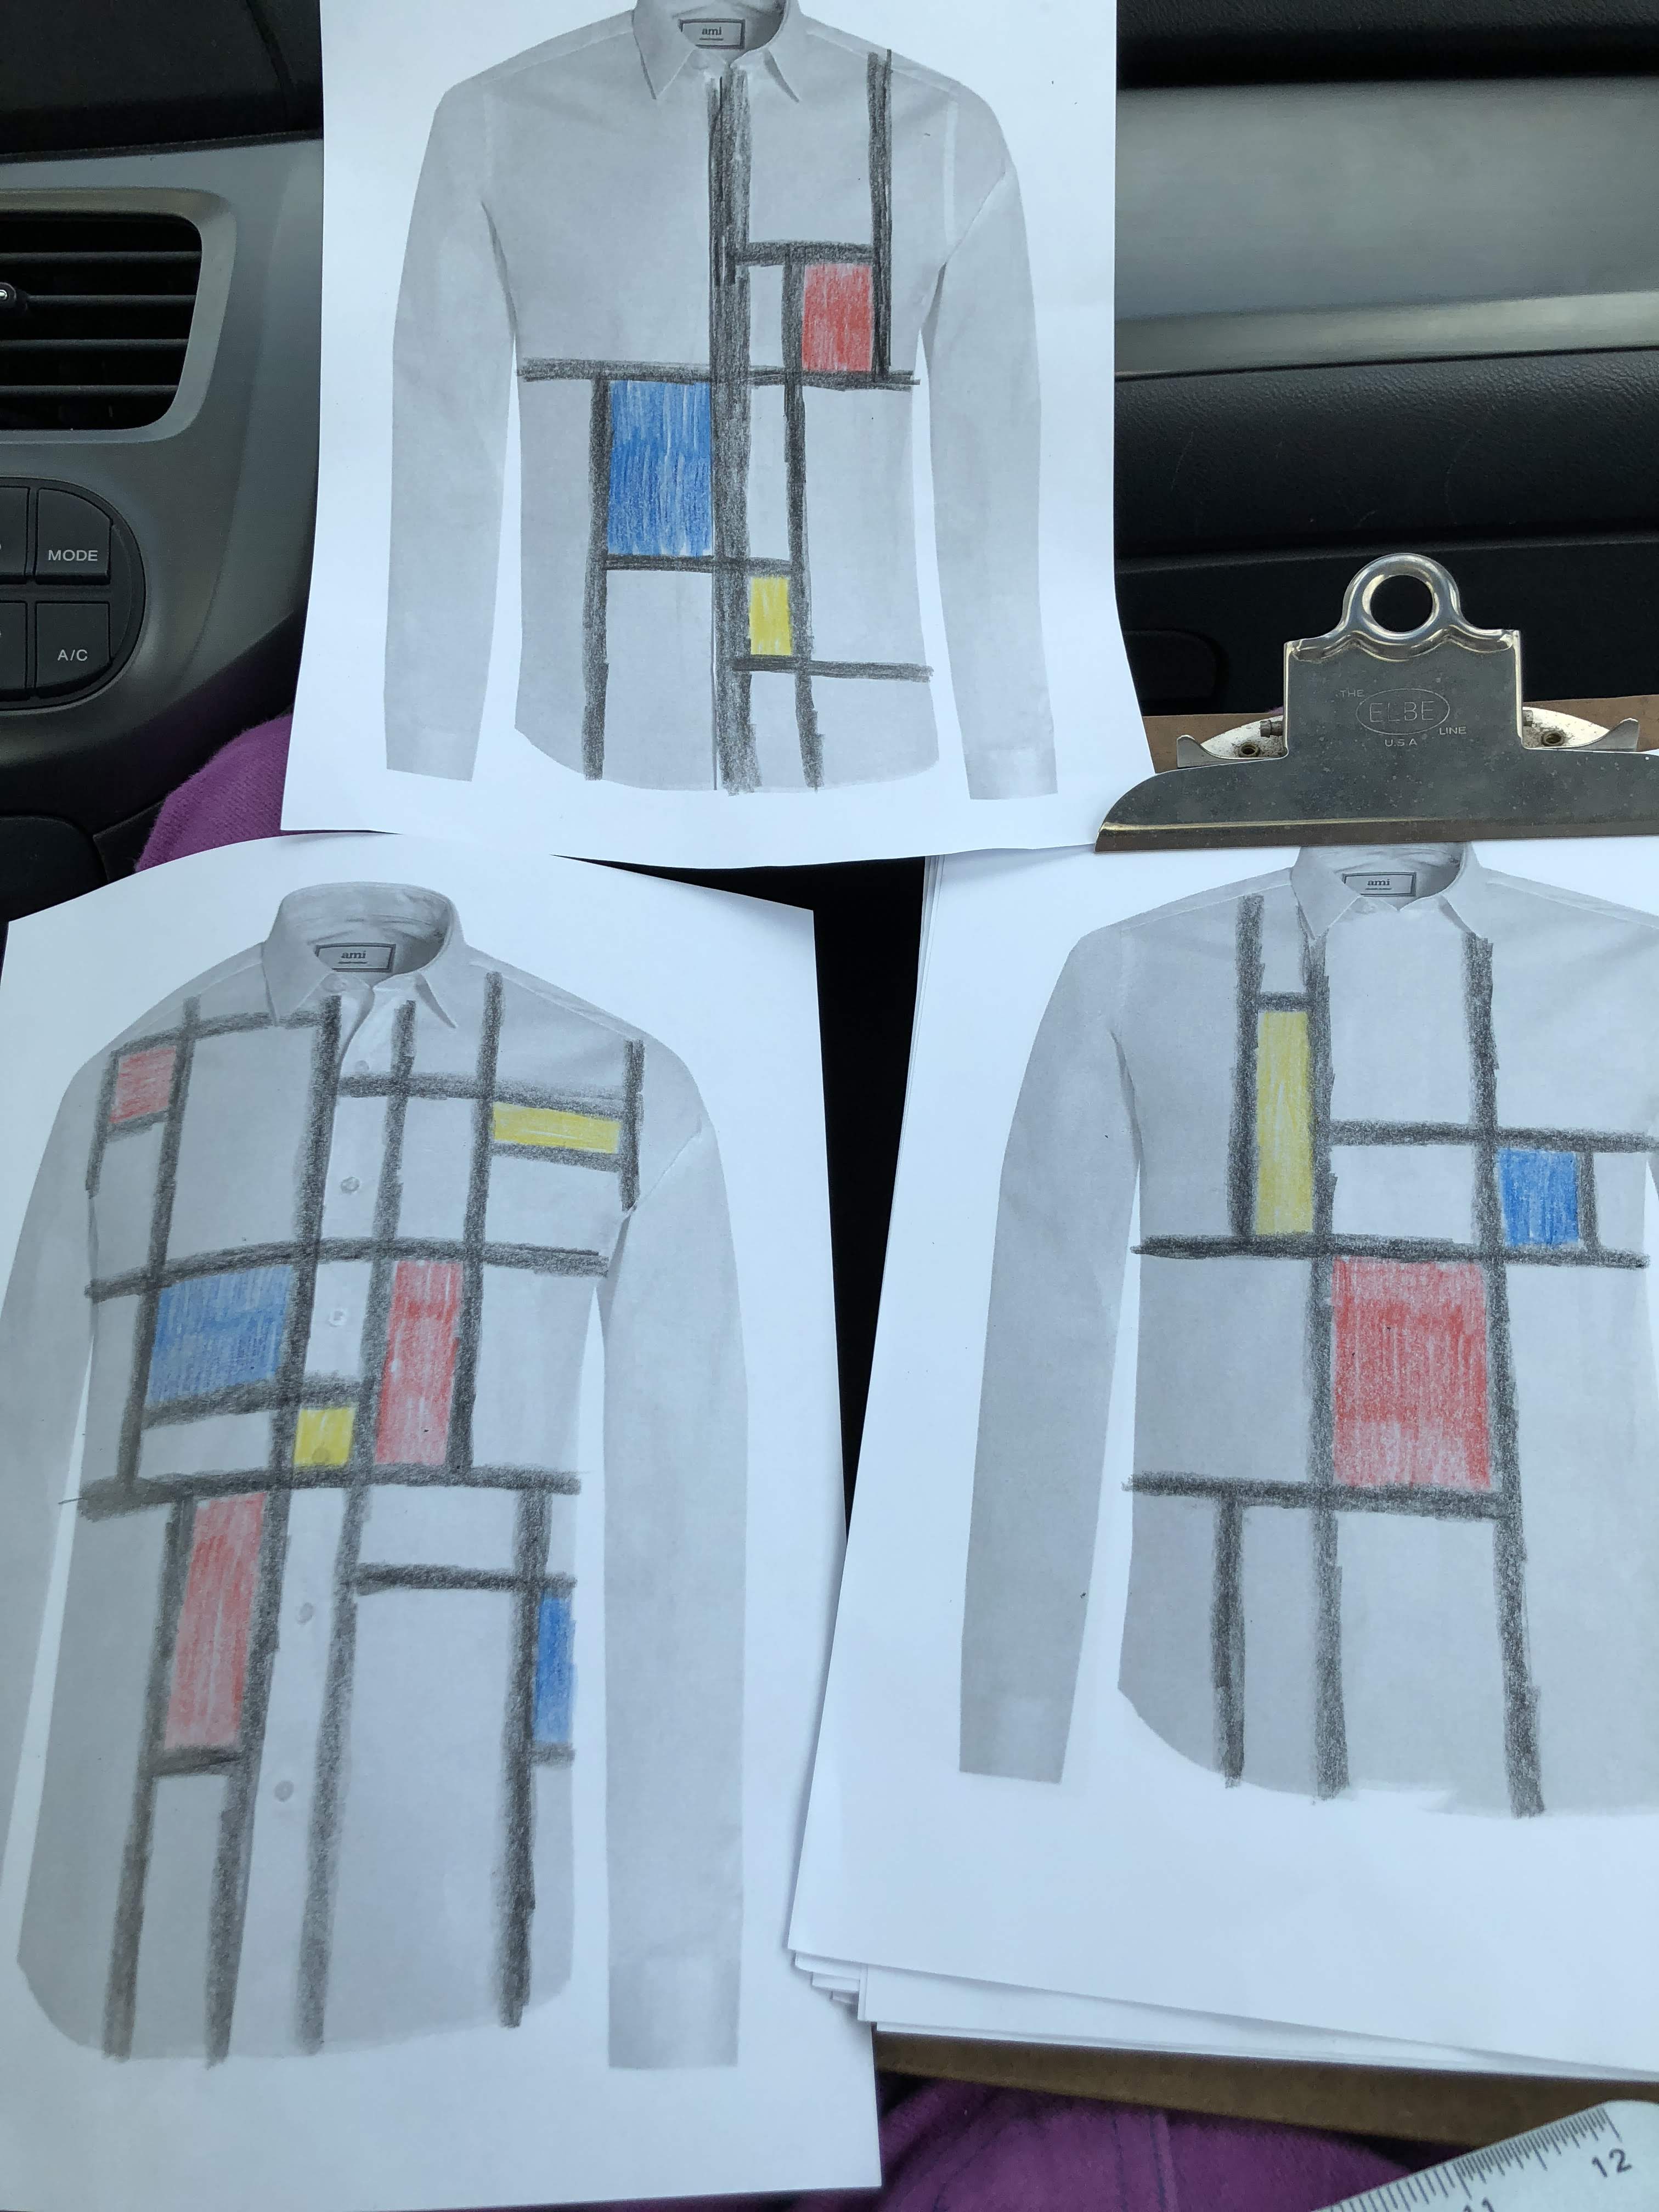
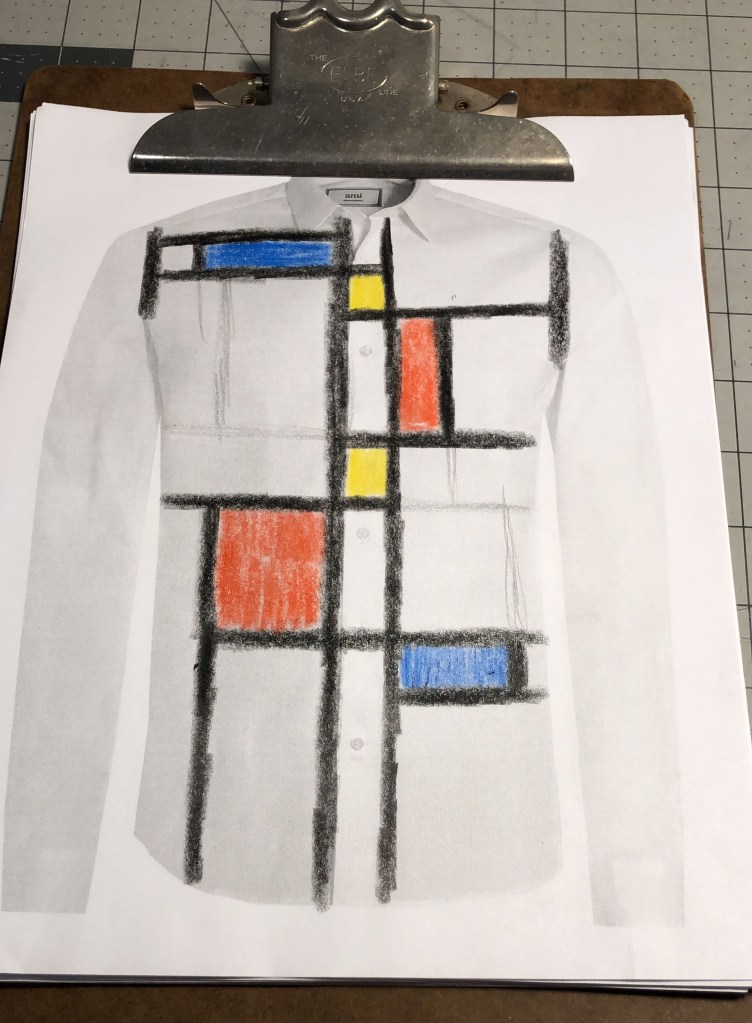
Just as it happens I was browsing through Instagram and looked through older posts from @adamarnoldstudio. And I was somehow struck by this photo.

I thought it was silly clever. A sweater that pretends to be a caricature shirt.

And then I realized I could do something with that idea.

I’ve made numerous shirts in the past years. And I think I can count the times I’ve worn a tie with them on my fingers. But I can do something with this. A shirt and a tie. Not just two things that are combined, but two things that are part of one.

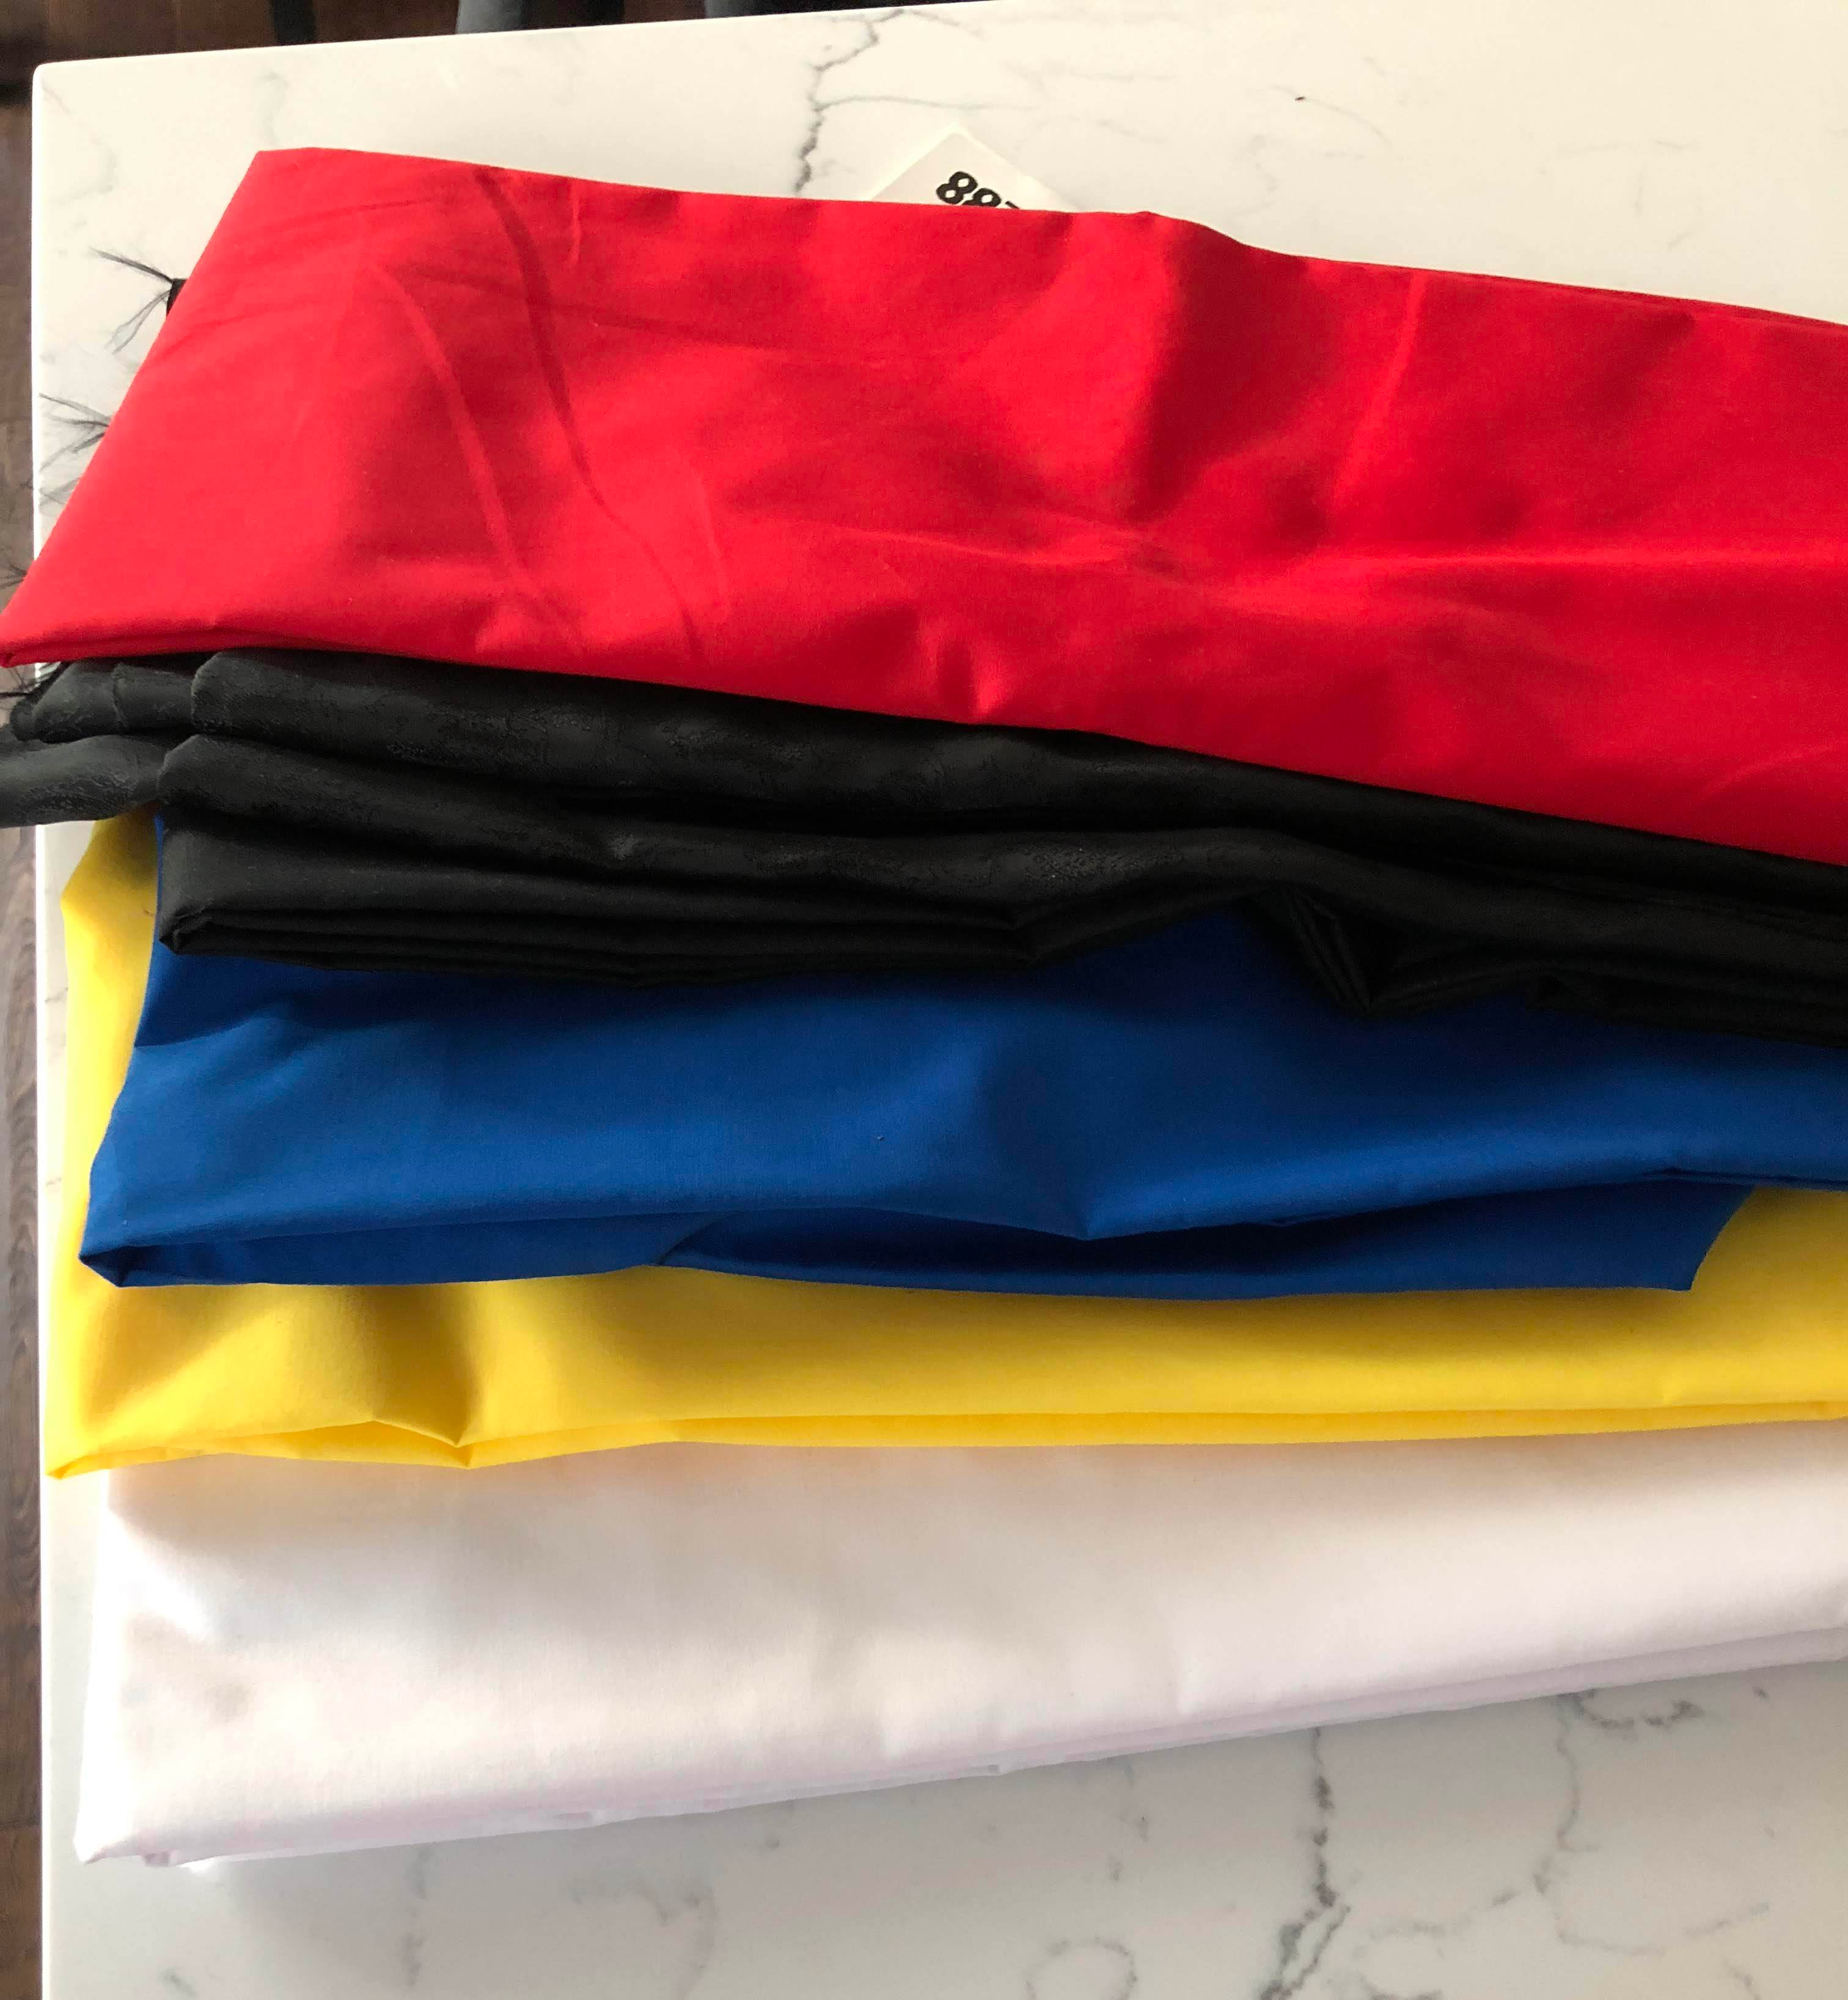
In the past, whenever I’ve seen some fabric with a pattern that I liked, I’ve looked for the same pattern in different colors. There is always something fun you can do with that. If I liked those additional colors, they would come home too. That is basically how things like the Faces shirt came about. With so much fabric in my stash, there should be something appropriate for what I had in mind.

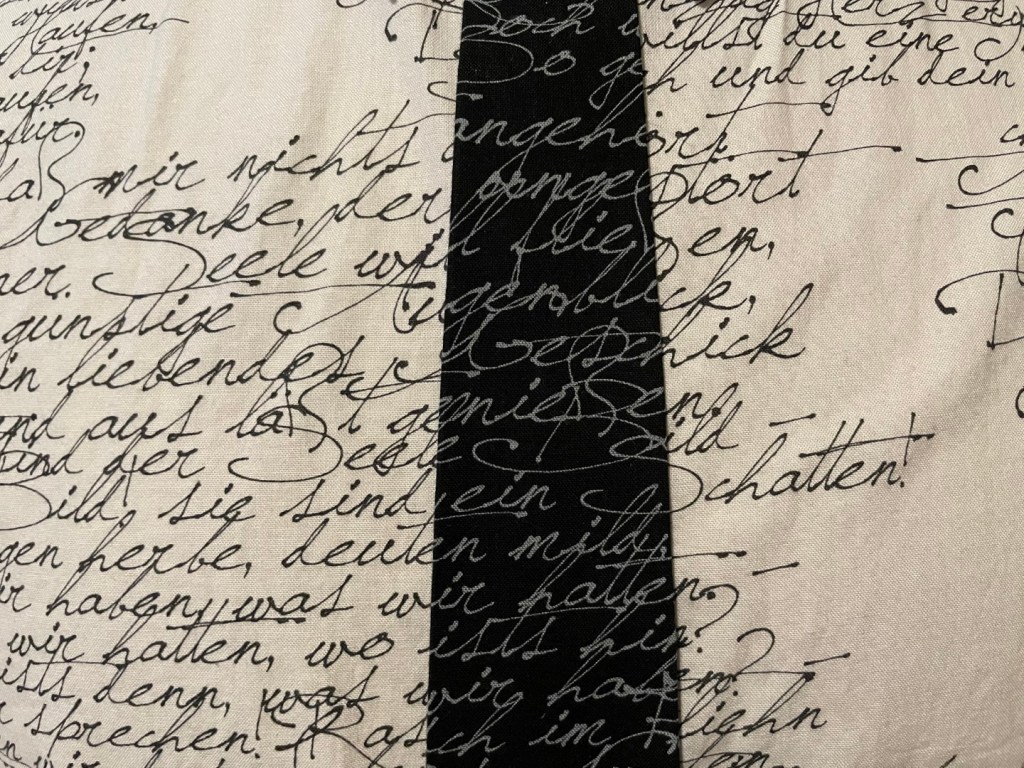
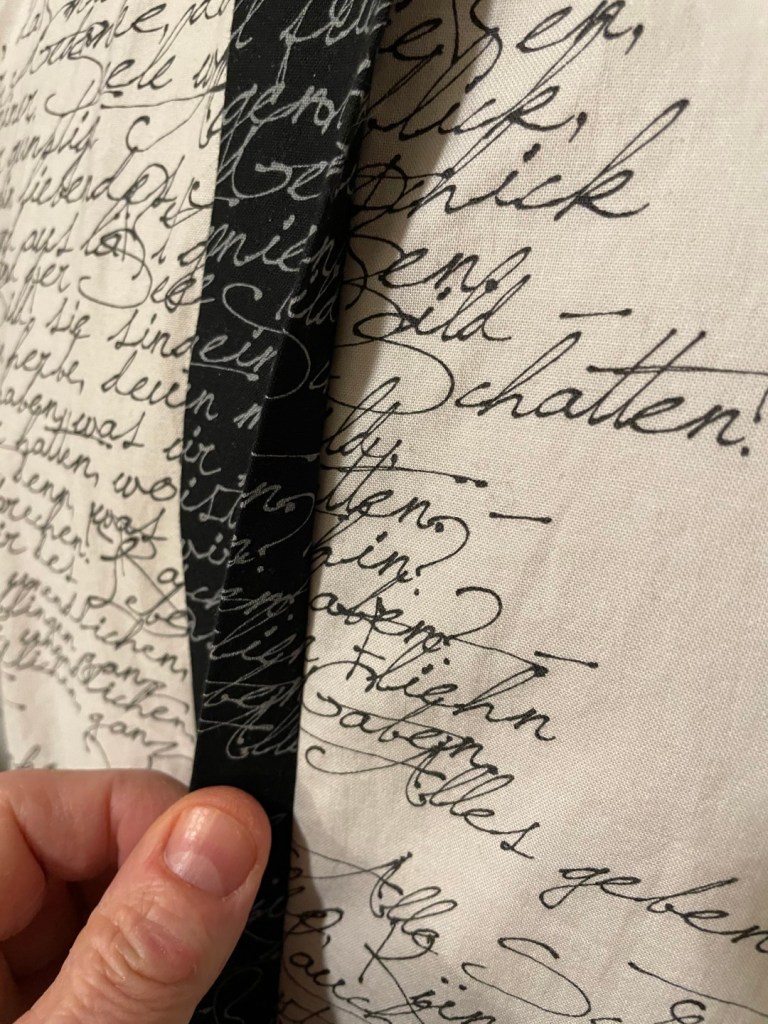
This fabric seemed perfect. A simple off-white color, with poems of Johann Wolfgang von Goethe on it. And I had the matching in black too.

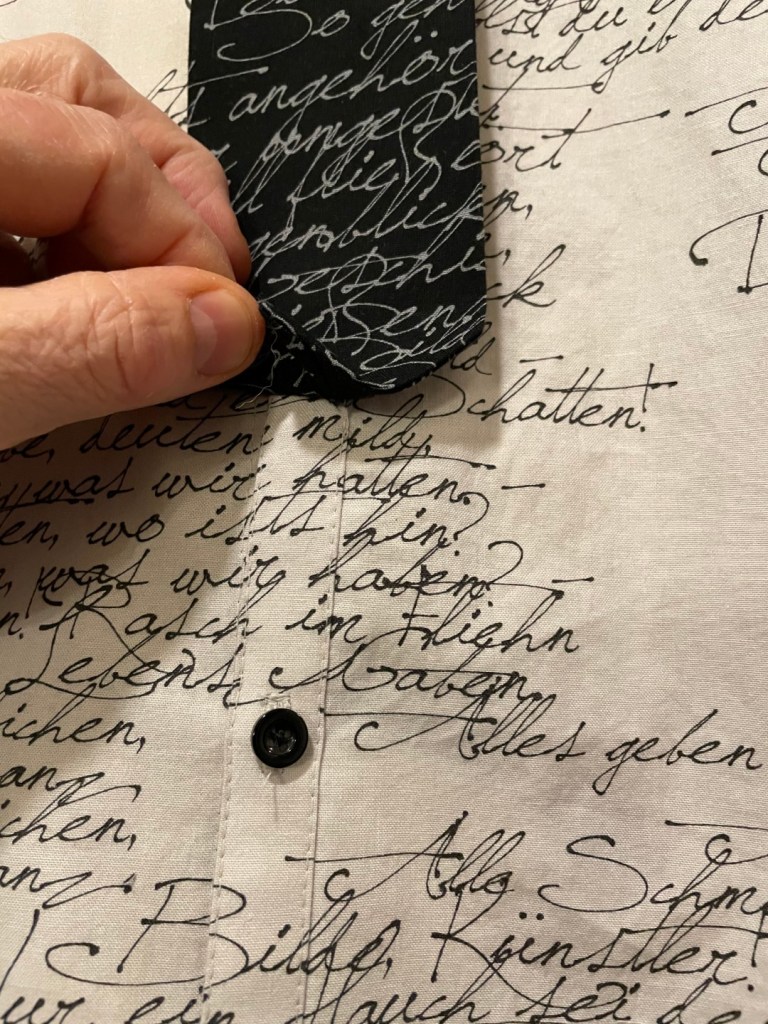
What I thought I could do with this was make a ‘tie’ that was really a hidden button placket. The ‘tie’ and the shirt would be attached, but independent enough that it was not obvious that it was attached. And functional that it allowed the buttons to be hidden behind it.

Of course, I only had bought a fat quarter of the black fabric. Maybe I only intended to make a contrasting pocket or cuffs? That really limited how long the tie could be. 18 inches is short for a tie, but it would have to do.

Since both the fabrics have the same poems on them, I had to see if I could match the pattern across the whole front. This seemed difficult, given the amount of fabric I had to work with, but definitely maybe possible.

And once that thought had crept into my mind, that was going to be the goal. Next was going to be the puzzle of figuring out where which pattern piece would have to be extracted from the limited fabric I had. And I had to create the pattern piece for the tie itself.

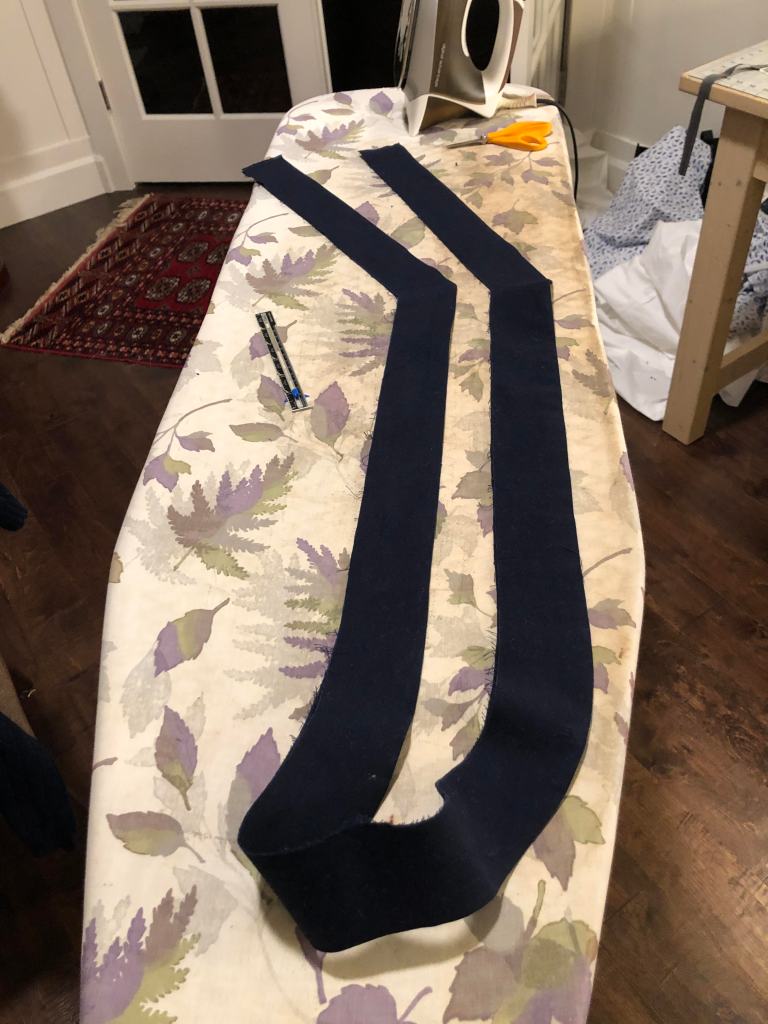
The latter turned out to be easier than I thought. The length was determined by the length of the black fabric. A standard tie is 3 inches wide, and I figured I would make the real placket, which would extend below the tie, 3/4 inches wide. Then it is just draw the tie diamond shape on a piece of paper, and add all the folds that will end up behind it. Before I was done with it, I had caught myself making a couple of mistakes. Forgetting the seam allowance, making a part that was supposed to be parallel tapered, etc. Since all of this is done with paper, a liberal amount of sellotape will fix those errors before you commit them to the fabric. And the paper is easy to fold, to check the way the end product will perform.

The pattern in the photo here is actually upside down. What is not obvious from this photo is how this is supposed to be used. Here is a diagram that makes that hopefully a bit clearer:

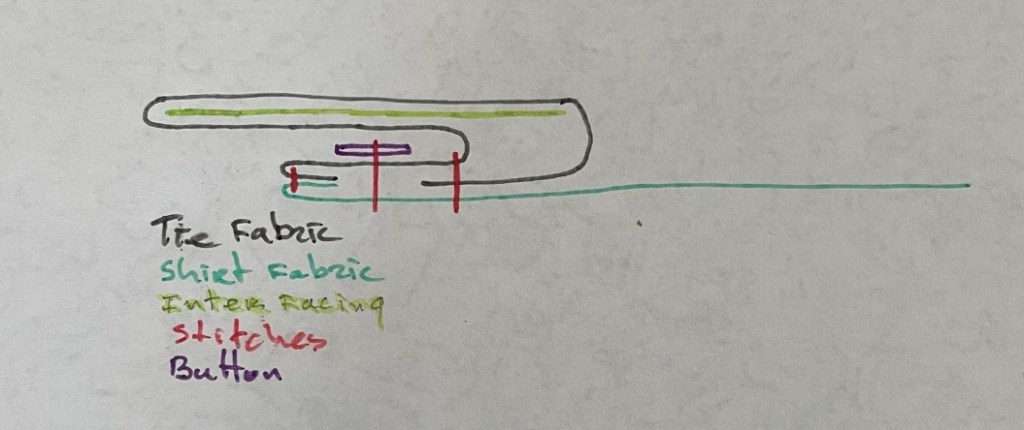
Most hidden button plackets I make are ‘grown on’, but this one needs to be ‘sewn on’. Not a huge difference, but you do have to keep your wits about you to avoid missing a required seam allowance.

I did what I normally do when trying to pattern match fronts; drawsome landmarks on the pattern pieces. First on the tie, because that had a limited fabric supply. Then align the front center marking on the tie pattern and one of the front patterns and transfer the landmarks (just pieces of text I could easily find). And then align that with the fabric. Repeat for the other front. You do have to make sure that all the pieces of fabric have been squared before you start, or you may end up with alignments at the top, but not the bottom.

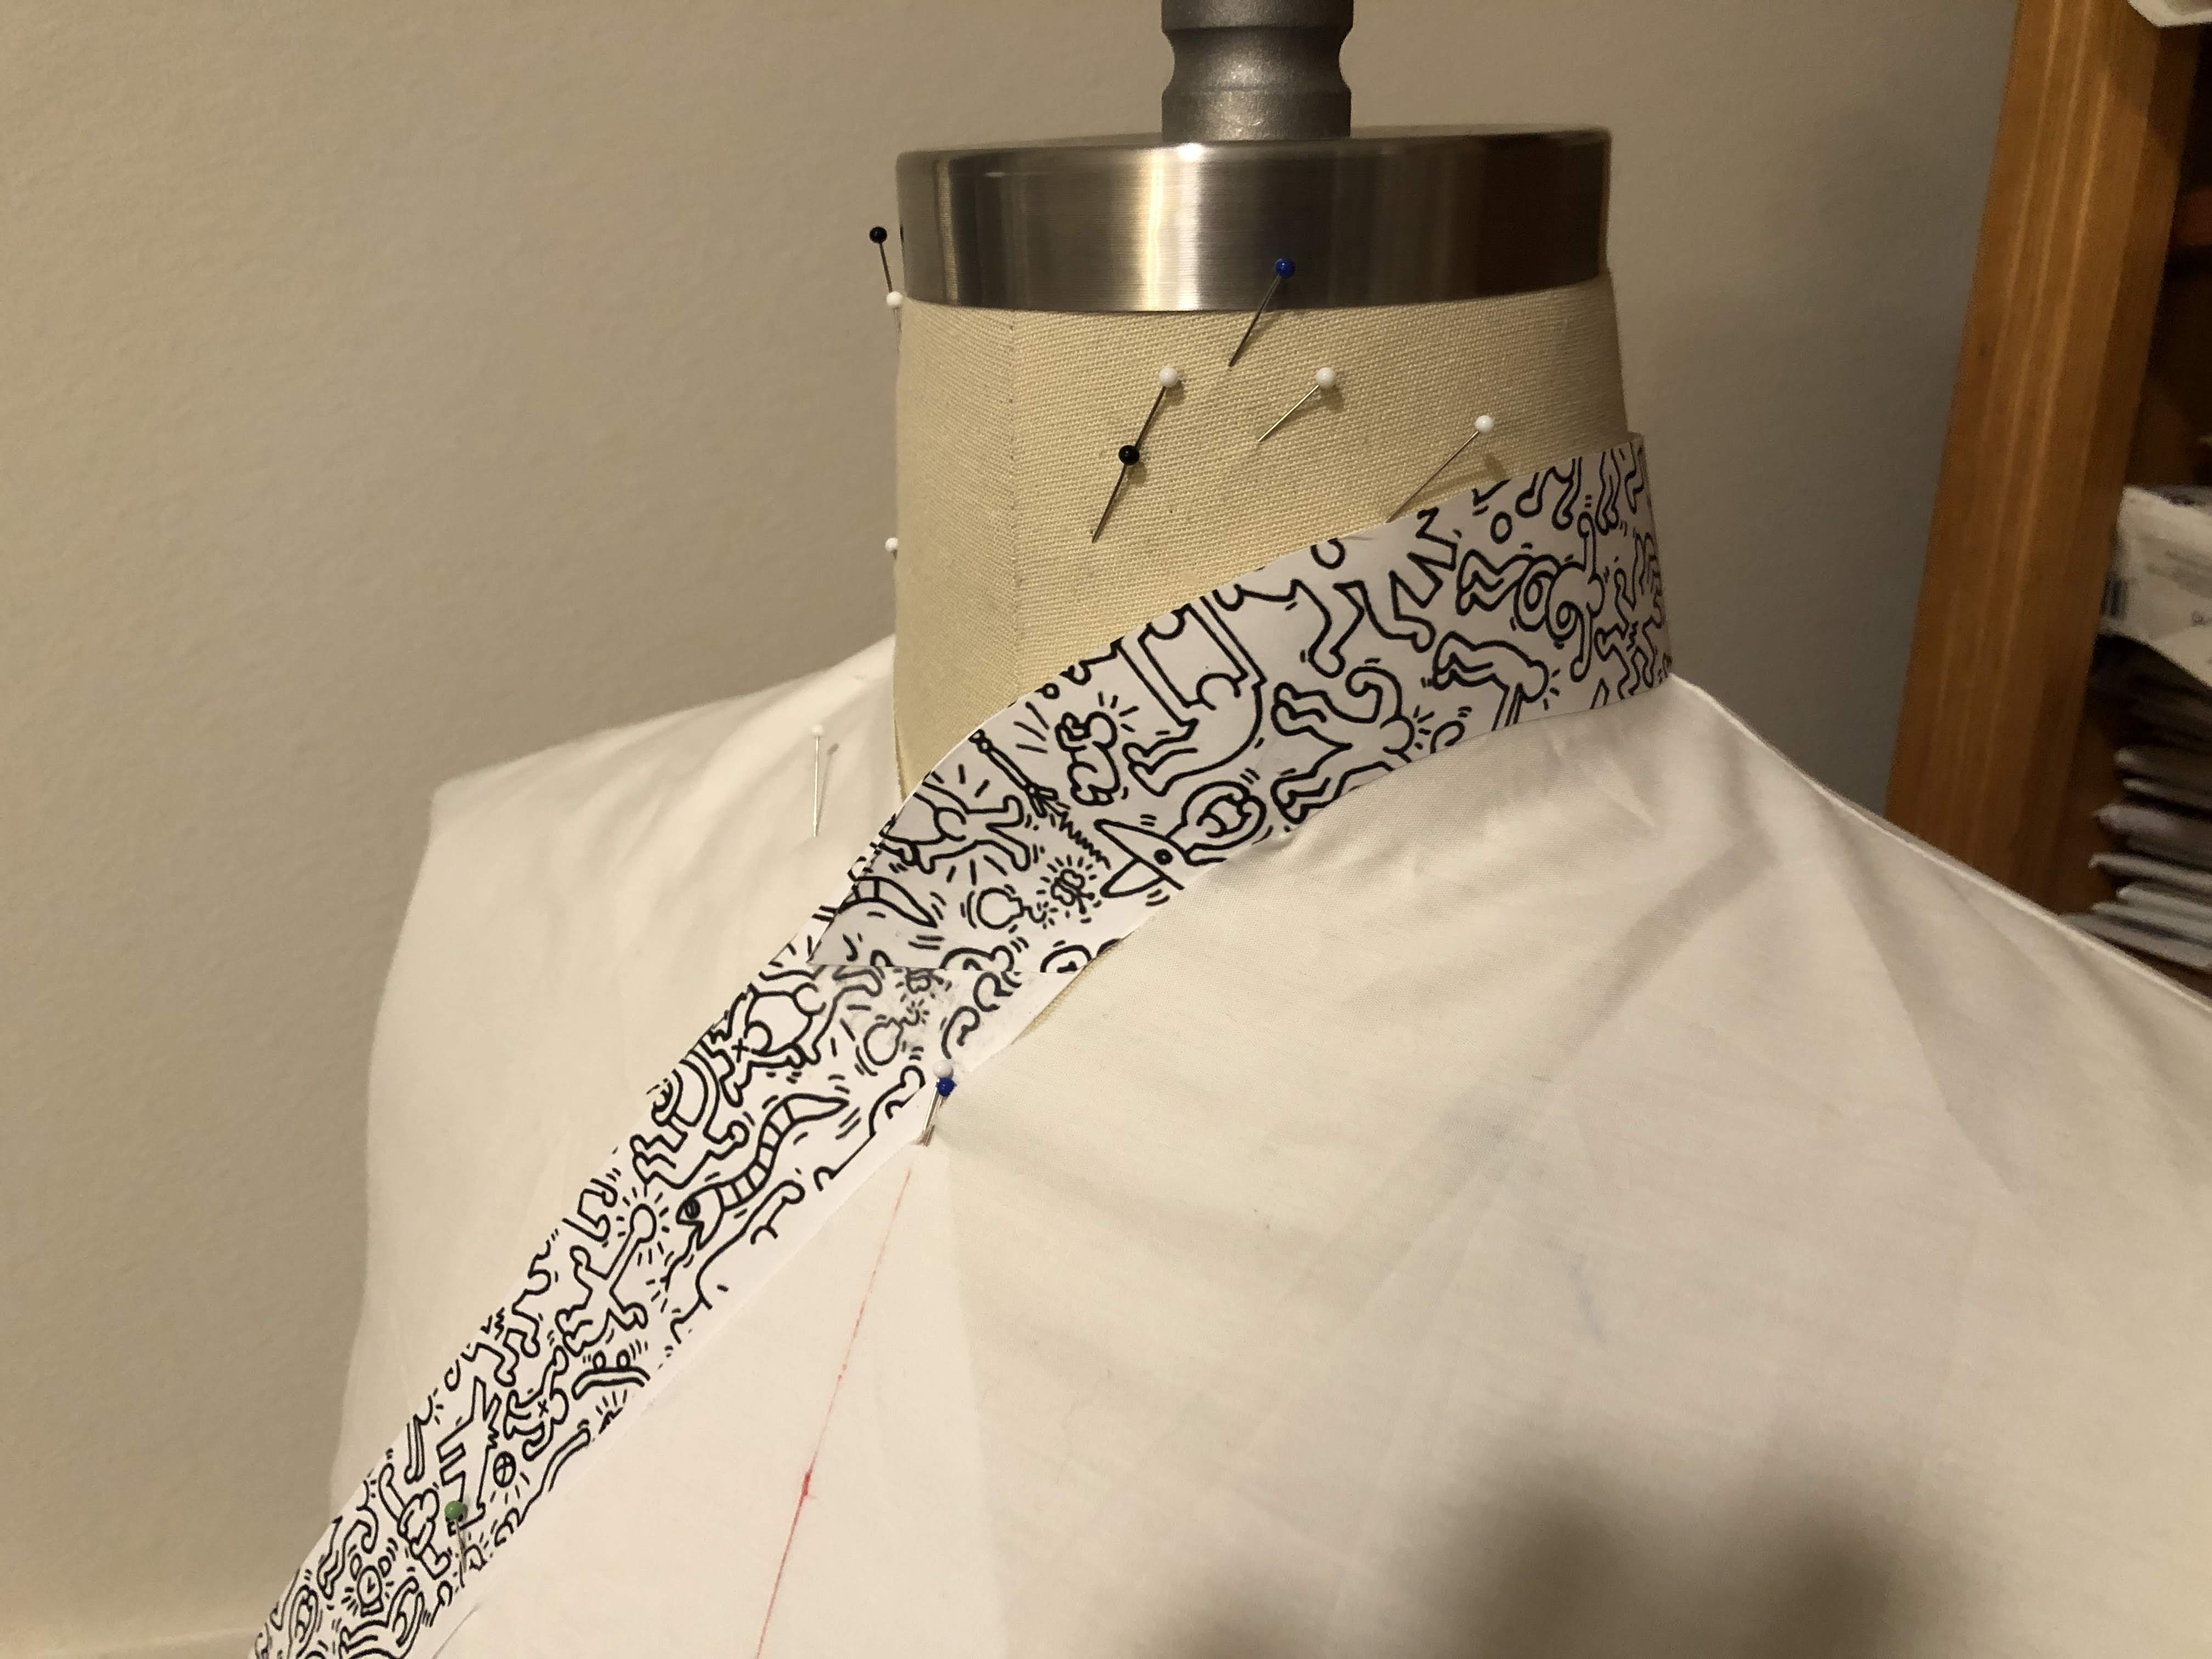
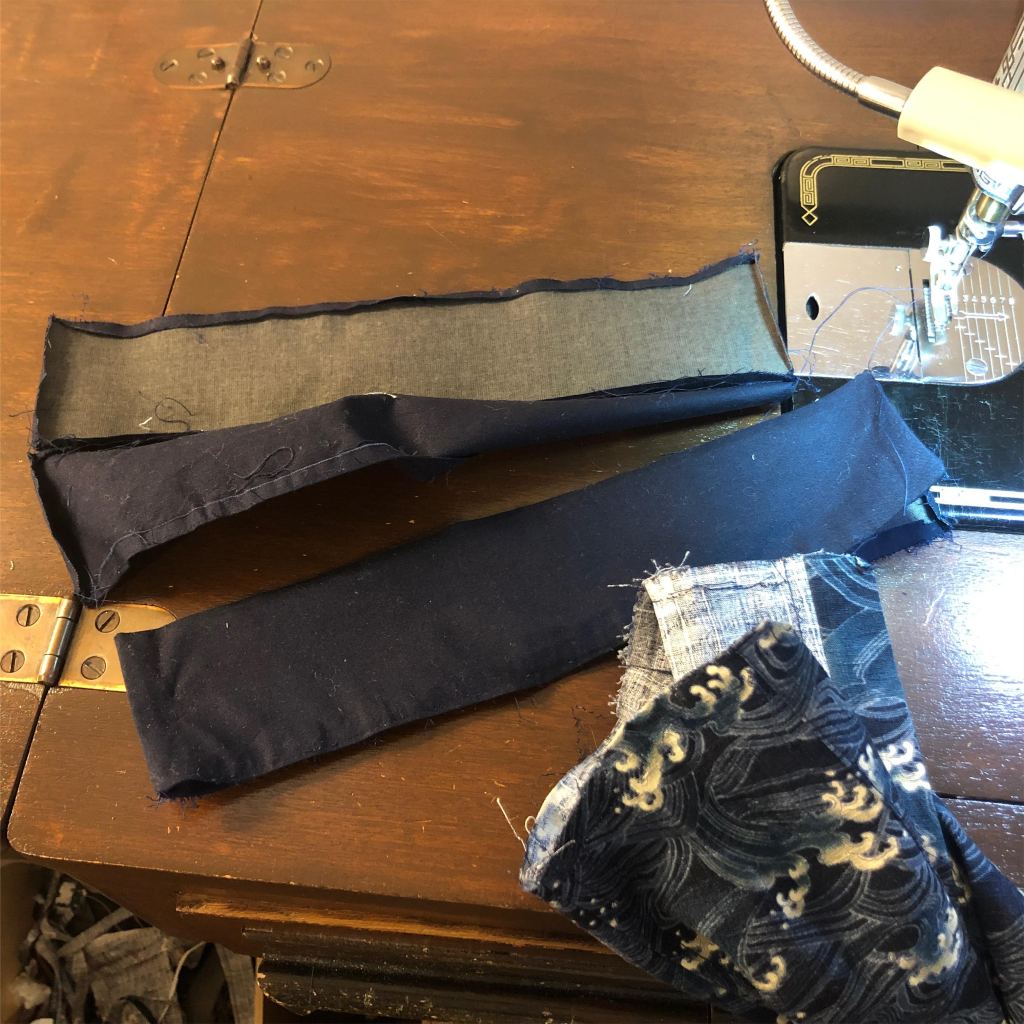
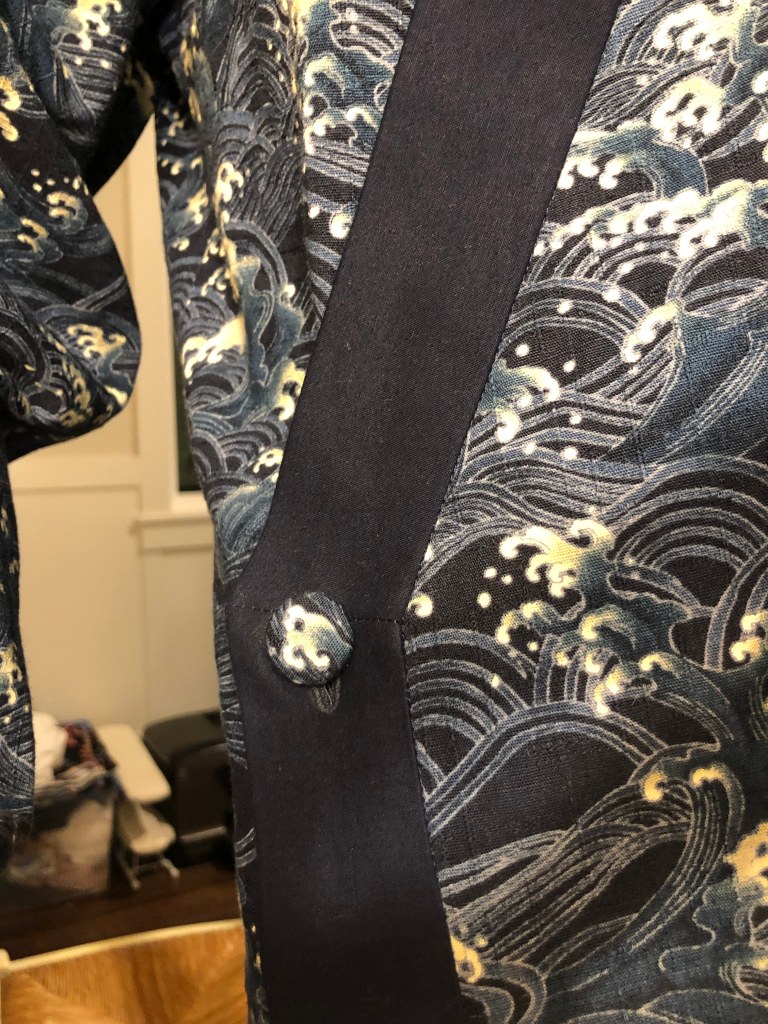
The tie and front came together easily once I had everything cut out. The only issue was the extra ‘normal’ placket that would continue down from where the tie ended. The tie’s tip is not connected to the shirt, and I had to figure out how to connect the two without showing that the tie was connected to the front. I ended up creating a strip of fabric that I sewed to the part you see on the right in the photo above, under a 45 degree angle. This way you could not see the seam without lifting the tie up. Aligning this, to maintain the pattern match was a hassle and took me many tries to get it done well. Basting this proved to be a requirement for a good result.

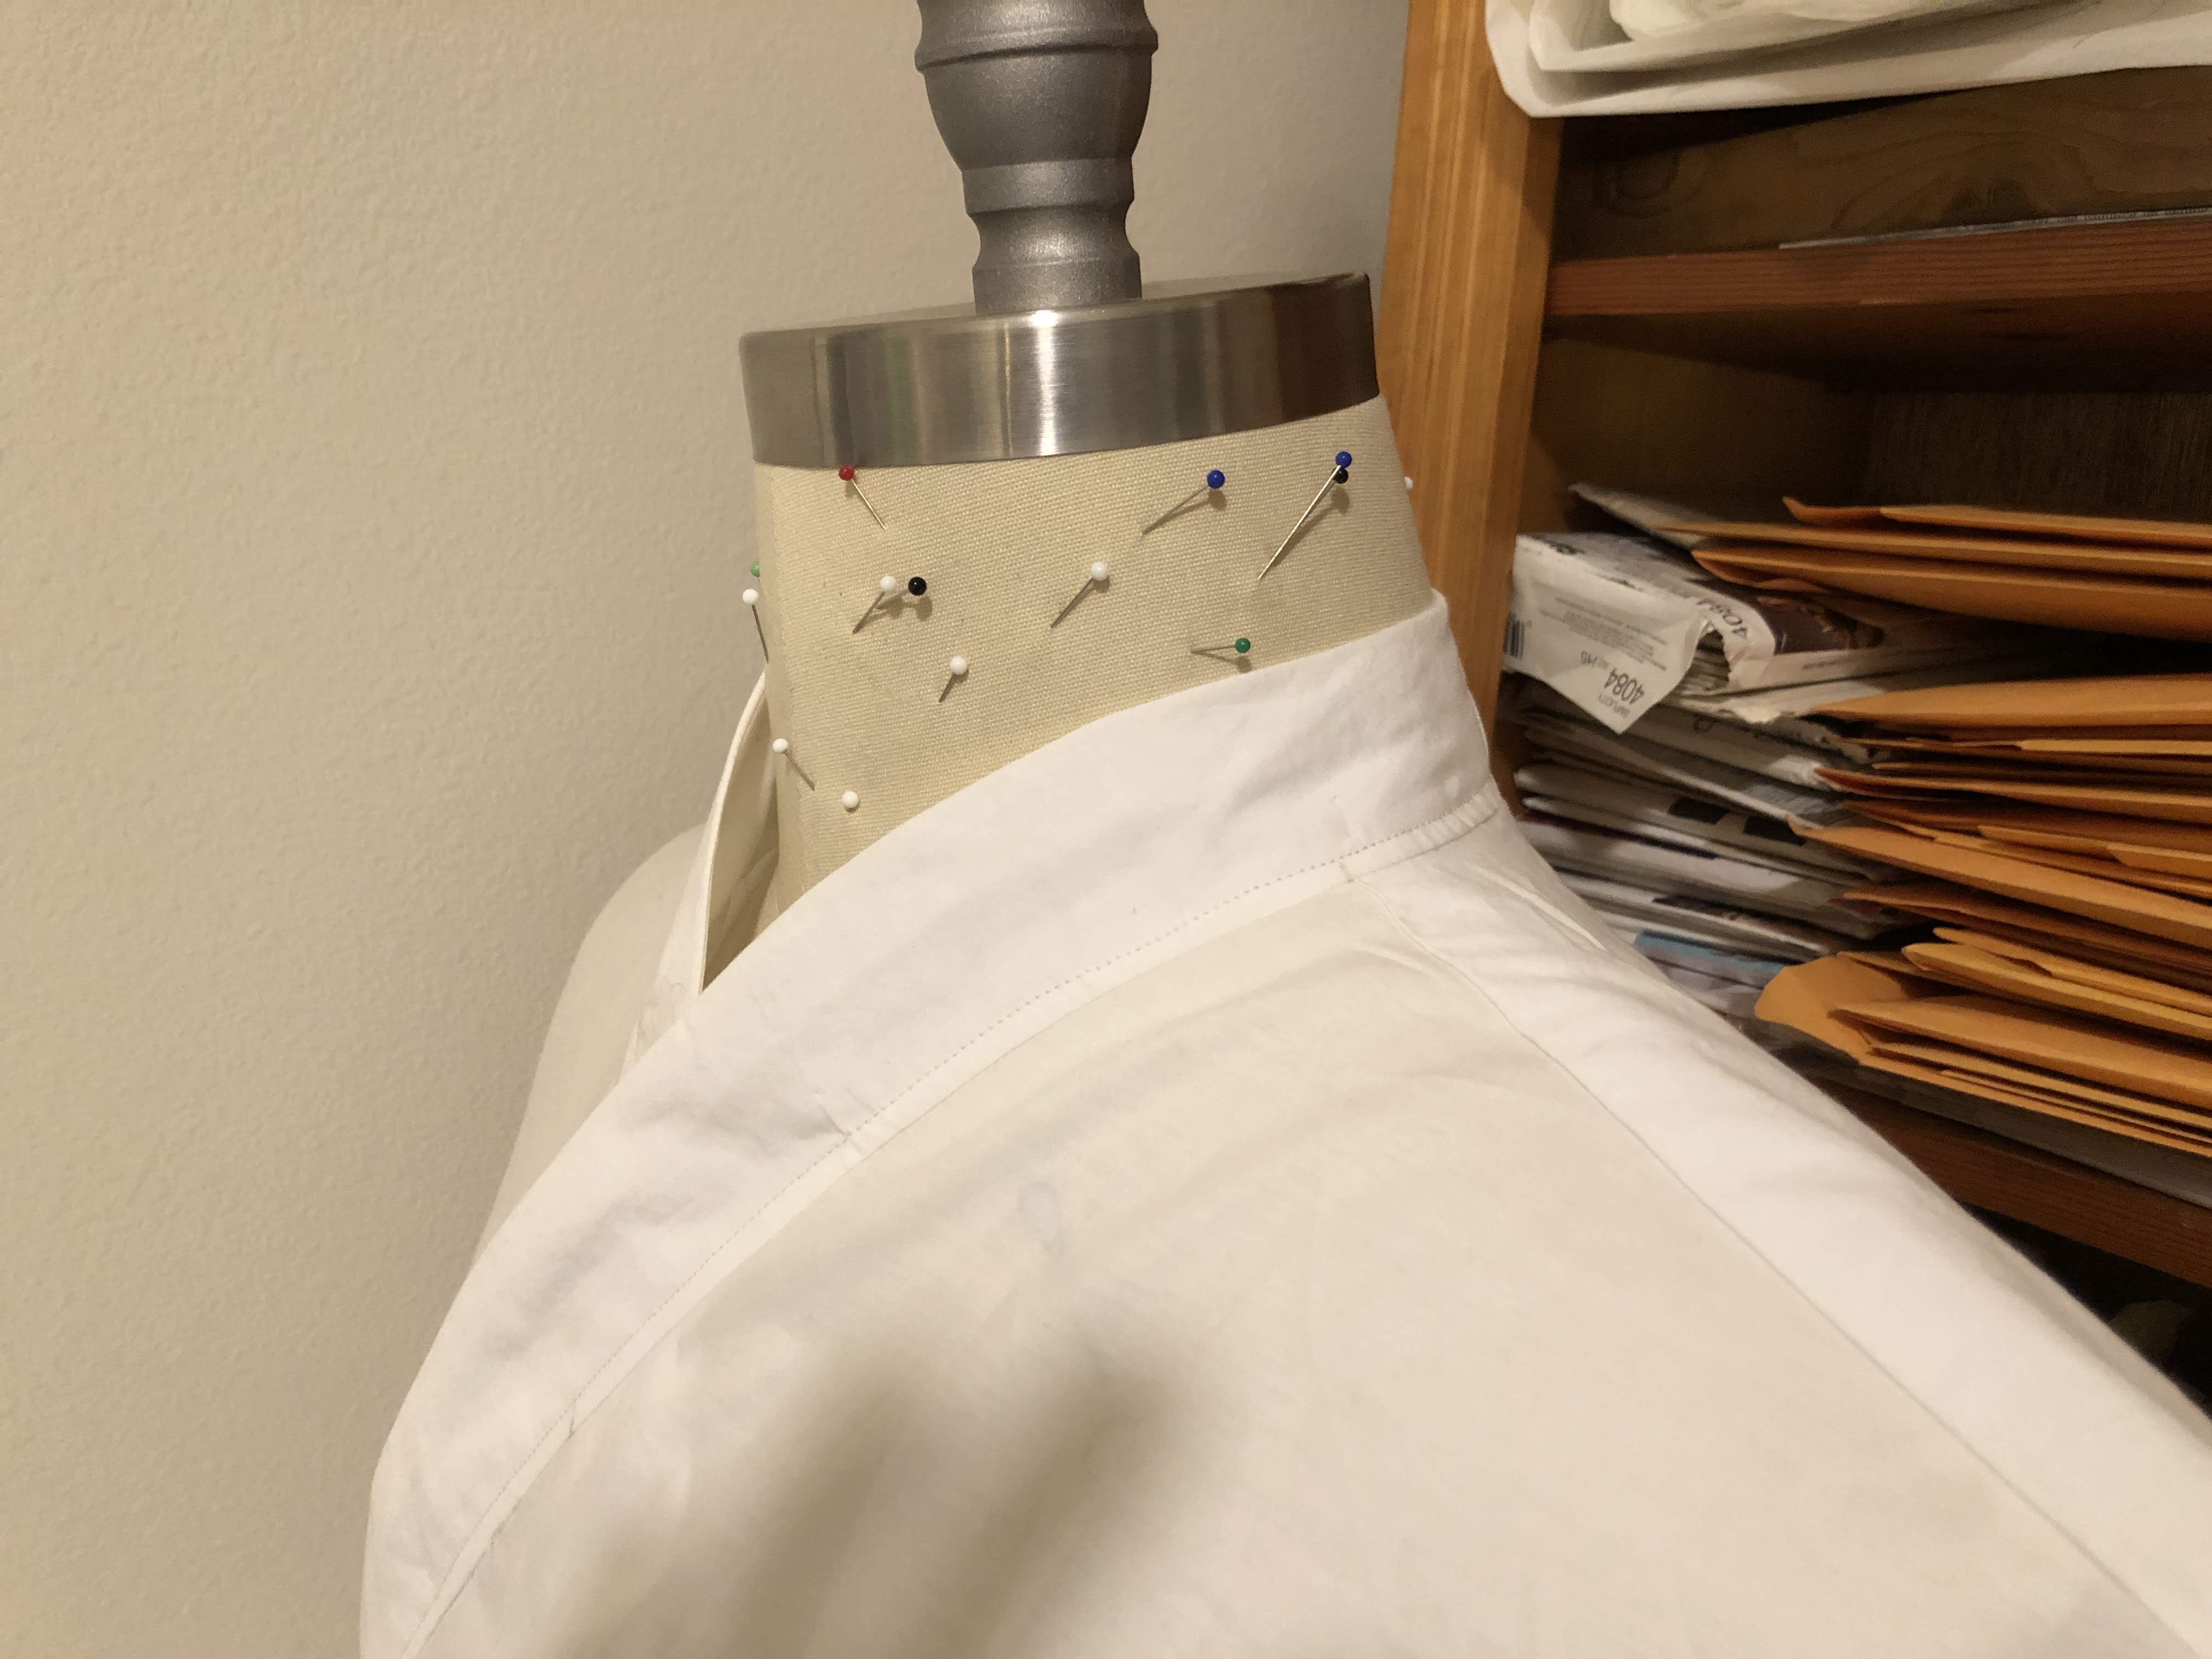
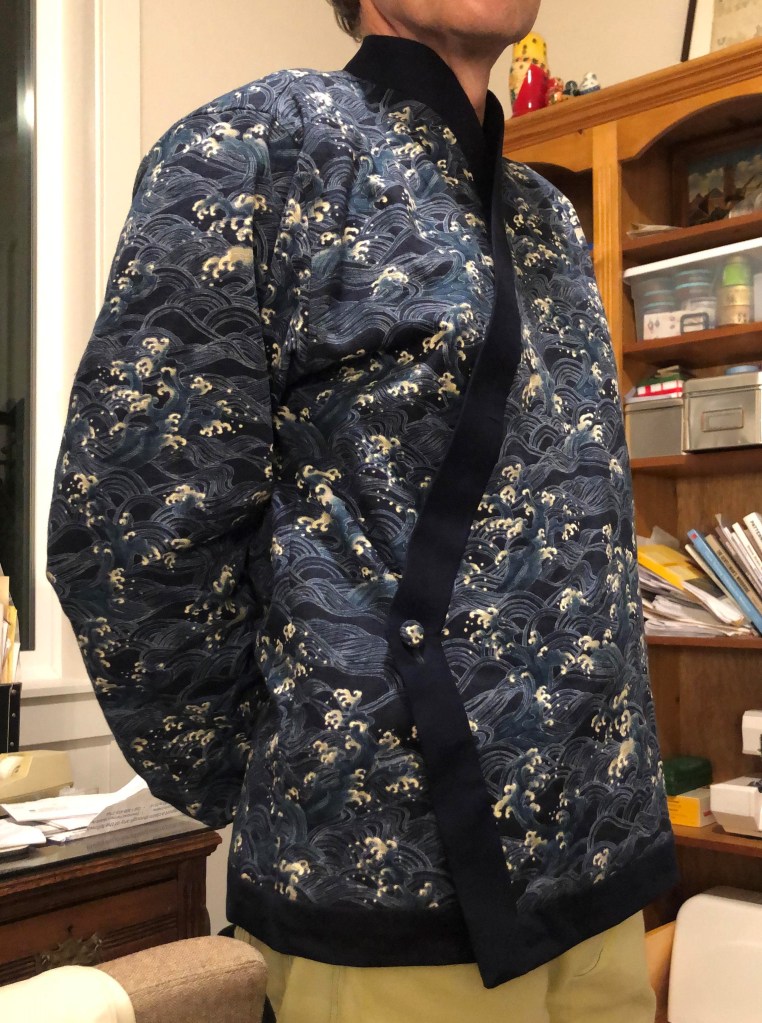
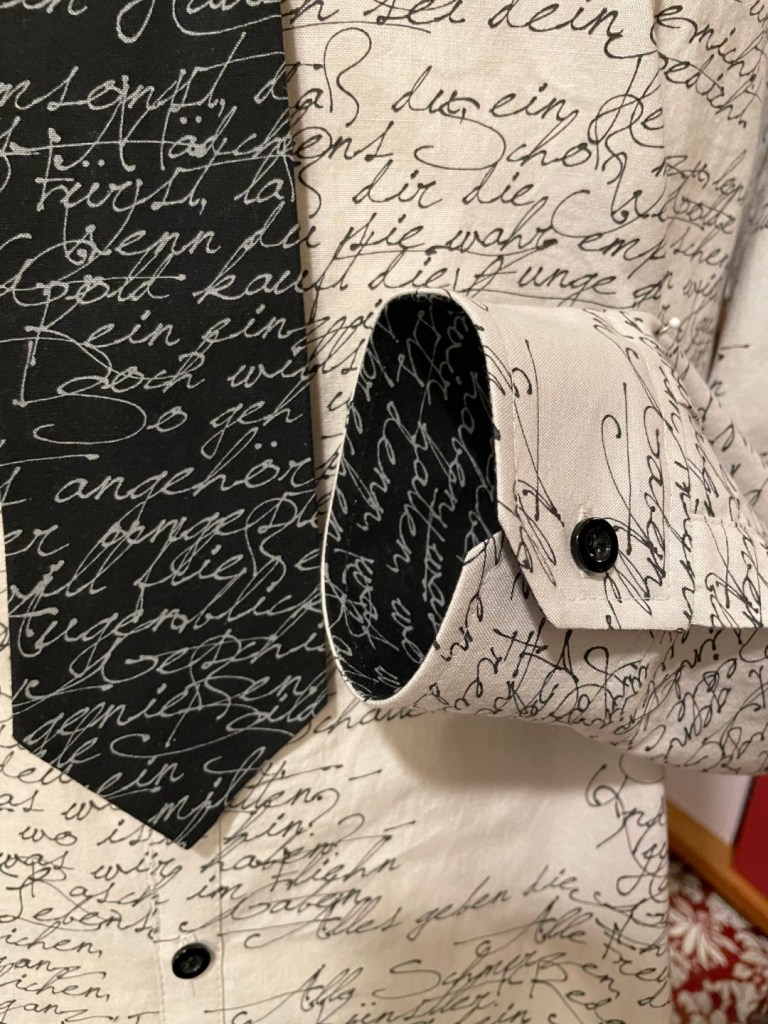
When I had this done I wanted to see how it looked on the dress form. And since I hadn’t made any shirts in what seemed like forever, I got a bit ahead of myself. I did the burrito method, and then sewed the side seams. It looked great on the form. Made the collar, with the outside of the collar stand in the black fabric to mimic the rest of the tie. But then came the sleeves, and after attaching the plackets, I realized that you don’t sew the side seam until you have the sleeves attached. And I had already made the flat felled seams. I had to laugh at myself, forgetting such an elementary step. After thinking it over a bit I just decided to make the sleeves separately, including the cuffs, and then set them in as you would do with a jacket. A bit more fussy, but in the end you can’t tell.

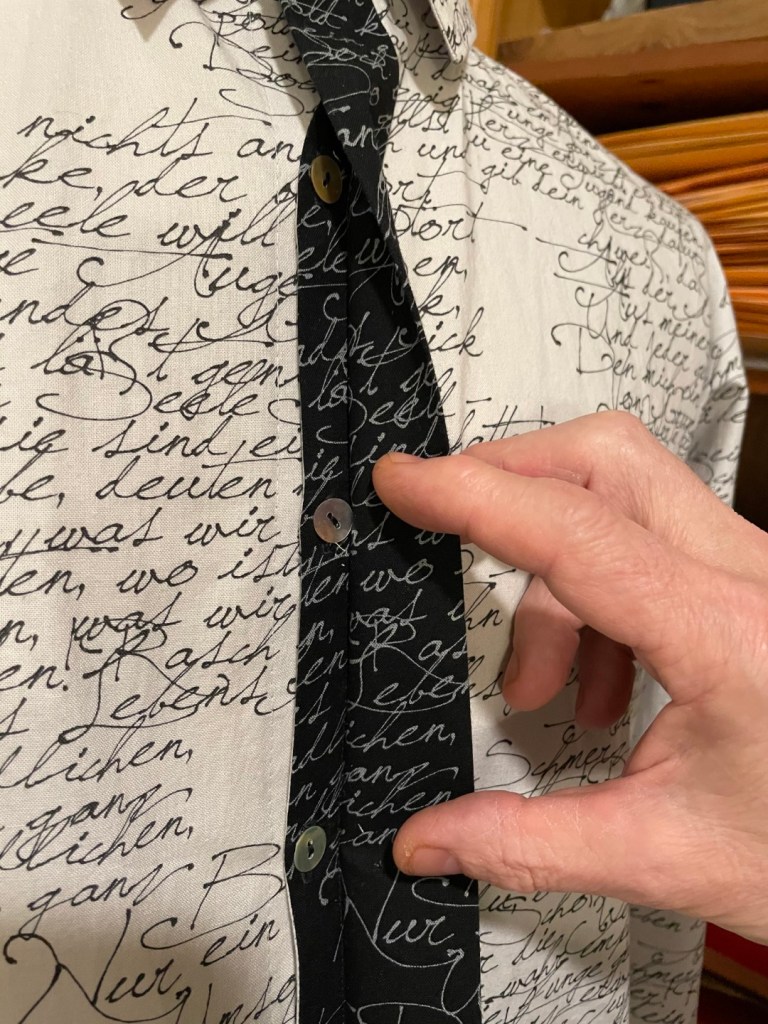
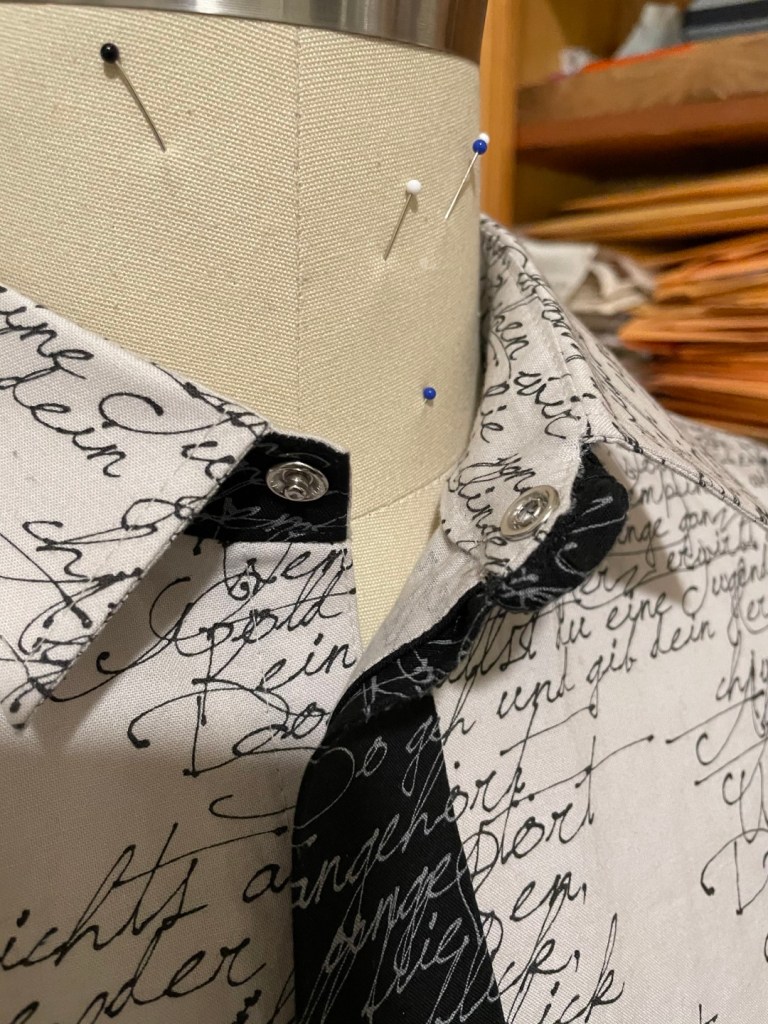
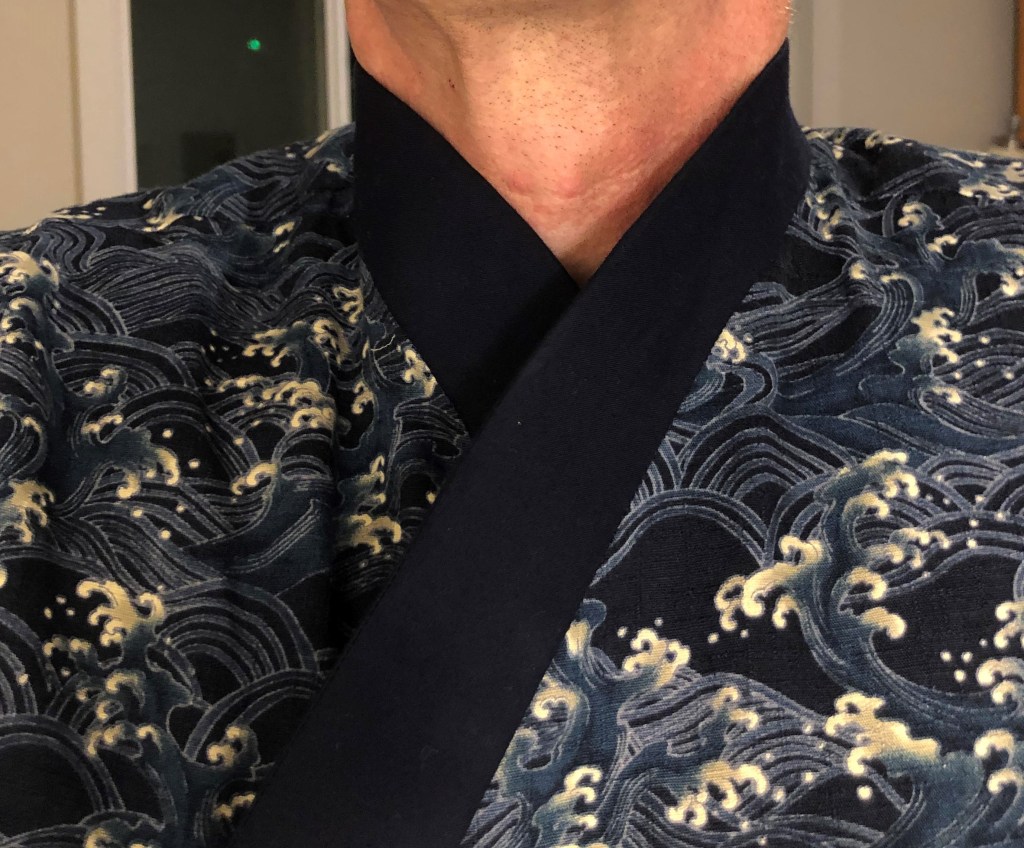
I made a little double triangle of the black fabric, and stuffed it with scraps. This would become the fake knot of the tie. The collar I chose to close with a snap, for I couldn’t think of a good way to hide a button there.

Thanks for reading!

Japanese fusion

About a year ago I bought some fabric from Miss Matatabi, a cotton dobby with a print reminiscent of the Waves shirt I had made some time ago. I bought it without having a project in mind for it. I just liked it a lot and didn’t want to regret not buying some.

After laying in my stash for a while, I finally decided to make a shirt with it. The fabric, being a dobby, has quite a different feel and drape than the normal cottons I sew with. It is a little stiff, like it is a light canvas. And so as usual, my mind starts to drift and wonders what changes I should make to make this a more interesting project. With the Japanese print, looking for inspiration in Japanese garments seemed logical.

Making a Kimono seemed too easy, too obvious. And I don’t know when I would ever wear a kimono. Exploring this a bit further brought me to Samue. This seemed like something I could use. The patterns I found were all comparable to a kimono pattern; angled pieces with straight seams.

I figured I could create a combination of a button-up shirt and a samue. Use my shirt pattern and adjust it for the different front opening. Make the sleeves somewhat wider at the cuff. But keep the shaped sleeve-head. And keep the back yoke and pleat. Add cuffs like a normal button-up shirt.

First thing to tackle was figuring out where I wanted the diagonals for the closure to go. With a current shirt of the same pattern, a string, and my dressform, I quickly came to something I found pleasing. I transferred the line to a copy of the front pattern piece and made a muslin with that.

Now I could work on the more challenging part; the collar. With the Japanese patterns, it’s all straight lines. I wanted something that would be more form-fitting. When presented with this problem before with another shirt, I just used paper. Tape it in place, draw where a seam needs to be, cut away what shouldn’t be there, and repeat. Eventually you’ll get to something that resembles what you had in mind. And that you can transfer over to a pattern piece and then onto fabric.

Now that this major hurdle was out of the way, I could start working on the real shirt. This required me to go shopping for some contrast fabric for the collar/placket combination. Creating the idea is one thing, having all the things necessary to put it in practice is another.

The shape of the collar/placket is really weird, and I made it out of a total of 8 pieces. From the centre back down the front is one piece, and the short vertical part that is almost at the side seam is another. This, of course, is mirrored on the other side, and then every piece has a corresponding one for the inside. It turned out to be the longest collar I’ve made by far.

Basting the cuffs

With this completed, I could do the normal work on the big shirt pieces and join this collar to them. Then add the sleeves and the cuffs. With all of this, I realised that I did not want to see any top stitching. I don’t actually know if this is true, but I don’t think kimonos and such have top stitching. This meant that I needed to stitch-in-a-ditch the collar and cuffs. And that required a lot of hand basting.

I had made the sleeve 3 inches wider at the cuff, to give it somewhat of a feel of a Samue. And once I tried it on, I realized I didn’t like the way I had done the pleats. Nor the size of the cuff. So off it came and I had to redo all of that work.

Now that I had almost everything in place, I had to figure out where the buttons needed to be to keep the front closed. A single button at the corner seemed to be enough. The exact placement was more difficult. Where I had initially placed that corner, using my dressform, didn’t work at all. Apparently, My body is different enough from the form to change the whole dynamic of how the shirt fits. This has never been much of an issue, yet for this type of closure it made a huge difference. I ended up taking 4 inches out at the waist, and moving this corner point quite a bit down.

All this time I had the idea that I would just hem the bottom like any of my other shirts. Then when I saw the shirt on me, I realised I should create another band of contrasting fabric along the bottom. And the bottom should be straight. This meant that I needed to buy some more contrasting fabric, and wash it a couple of times before I could continue. Some trail and error , and a lot of looking in the mirror showed me where to cut off the hem. The rest was easy and it came together well.

I’m quite happy with the result, while at the same time I wished I could have taken more time to make it even better. I will have to remember to check designs on my own body and not just on the form.

Mondrian Shirt – The beginning

Almost a year ago I travelled to The Netherlands to visit my mom. I had a lot of time by myself while I was there and decided to play tourist in my own (former) country. In 2013, the Rijksmuseum opened its doors again after 10 years of renovation. I had been there since, and seen all the famous pieces that draw in all the tourists. But the museum is big, and there are a lot of things you will miss. So this time I decided to go there, skip all the usual, and find all the hidden gems. In the brochures online I had seen that there was a dress by Yves Saint Laurent, inspired by Piet Mondrian, a Dutch painter. This seemed like something I should not miss.

It is displayed all the way at the top of the building, in a far-away room. Unless you know what you’re looking for, are dedicated to see everything in the museum, or you’re lost, you would never find it.

This dress is part of a collection that YSL made in 1965 and became very popular after being on the cover of Vogue.

But to be honest, I wasn’t impressed. When I think of Piet Mondian, I think of more complex works. And the chair Rietveld made. This dress just left me wanting.

I spend quite some time looking at it from all angles. And I kept getting back at the same thought; I can do this better, with a shirt.

Weird, thinking you can improve on a famous designer. Although I wasn’t going to set out to create a new fashion trend, like YSL had done, it did seem rather arrogant. Yet the seed had been sown, and there was no turning back.

As with any bold adventure, it is very difficult to take the first step. I just let it play through my mind every now and then. The easy way would be to take one of his paintings, distribute it across some pattern piece templates on my computer, have it printed by Spoonflower onto fabric, and make a shirt. I have done that a couple of times with different art shirts. This seemed like the easy way out. And I didn’t think this would produce the vibrant colours that Mondrian used.

The alternative would be to create the cloth myself out of individual pieces of fabric. For that I would need to find the five colours – white, black, red, blue, yellow – in the same fabric. Looking at a couple of quilt shops did not provide me with what I wanted. The online store where I normally buy my trousers fabric, SellFabric.com, did.

The right weight, nice drape, nice colours, good price. The later was especially nice, considering I would need a yard of each colour and two or so of white. The only issue I found was that it bleeds like crazy. I must have washed each piece at least 6 times separately, adding Retayne to two of the washes. Eventually it stopped turning the water the same colour as the fabric. I’m not sure I trust it enough to actually wash the shirt once I’m finished.

With this hurdle completed, it was time to make the design. What an opportunity to procrastinate! “Let’s think about this for a while.
Of course, you can only tell yourself that for so long before you get cross with yourself.
I took an image of a dress shirt, removed as much detail as possible, and made a bunch of copies. This would let me design straight onto the ‘canvas’ and see what it would look like. One of my daughters provided crayons in red,blue, yellow, and black. Perfect!

This is a lot harder than I thought. The right combination of coloured areas, and the distribution of them and the black lines on the shirt, turned out to be anything but easy. All the while allowing for construction of the shirt.
I wanted the shirt to have a normal opening in the front. That basically gave me three options; a narrow placket the size of a black line, a normal sized placket, or a wide placket the size of the neck opening (like a double-breasted shirt). Using a narrow placket seemed to be problematic. The black lines should be really narrow, and that would allow the front to open between the buttons and show your chest. So I considered only a normal sized placket, and a wide one.

These to the left were my first three attempts. None of them I liked at all. Now, I’m not an artist, so that should not really have been a surprise to me.

Although I didn’t really know what was wrong with each of them, they did help me to sort of intuitively improve with each iteration. I would make one new attempt every couple of days to a week. The wide placket variation, which you see on the right in the photo, was voted out pretty soon in the process. I just didn’t really like how that looked. The numerous tries after that decision resulted in a table full of attempts and one I was finally happy with.

By now I was 8 months into the project, and needed another (procrastination) break.

A Blog

I have been keeping my sewing adventure posts mostly in Instagram. But since recently someone asked how I did something, I figured I needed a different medium to share some things. So a blog has been started. I’m not sure how often I’ll be updating this, as I’m not really the worlds most prolific talker.

The title is an immodest hintĀ of where I want to get to.